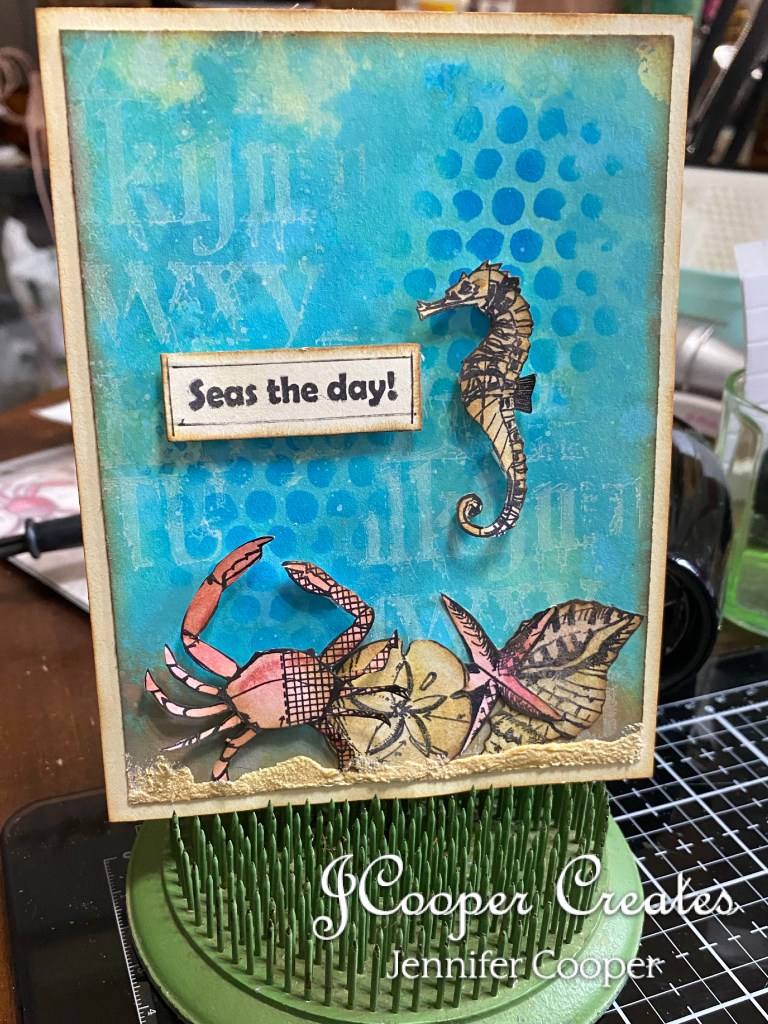
Todays theme for the Simon Says Stamp Wednesday Challenge was “Summer Fun.” Nothing says Summer fun more than the beach. Well, at least in my book. Todays card definitely had a beach vibe. Let me explain the process.
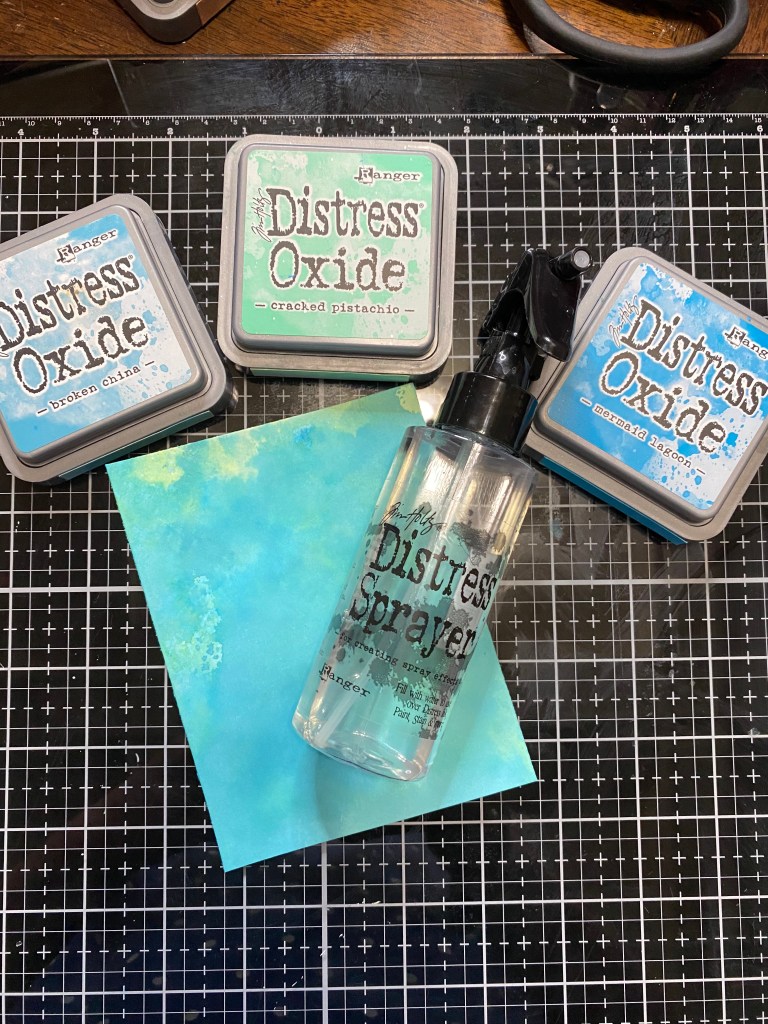
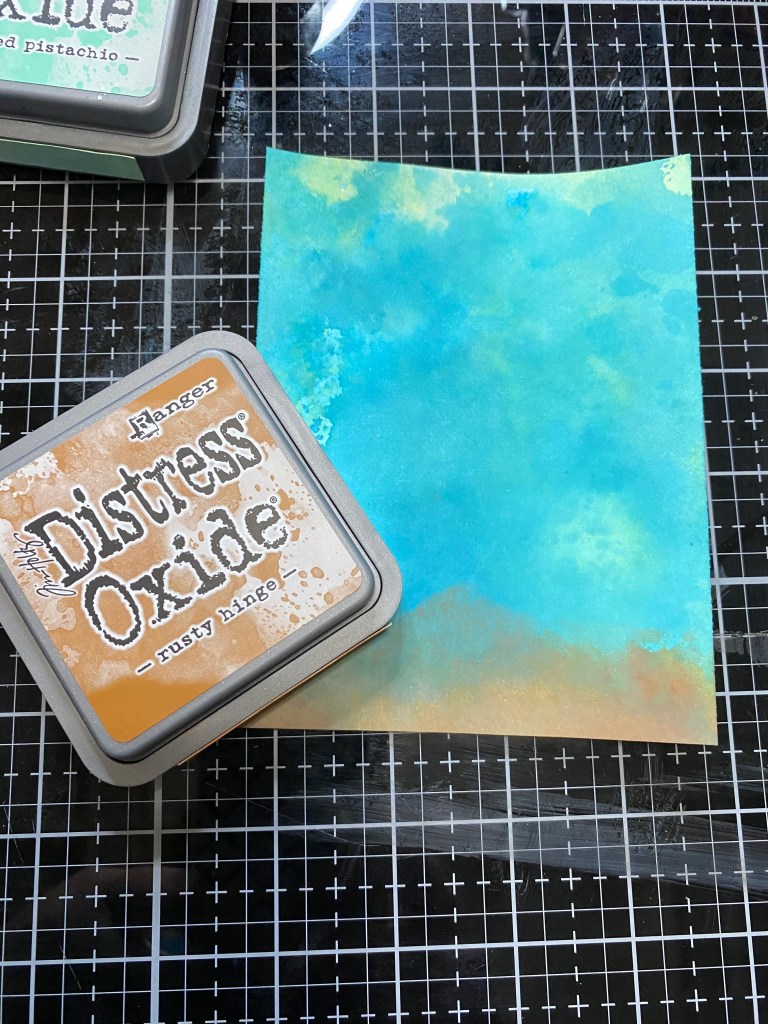
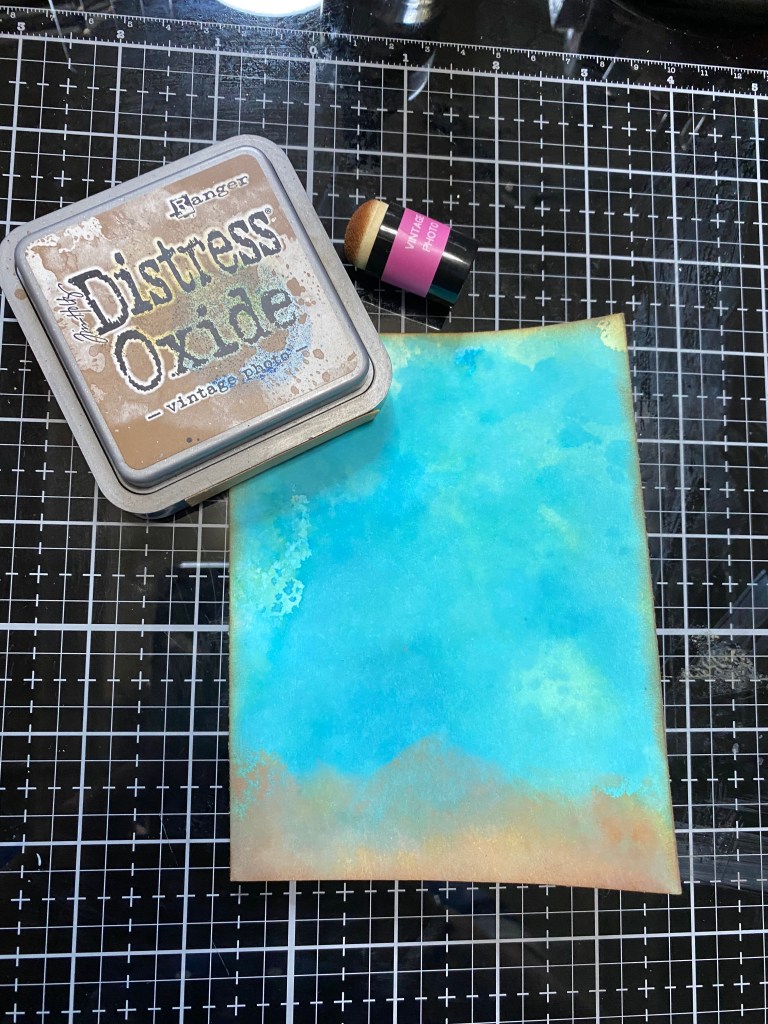
Of course the first thing is the paper, or substrate, that I used. I used Dylusions Mixed Media Card stock. It is a great paper when you are doing a mixed media project. I also used my Distress Oxide Ink pads. The colors I chose today were Mermaid Lagoon, Cracked Pistachio and Broken China. I put a little of the ink on my Tim Holtz Media Mat and spritzed it with a little water. I then dabbed my paper into the mix until I was happy with the coverage. I used this same technique for all three colors until I was happy with it. I also took the Rusty Hinge and did the same thing, but only applied it to the bottom of my paper. This was my bottom of the sea floor. Then I took my Distress Sprayer water bottle and very lightly gave it some water droplets to give it that nice, bubbly effect. Last for the inks, I took my Distress Oxide Vintage Photo and a finger dabber to distress the edges of my paper.
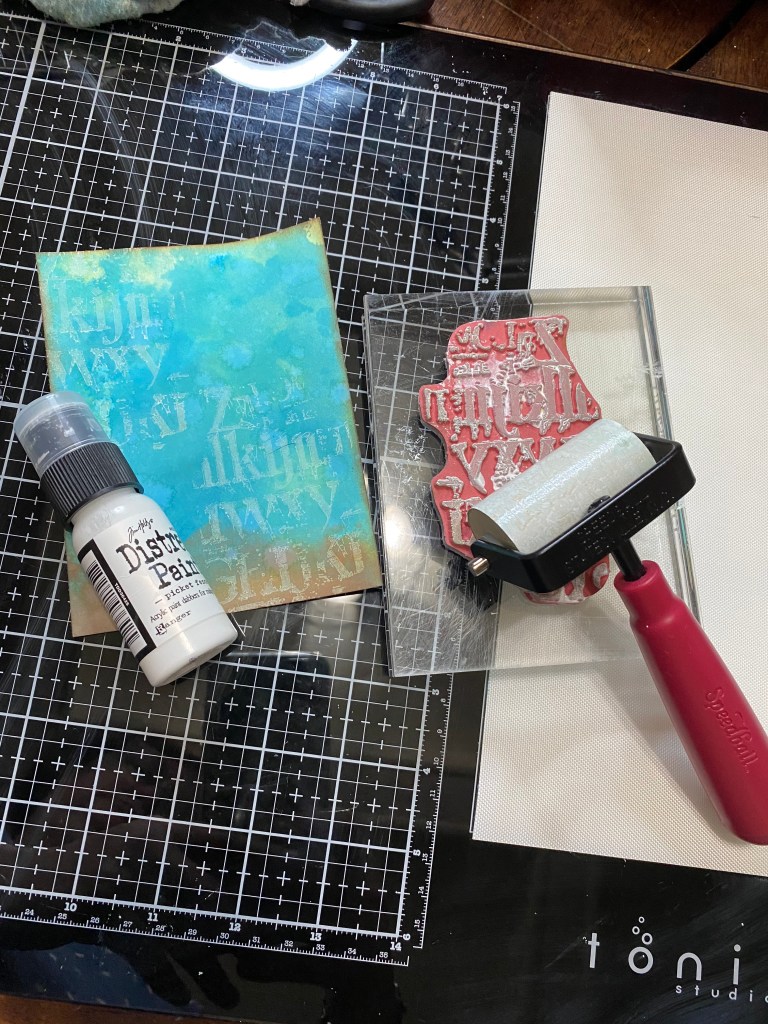
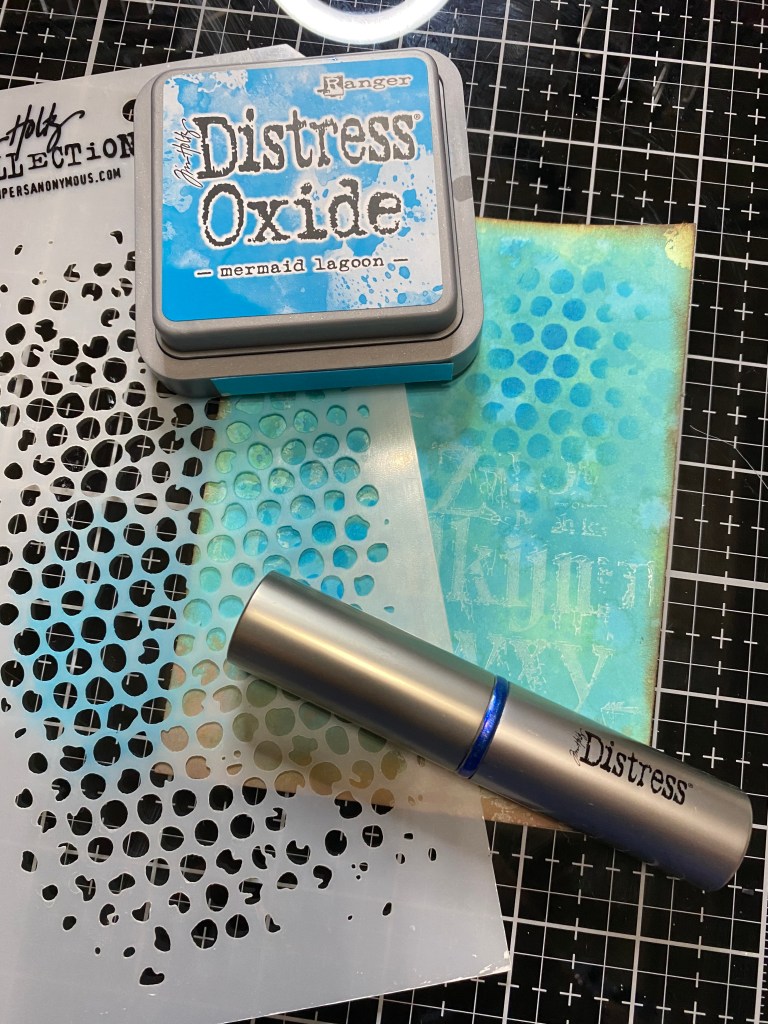
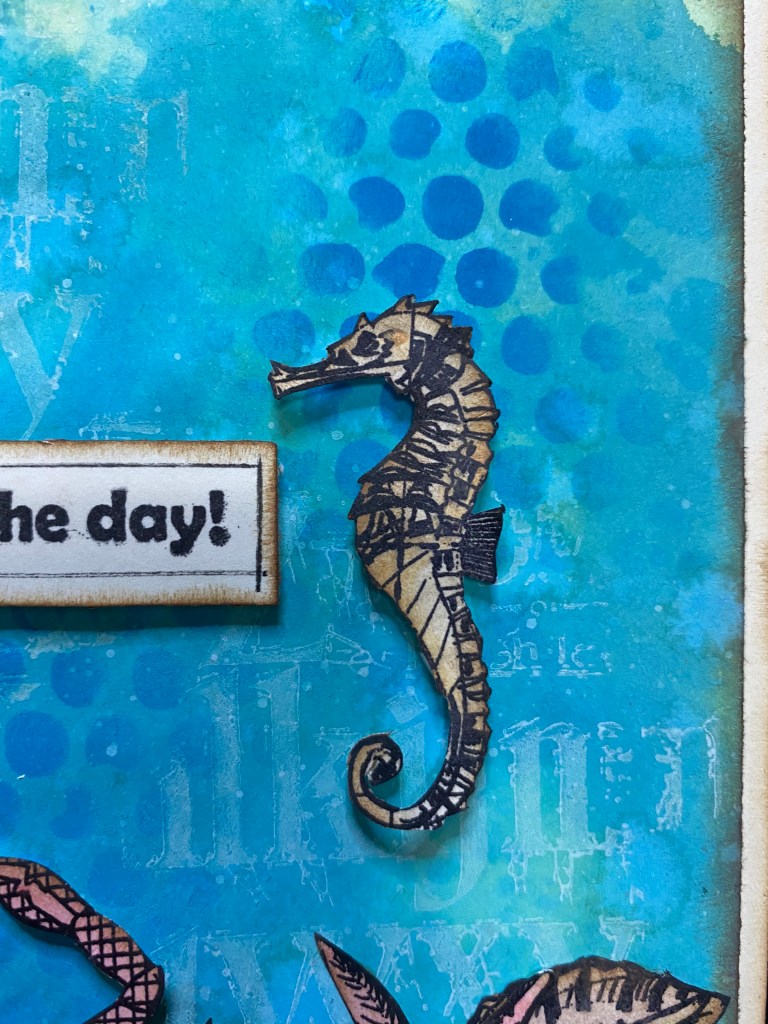
Next, I took my Faded Type (CMS397) stamp set from the Tim Holtz line at Stampers Anonymous. I wanted to add a little text to the background so I took my small rubber brayer and my Distress Paint Picket Fence. I rolled the paint onto my stamp and stamped the text just twice for such a small area. Then I used my layering stencil (THS002), a Distress Blending Brush and my Mermaid Lagoon to give it that effect of some bubbles.
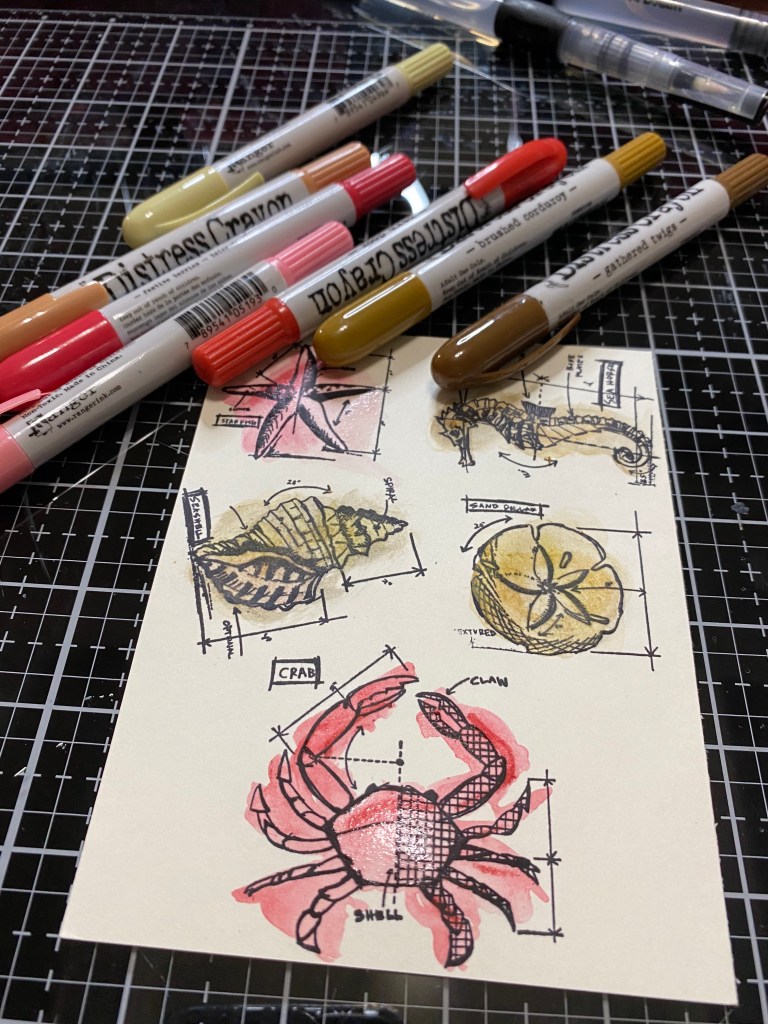
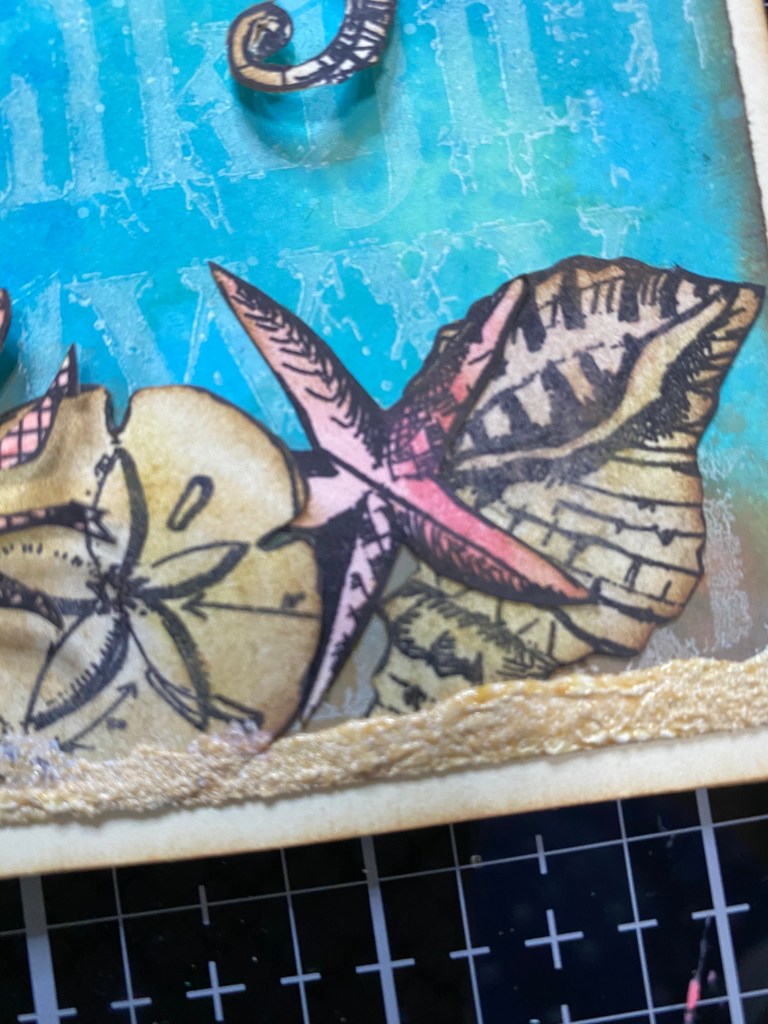
Next, my stamped images. For my images today, I used some of the minis from Stampers Anonymous. The names of these sets are Nautical (THMB017) and Mariner (THMB027). I used my Stamping Platform and Distress Archival Black Soot to stamp my images. I then used my Distress Colors and a water brush to color them. I took my scissors and fussy cut them and last but not least i distressed the edges again with Vintage Photo.
For my sentiment today, I used an old set from C.C. Designs. The name of the set is Beach Sentiments (AR1012). I thought that probably couldn’t get any more perfect. The sentiment I chose was “Seas the Day”. Again, I used my stamping platform and my Black Soot to stamp the sentiment. I cut it out, and with my black, permanent marker and drew a frame around it. I distressed it with the Vintage Photo too. Now I’m ready to glue! I glued the seashell, sand dollar, and starfish in the background, but I pop dotted my SeaHorse and Crab to give them a little more dimension.
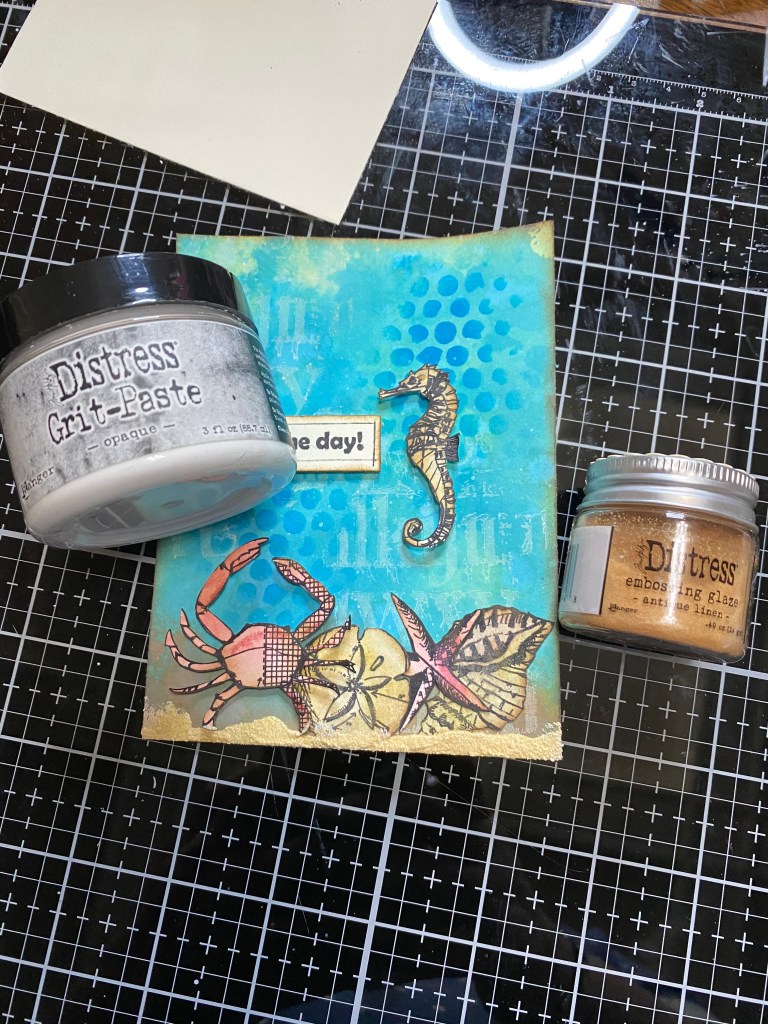
Last and definitely no least, I used my Distress Grit Paste, and my Distress Embossing Glaze in Antique Linen to add some sand to my ocean floor. I simply added some of the texture paste to the bottom of my project with my finger. Then I sprinkled some of the Distress Embossing Glaze on top of that. I heated it with my embossing tool, and that was that.
Once I was done with my project, I used my Hi-tak double sided tape to adhere it to my card blank. And that my friends, is that. I think it turned out pretty cute, if I do say so myself. Haha. Now I want to go to the beach. Hmmm.
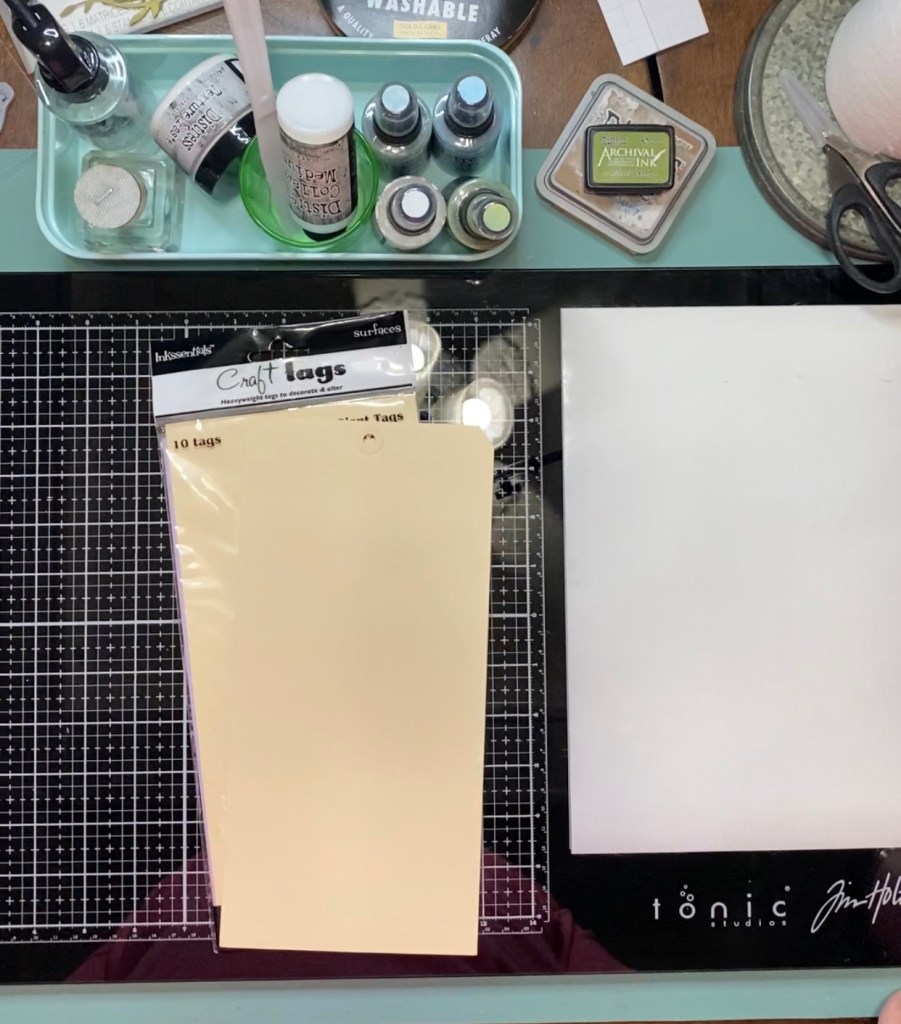
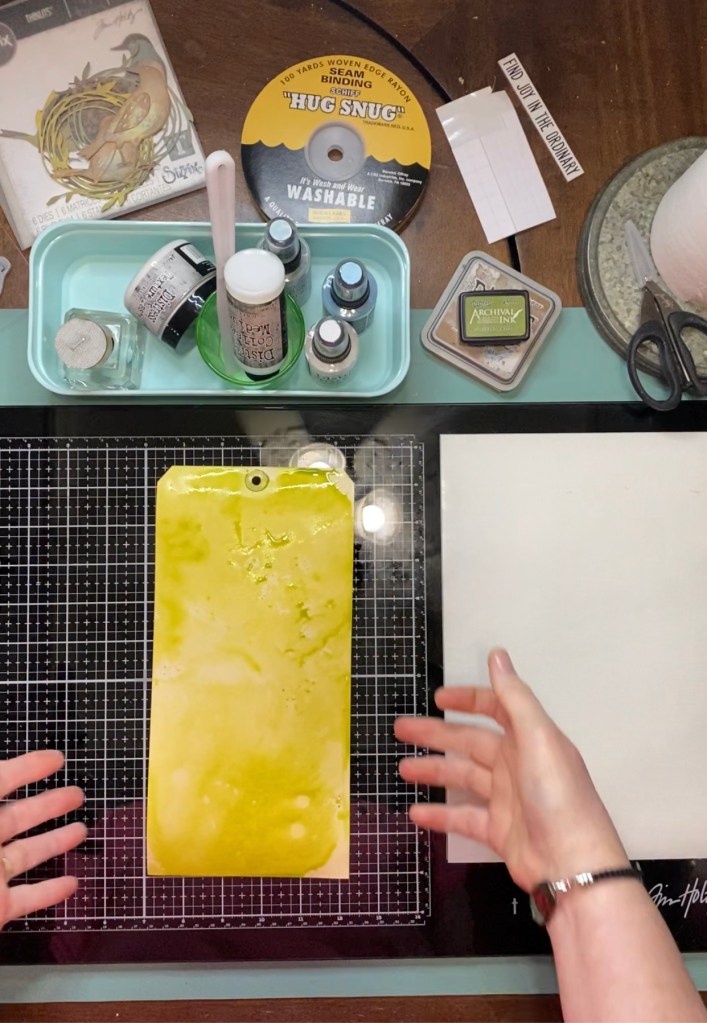
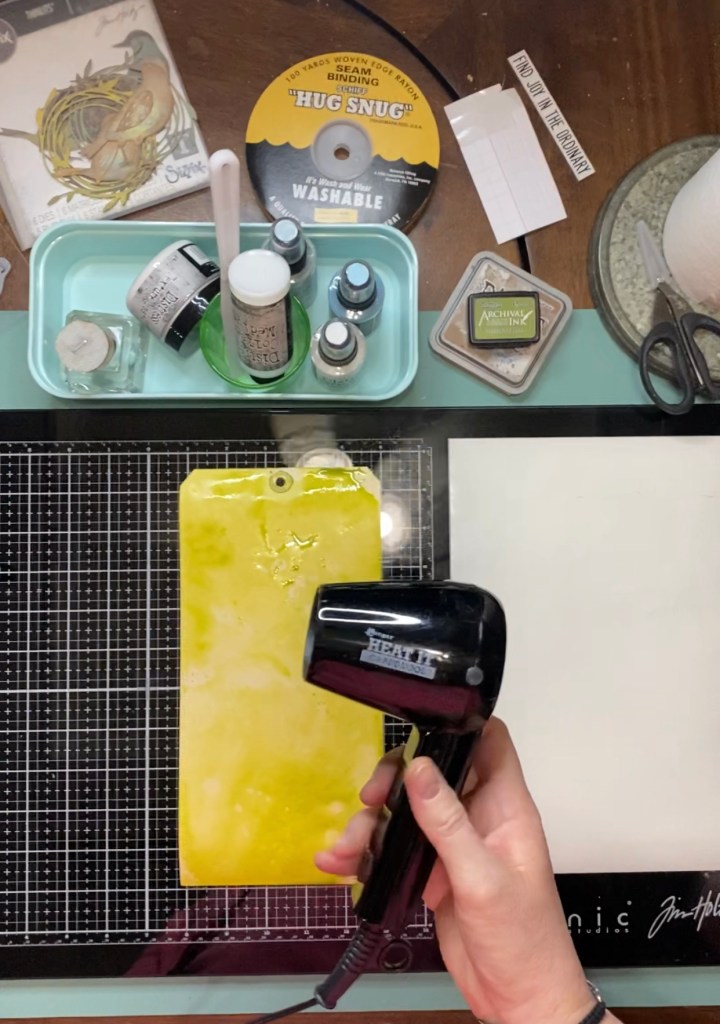
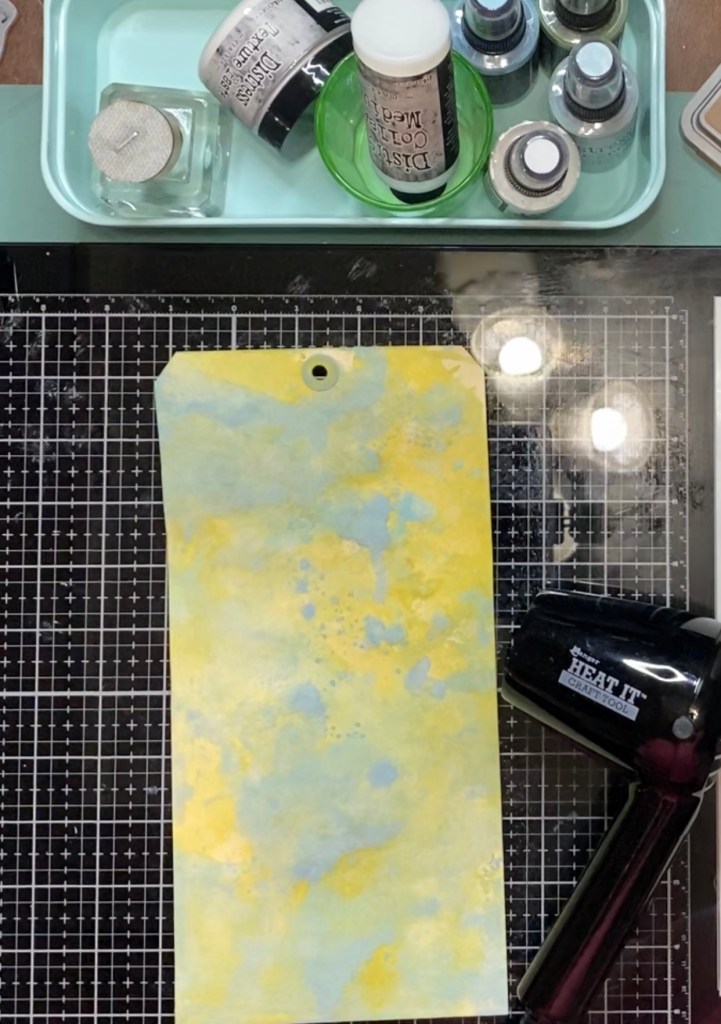
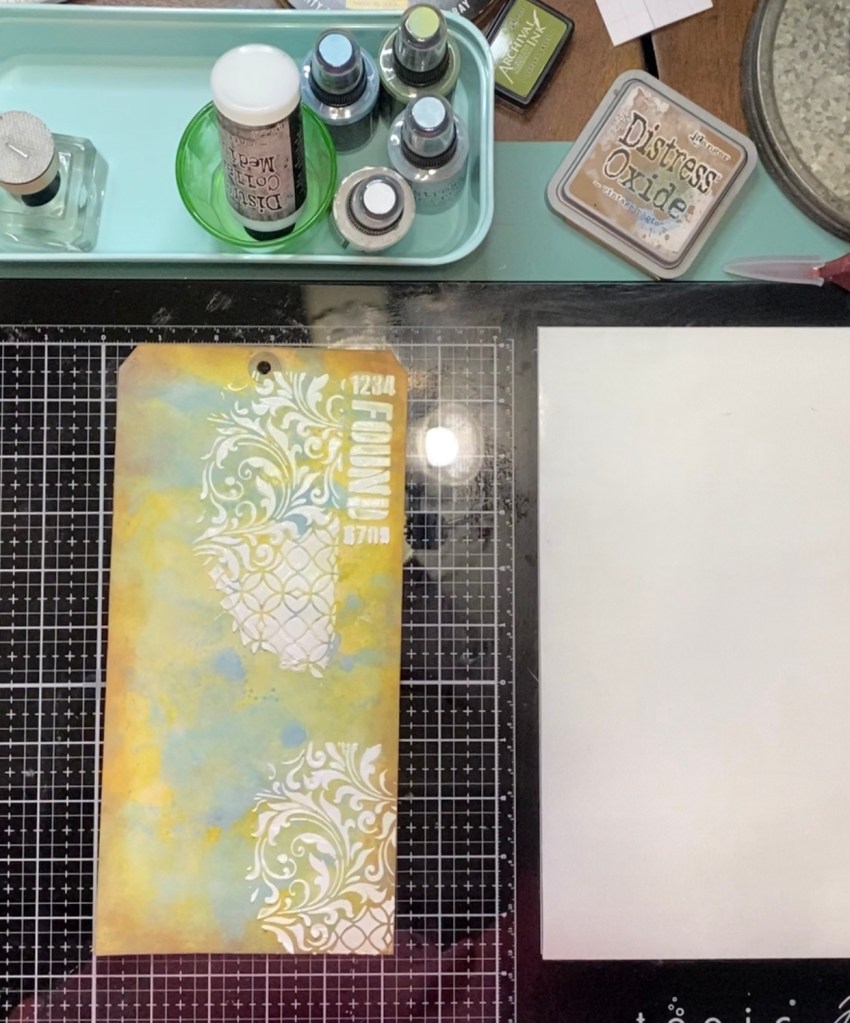
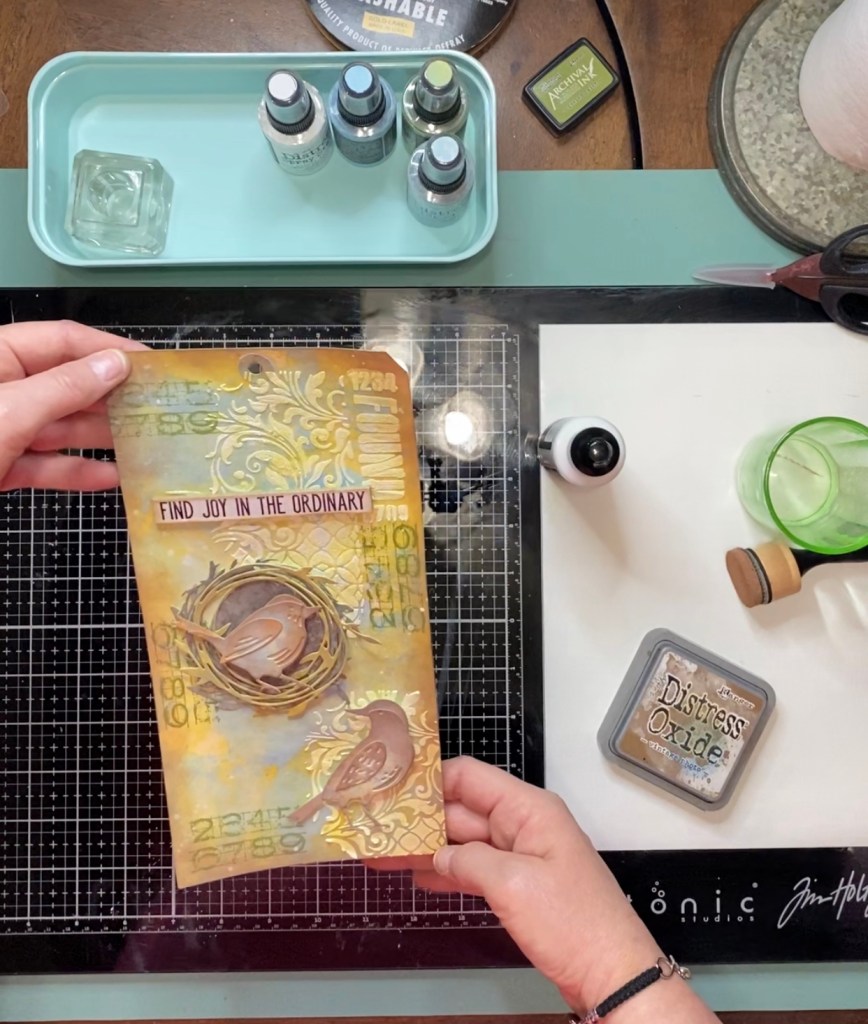
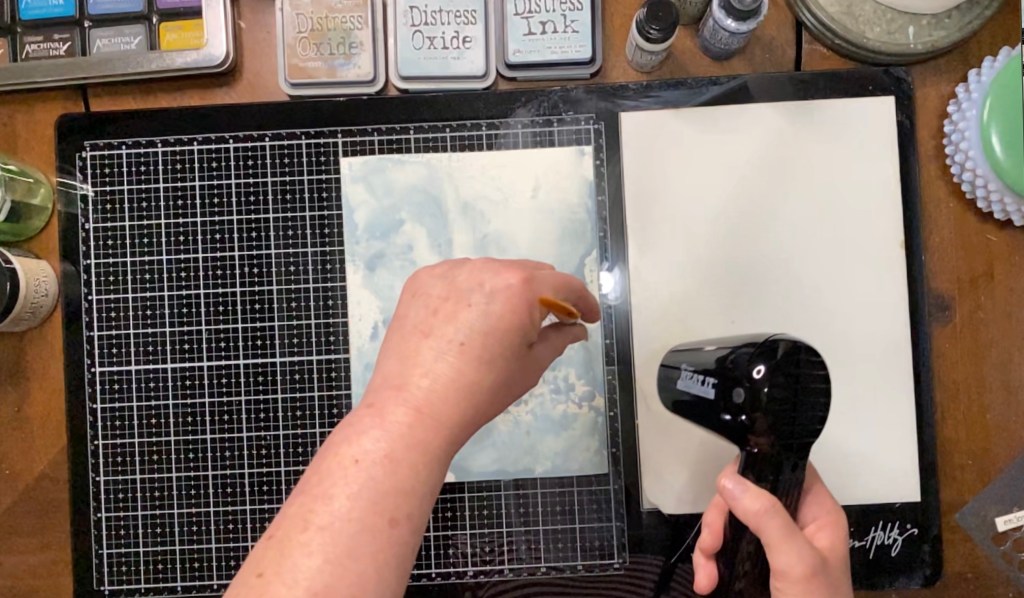
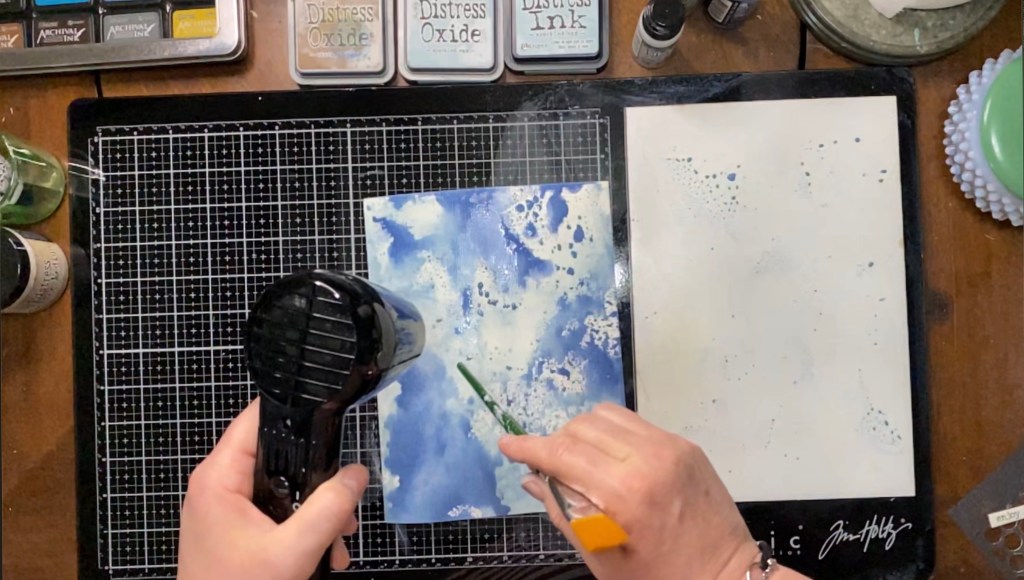
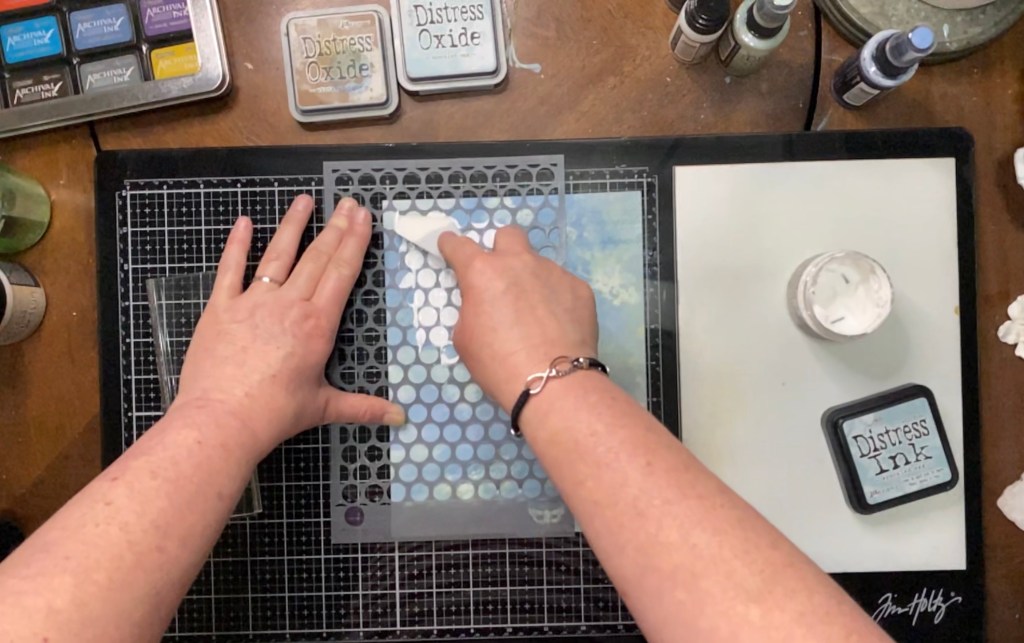
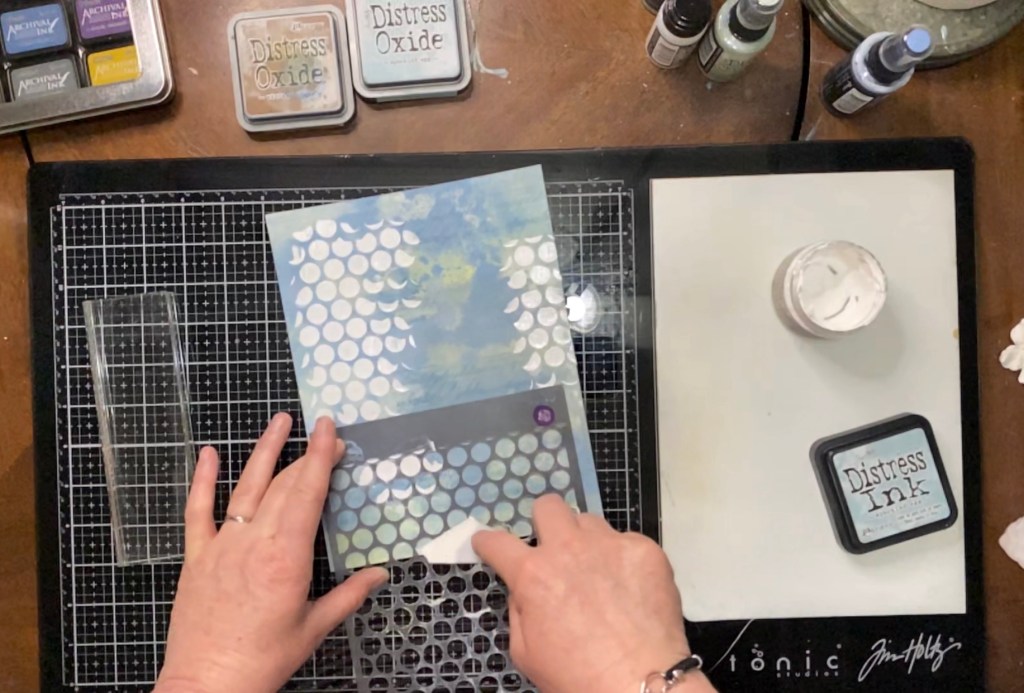
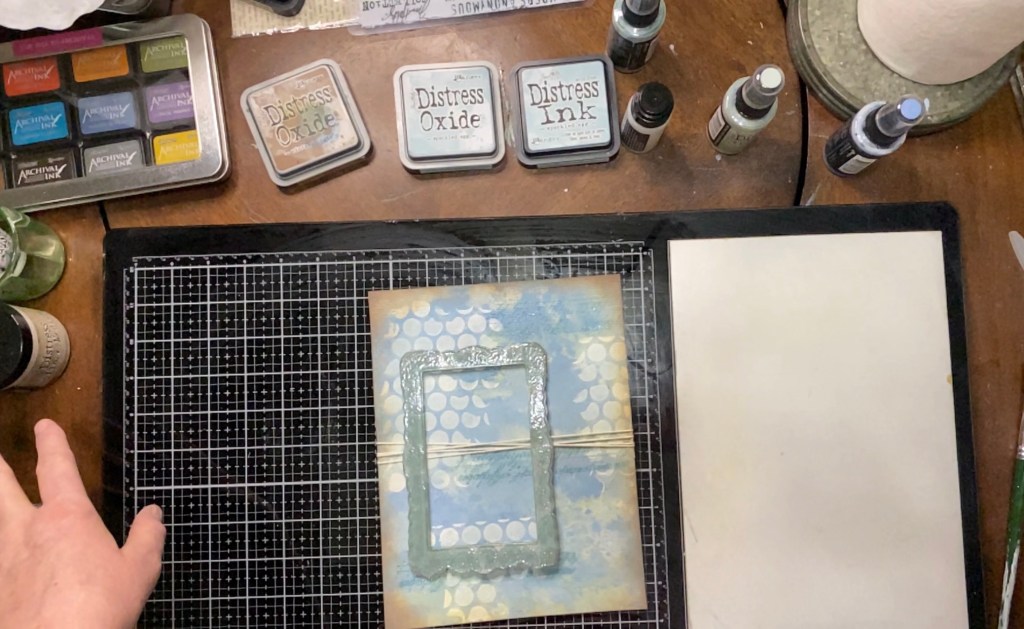
Y’all! Today’s challenge was something I really enjoyed. “Sprays and Splashes” is something I have been practicing all weekend!! Haha. For today’s challenge, I used an Inkssentials #12 Giant Tag. It’s just a very large, manila craft tag by Ranger. As for sprays, I used what seems to be my favorite these day, Distress Oxide Sprays from the Distress Line by Tim Holtz. I just love the way these inks layer so beautifully. The colors I used today were Peeled Paint, Tumbled Glass, and of course, you guessed it. Speckled Egg! The first color I used was the Peeled Paint. Being the darker of the three, I wanted it on the bottom. I sprayed a little of the ink onto my nonstick mat area of my Tim Holtz Glass Media mat from Tonic. Then, using my Distress Sprayer, I spritzed it with some water to get those nice, big ink droplets that we love so much. I then dabbed my tag into the mixture until I was happy with the coverage. Next, I made sure it was nice and dry with my Ranger Heat It tool. I then proceeded to do the same exact steps with the Tumbled Glass and the Speckled Egg.
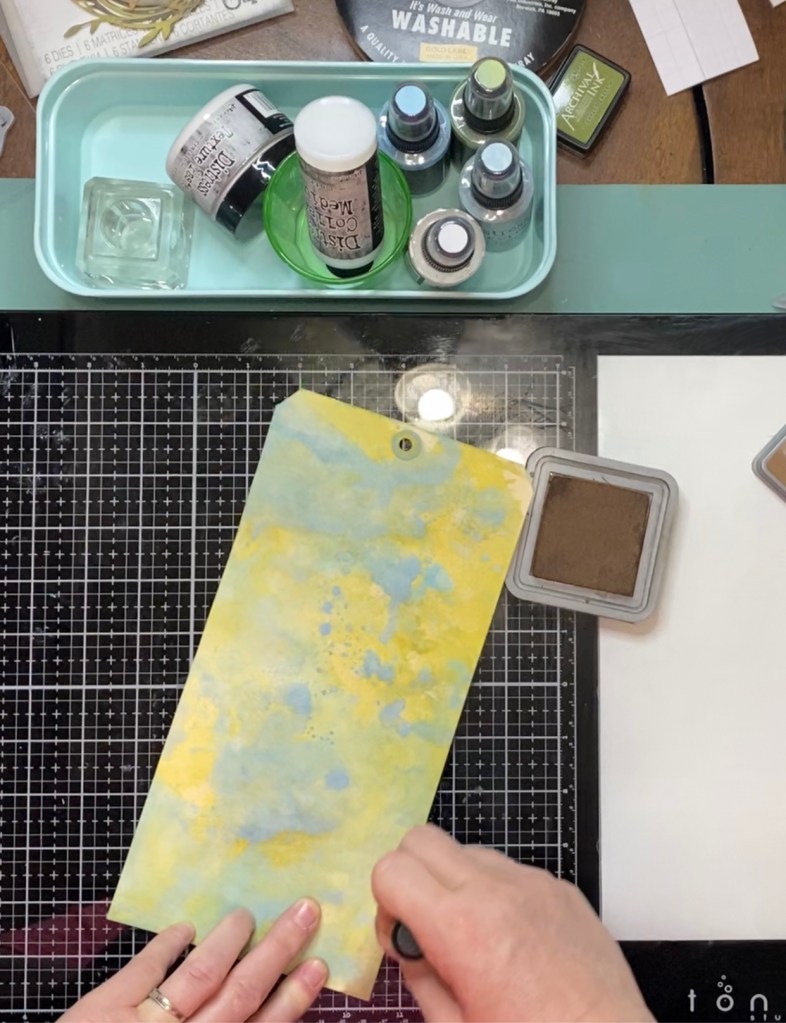
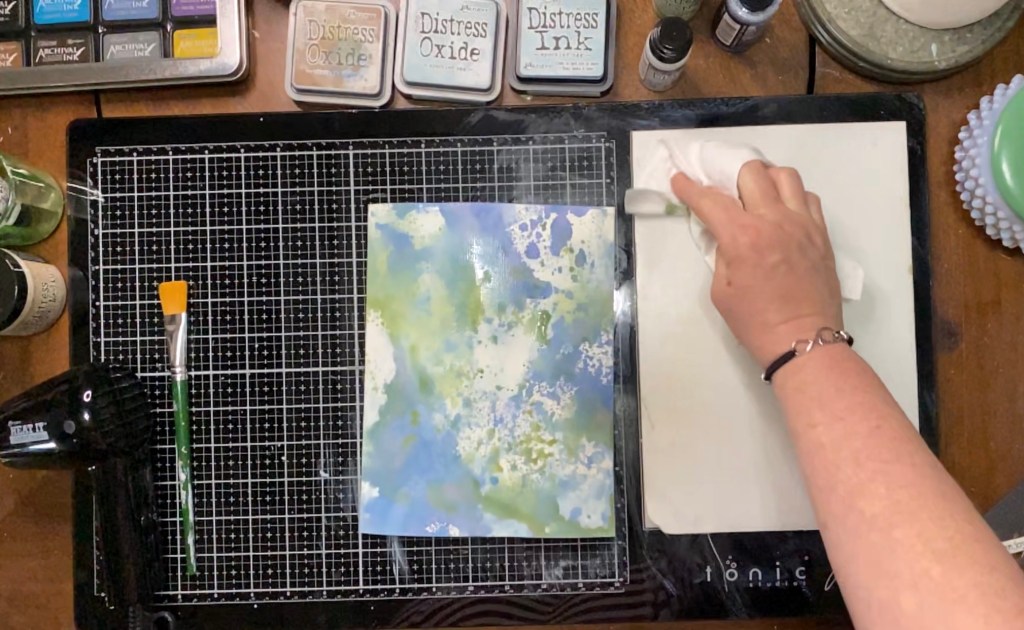
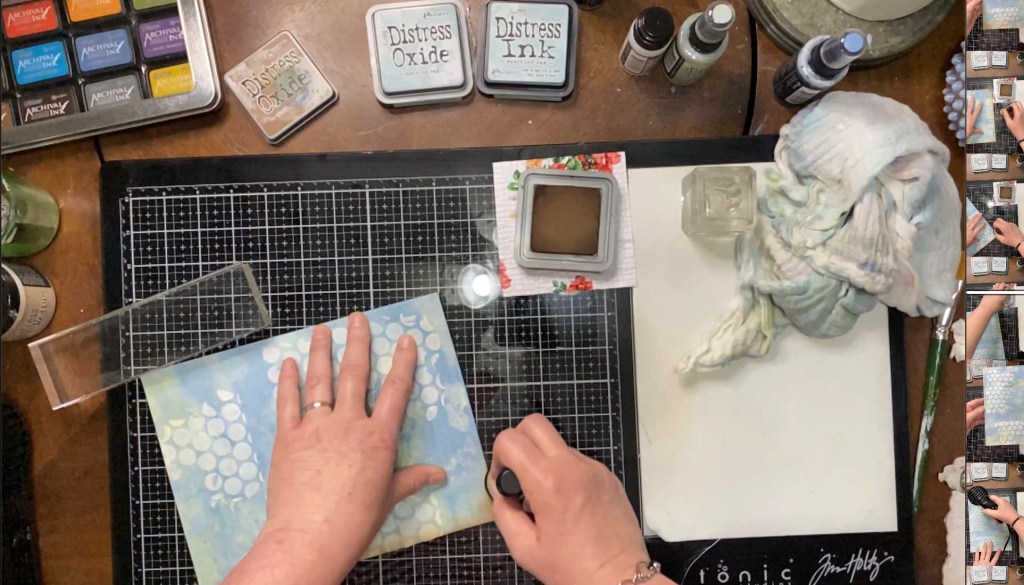
Once I was happy with the coverage of the inks, and it was nice and dry, I used Distress Oxide Vintage Photo and my Ranger Blending Tool and distressed the edges. To quote “Distress” the edges, all you need to do is ink your blending tool and in a circular motion, blend the ink around the edges of the paper until your page or project is nicely framed in.
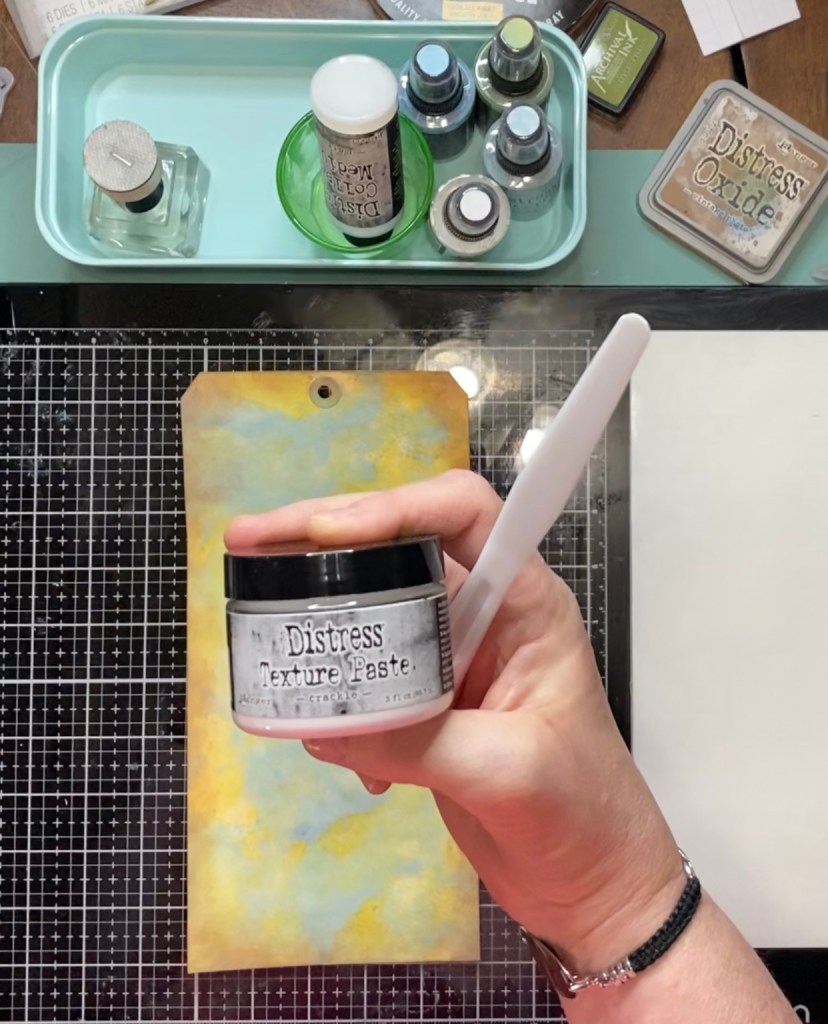
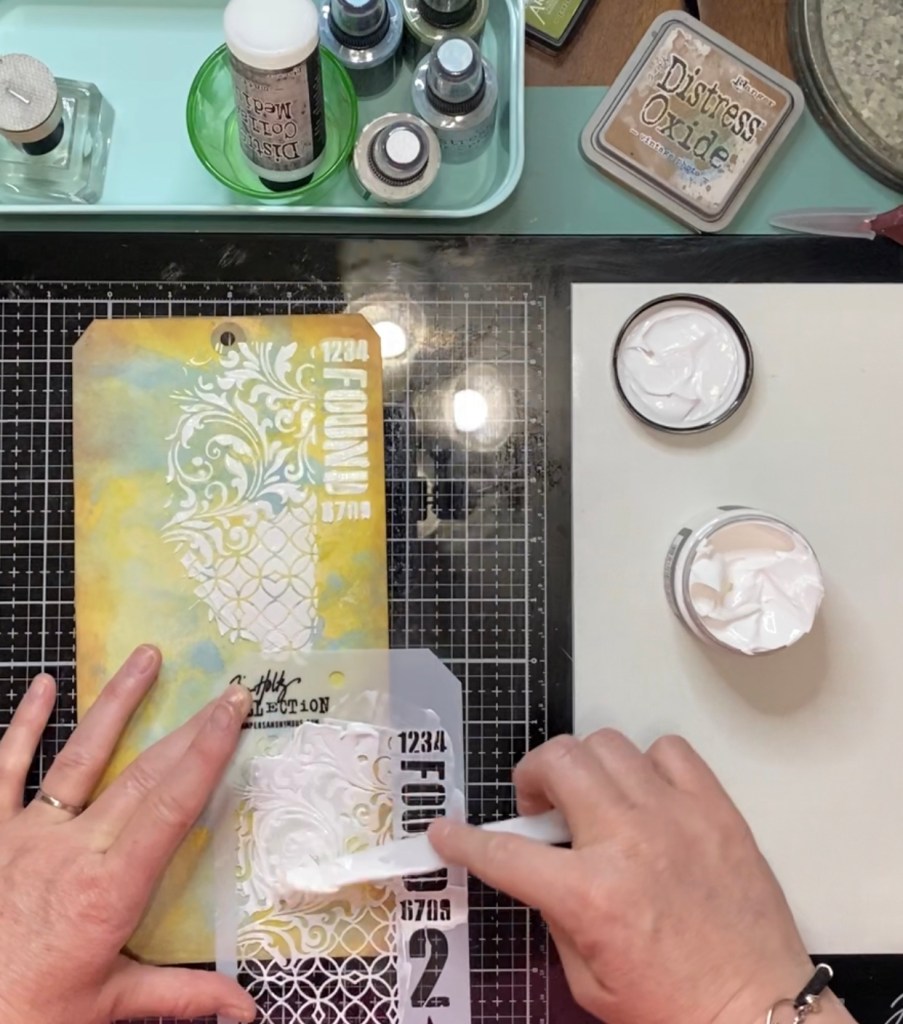
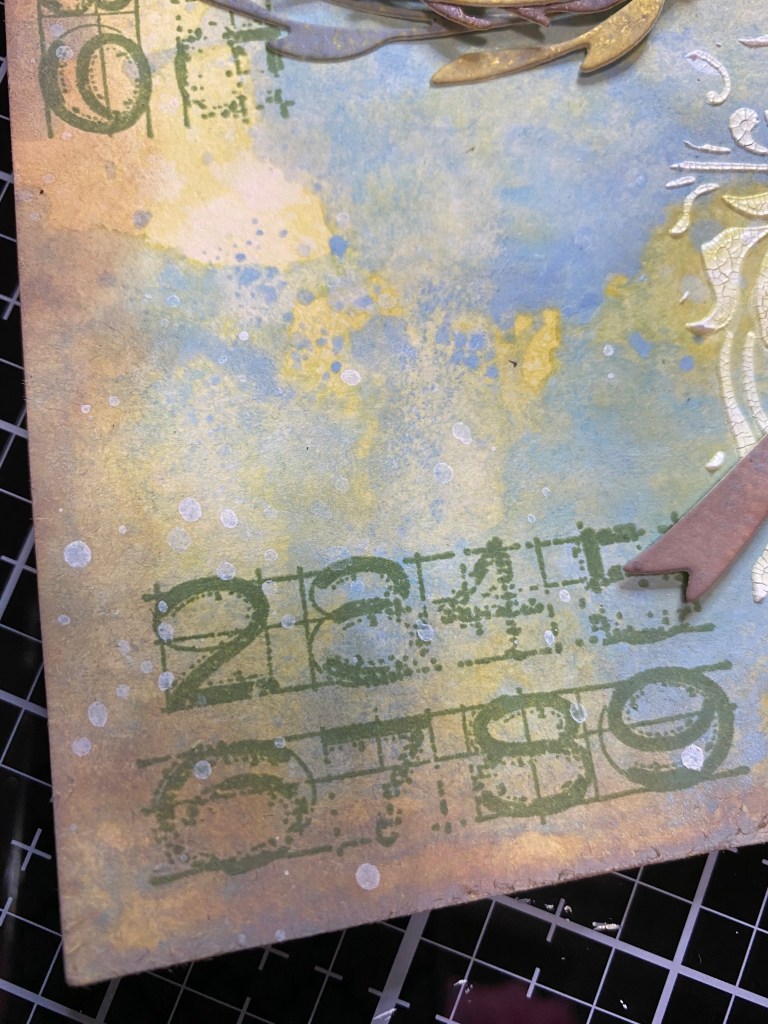
Next technique, or should I say product, has become one of my favorites these days. I used a spatula and the Distress Crackle Texture Paste with my limited edition layering stencil that i received in the mail a few weeks ago from the one and only Tim Holtz. I’m still geeking out about that a little. Haha. Any-who, back to the post. I took my spatula and spread just a thin layer of the crackle texture paste over the stencil. Just enough to be even with the stencil, and I set it aside to dry.
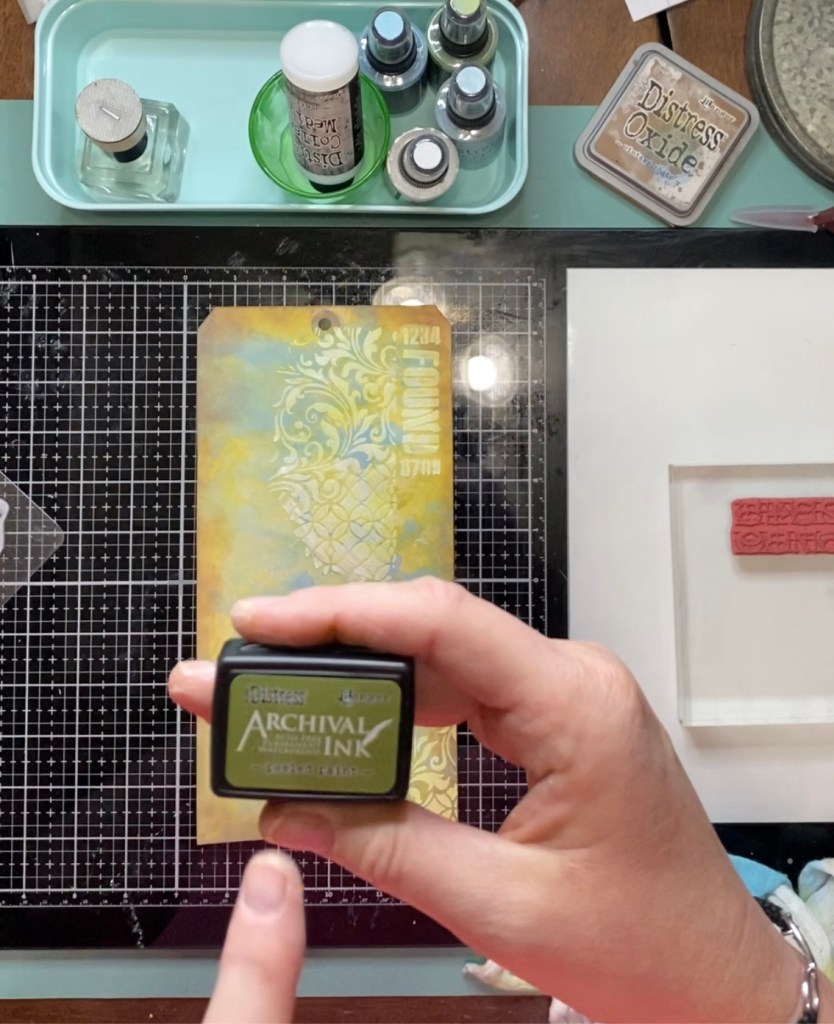
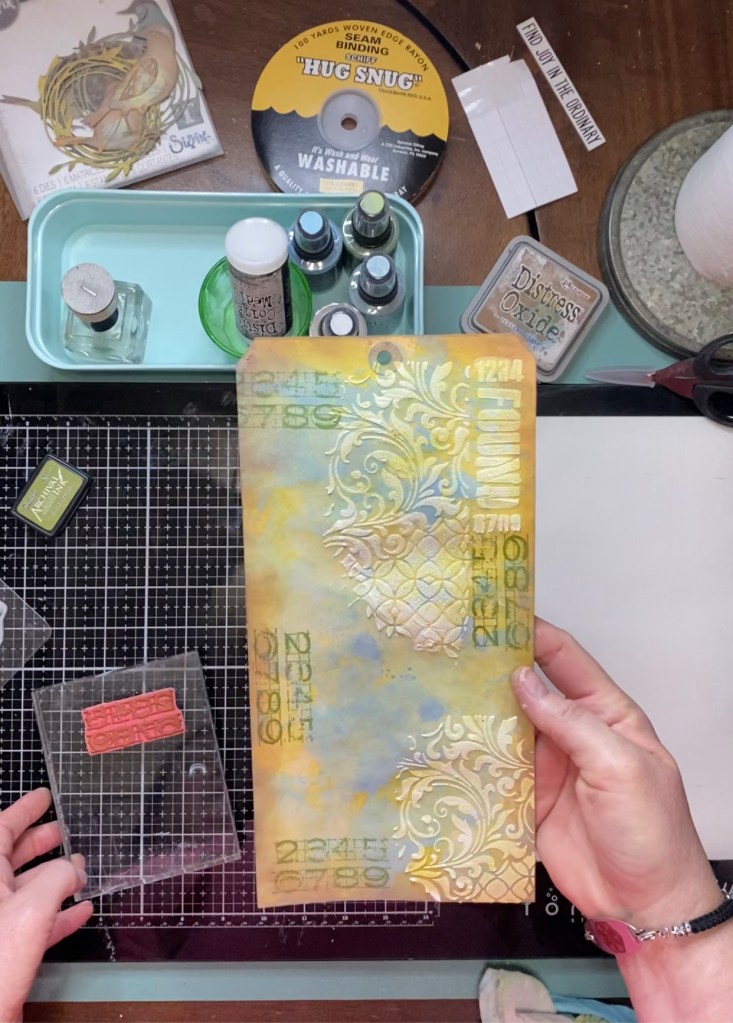
Next up, was a little stamping on my background. The stamp set that I used was the Faded Type – CMS397 (of course), just a stamping block and the Distress Archival Peeled Paint. I did however use a different stamp this time. I chose a smaller stamp so that it didn’t take away from the crakle paste and all those lovely colors.
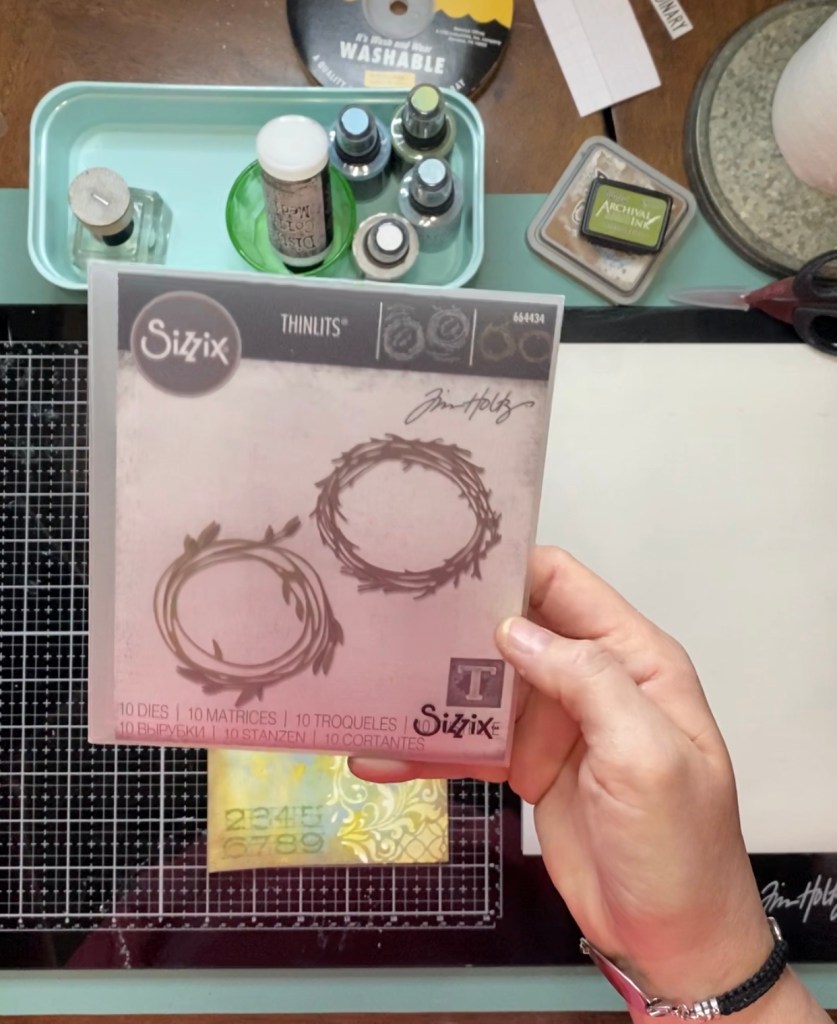
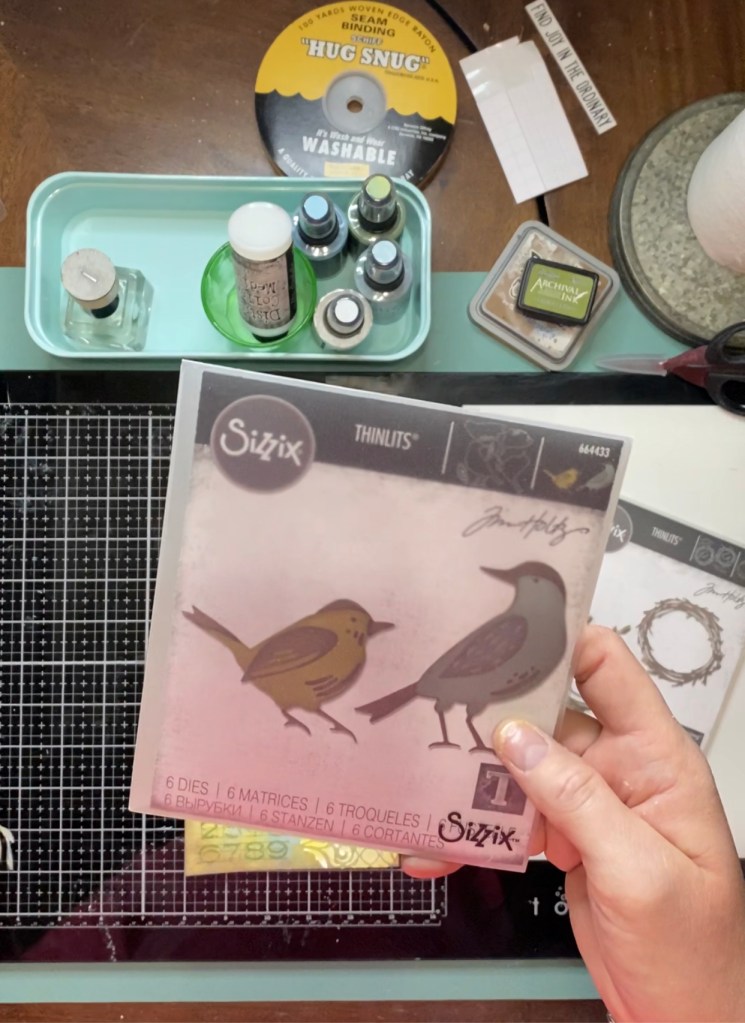
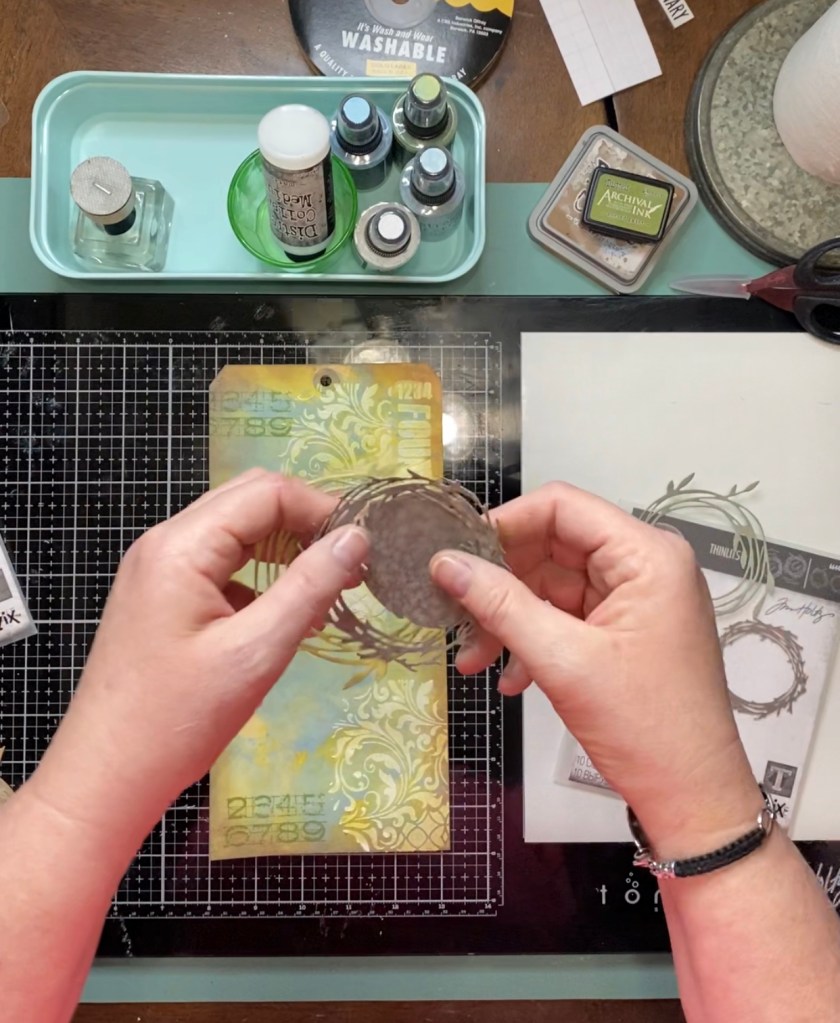
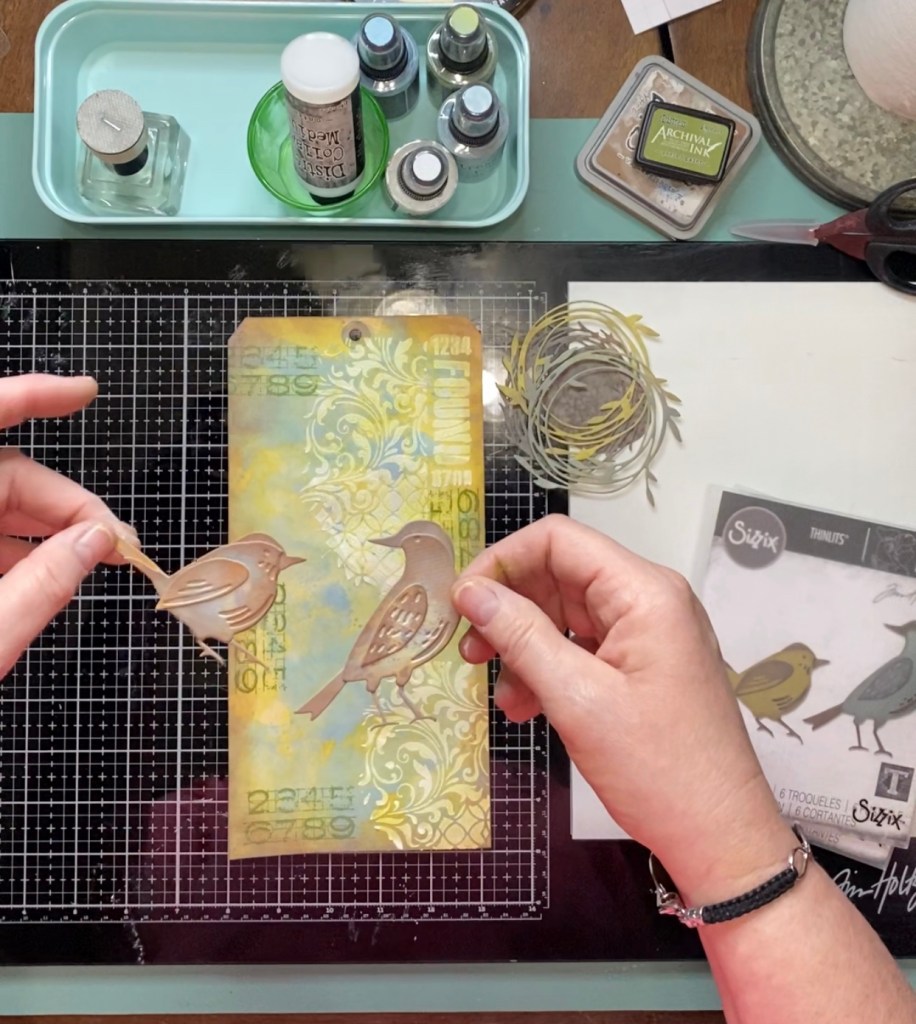
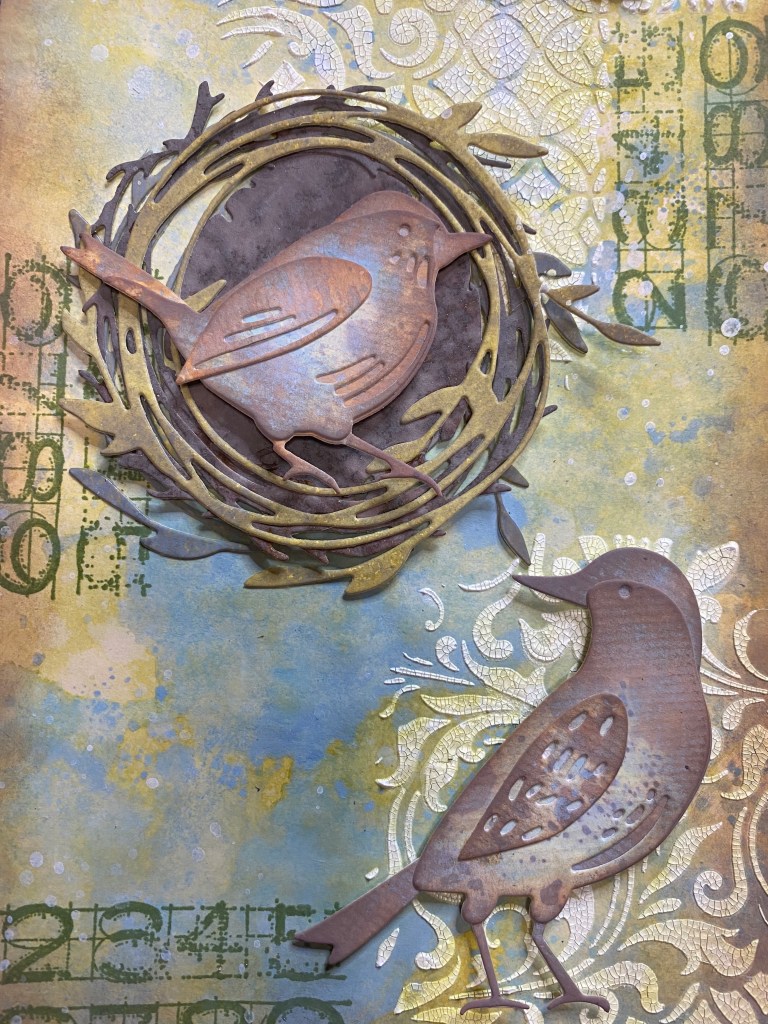
The next step, I’ll go into a little detail because this is something that I already had done and I think it was a real time saver. Long story short, this weekend, I had an ink and Vagabond party. I took my watercolor paper and my mixed media cardstock and just went to town with the inks. There were way too many to remember the colors, and I apologize for that, but in the end you do what makes you happy. I’ve gotten a lot of new die sets in lately and I haven’t even taken them out of the wrapper. I know, “Shame on me!”. So this weekend, that’s what I did. I cut leaves, flowers, crazy birds, crazy cats, daisies, clocks, picture wheels, and of course Funky Wreaths (664434) and Feathered Friends (664433).
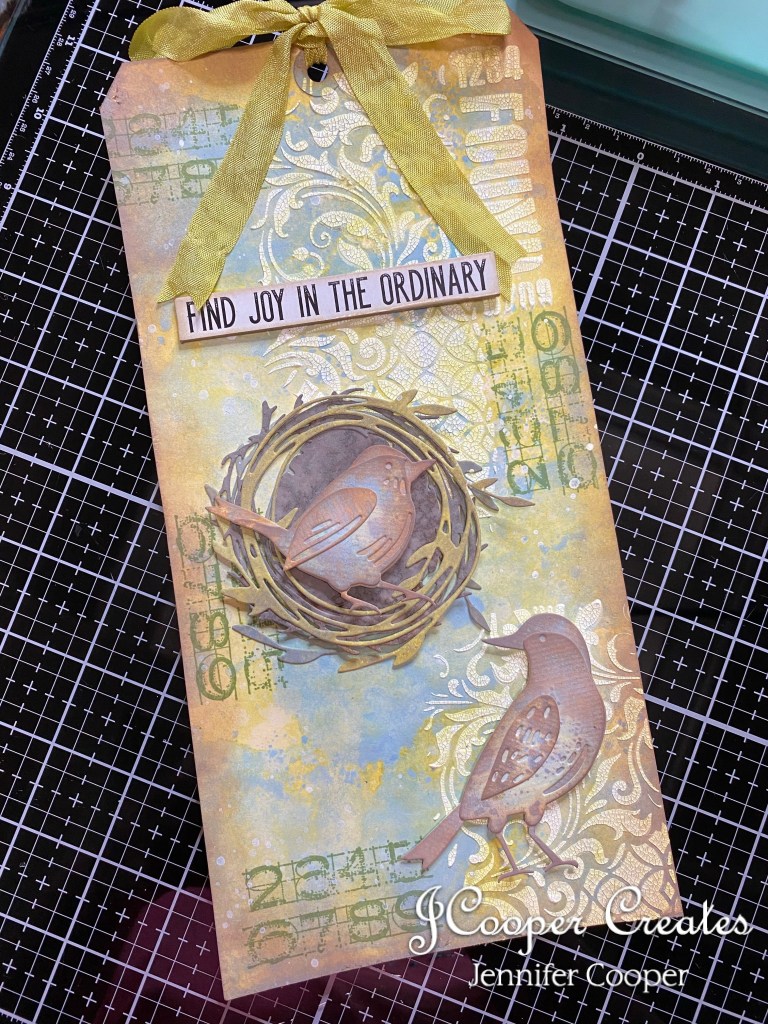
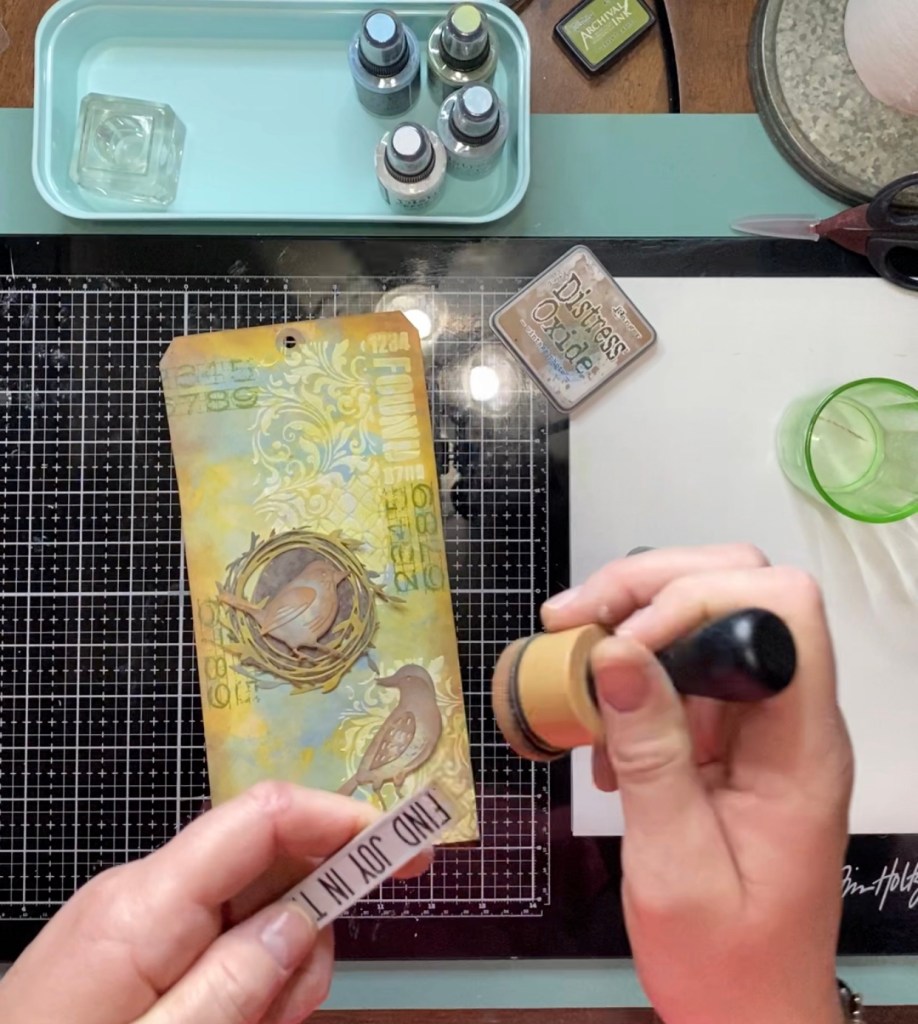
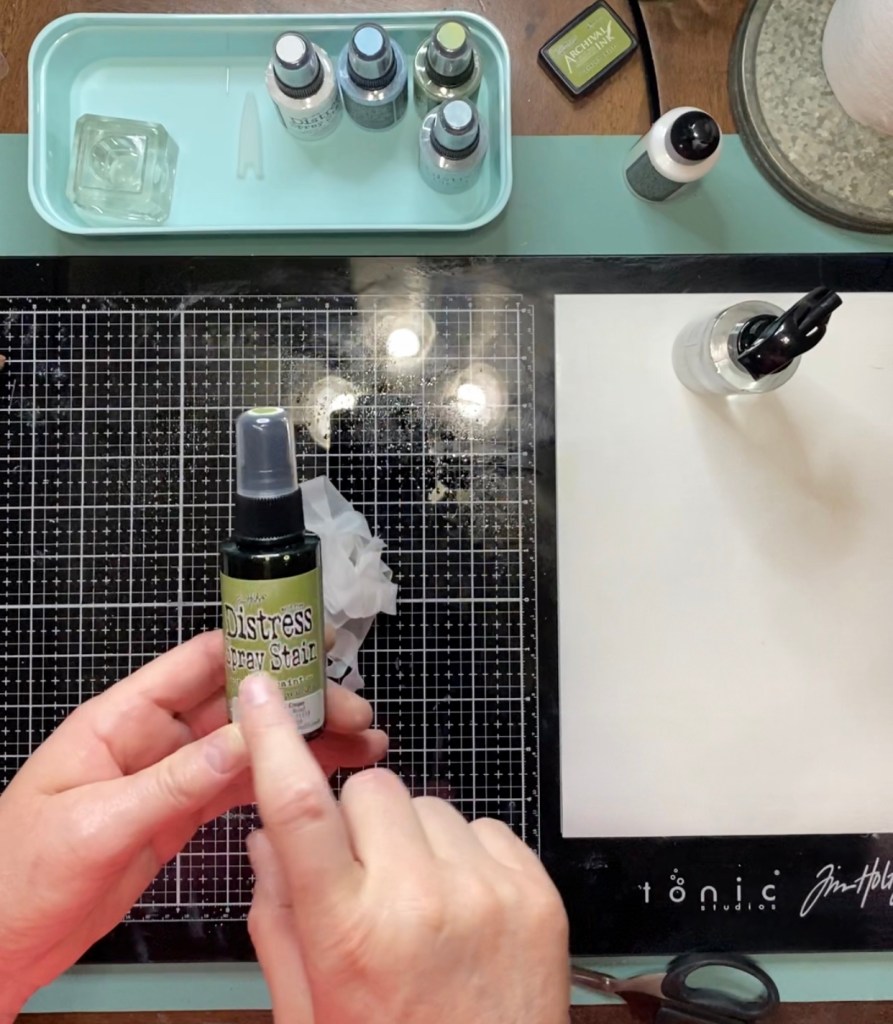
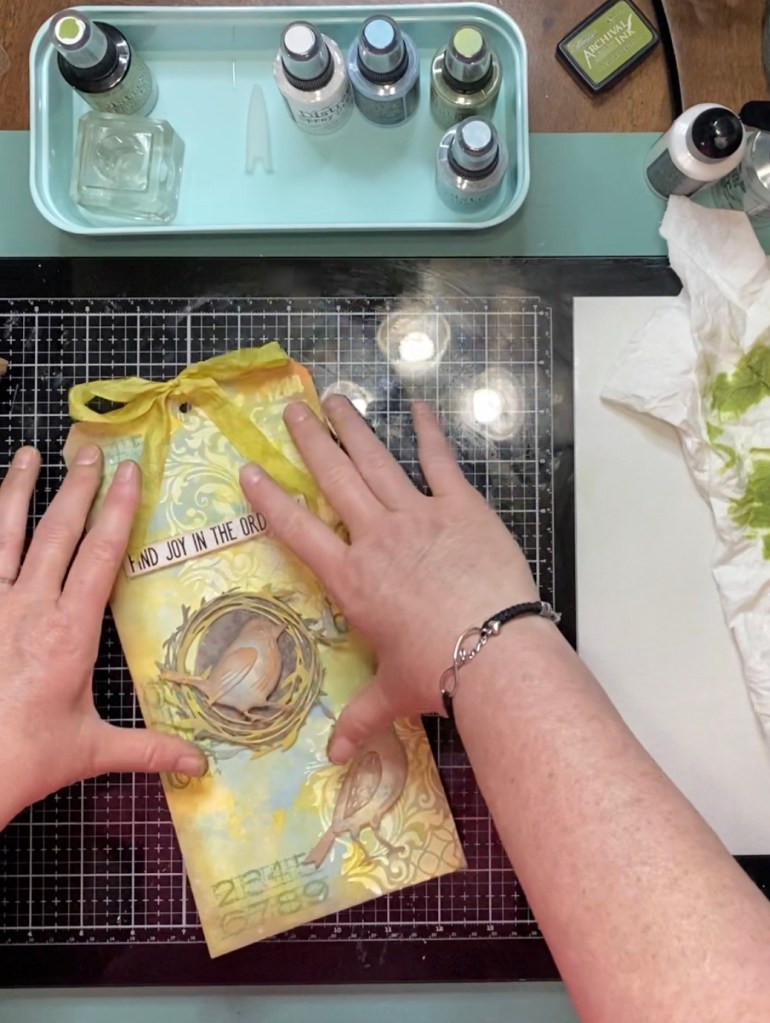
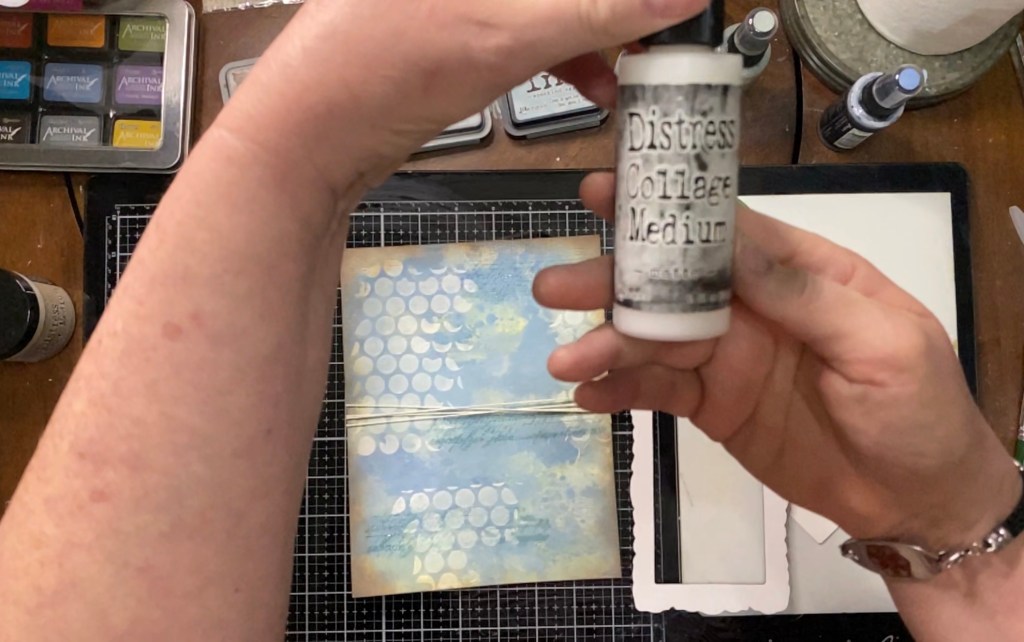
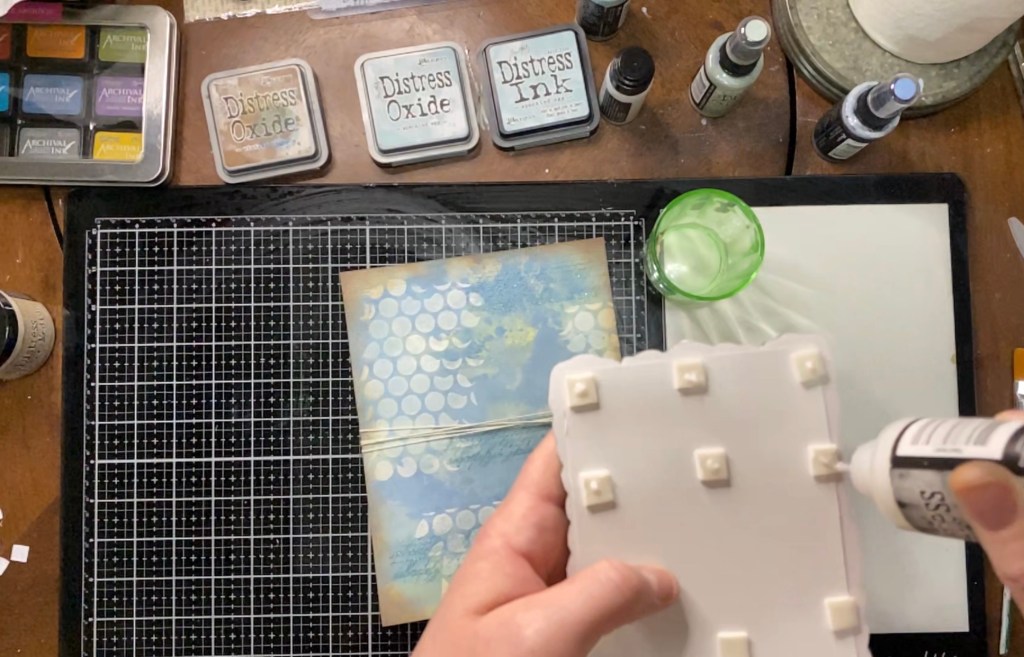
So once I decided on the wreaths and the birds, and their placement, I used my Distress Collage Medium and glued them in place. I took one of the Chipboard Sentiments “”Find Joy in the Ordinary”, because I thought it went perfect with the text on the stencil. I took the Vintage Photo and distressed the edges of the chipboard piece. I took my collage medium and glued everything into place, but, not before pop dotting the birds to add a little dimension to the project. I sort of got a little ahead of myself. I forgot about the splashes. I had it on the table, just forgot. That tends to happen as you get lost in your project. Age has nothing to do with it. Haha. There was an easy fix to the situation. I took a piece of paper and tore pieces to cover my birds on the tag. I then took my Distress Spray Stain Picket Fence and removed the spray nozzle from the bottle. I then “splashed” a few drops of the white onto the project without speckling my birds any further. Then glued the chipboard sentiment to my project.
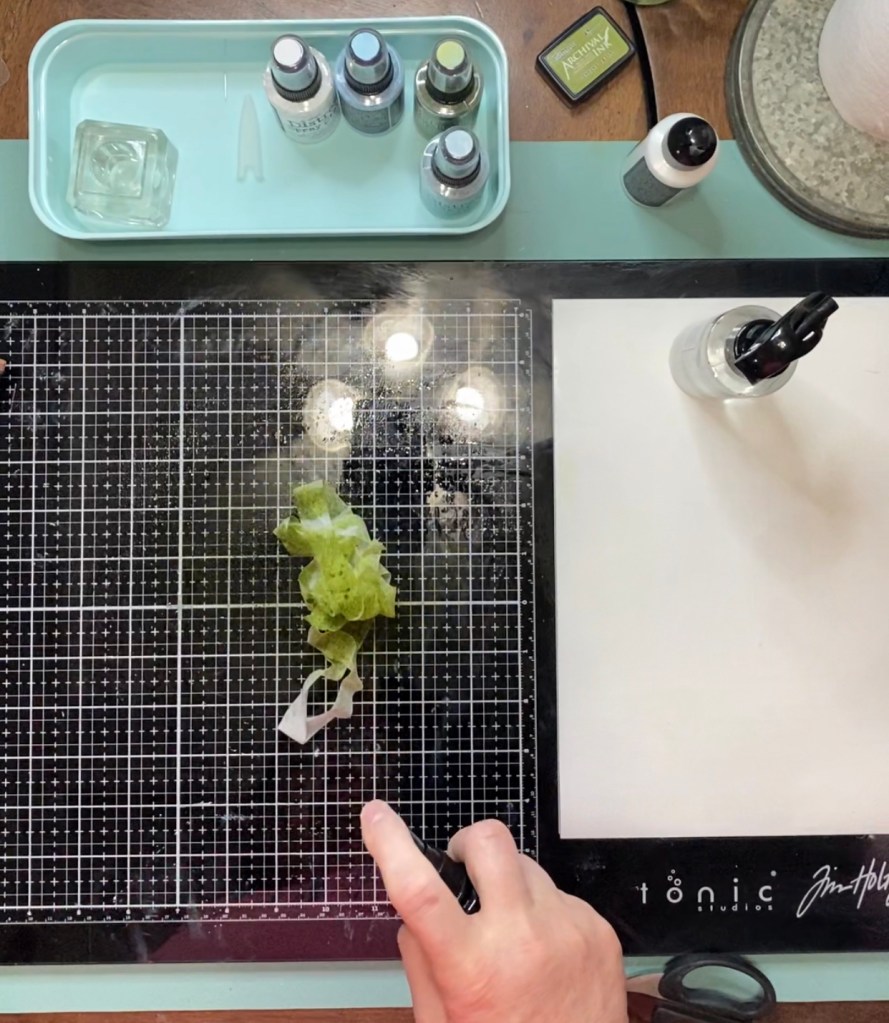
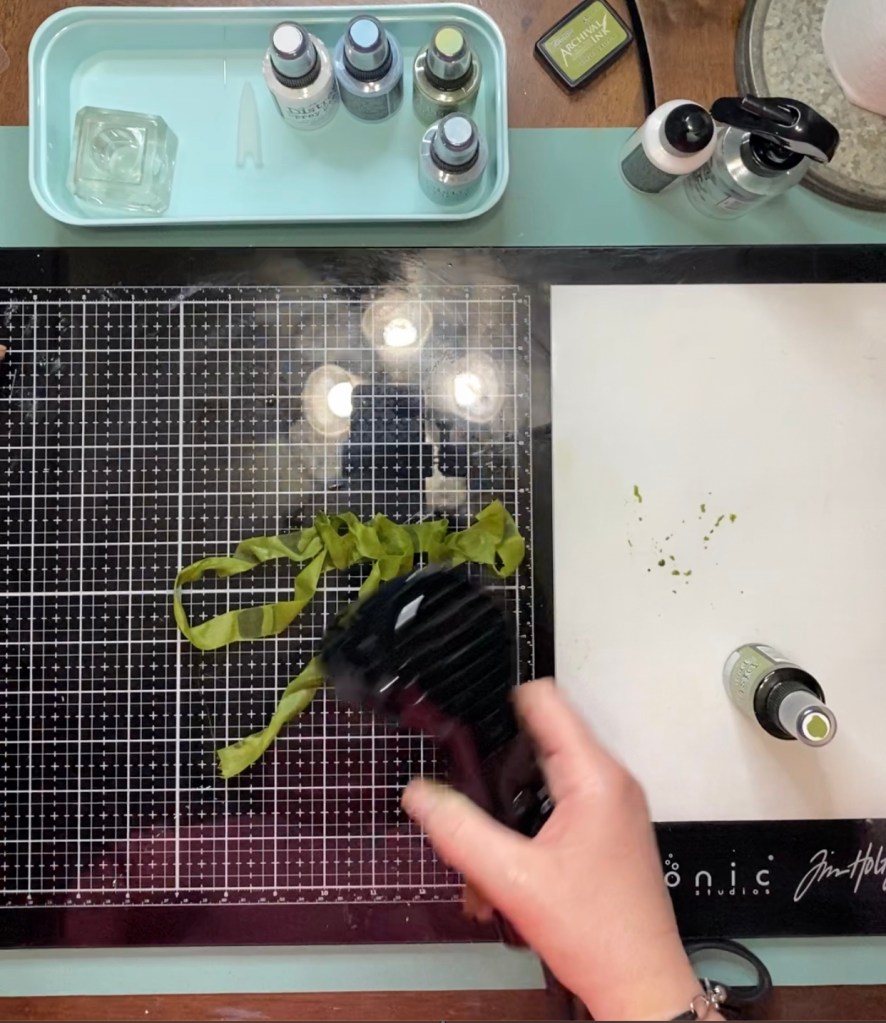
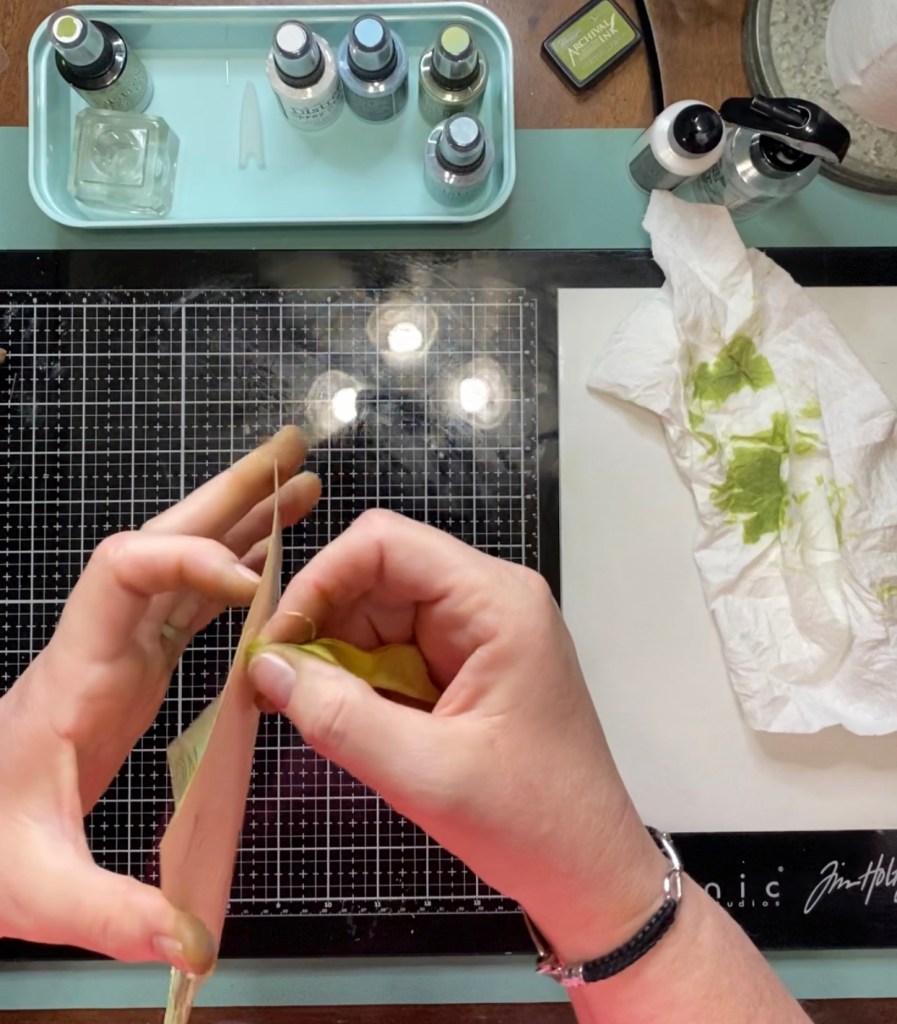
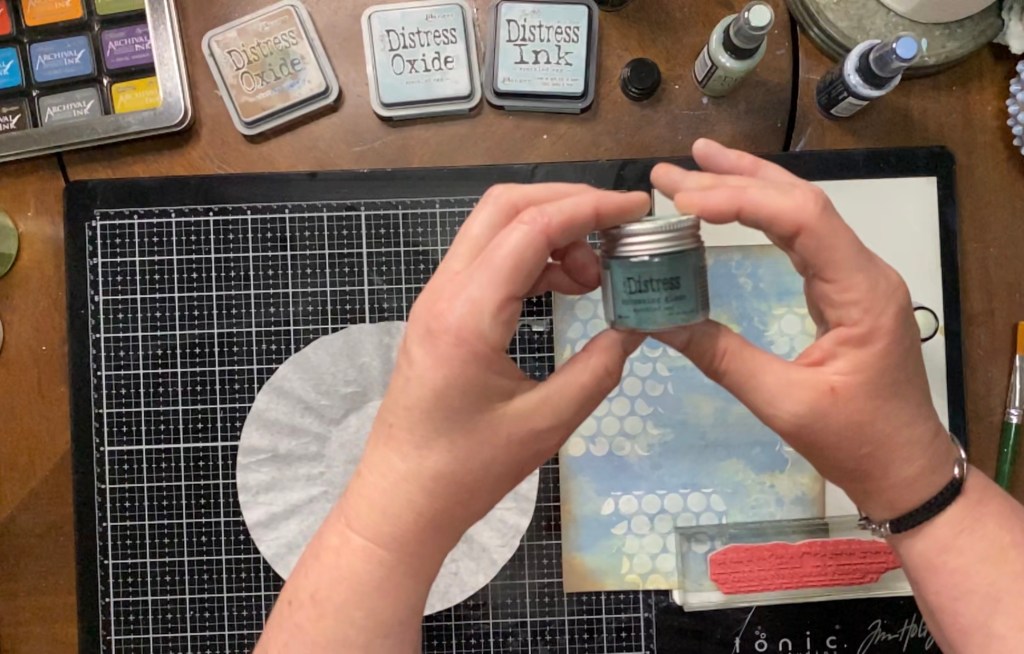
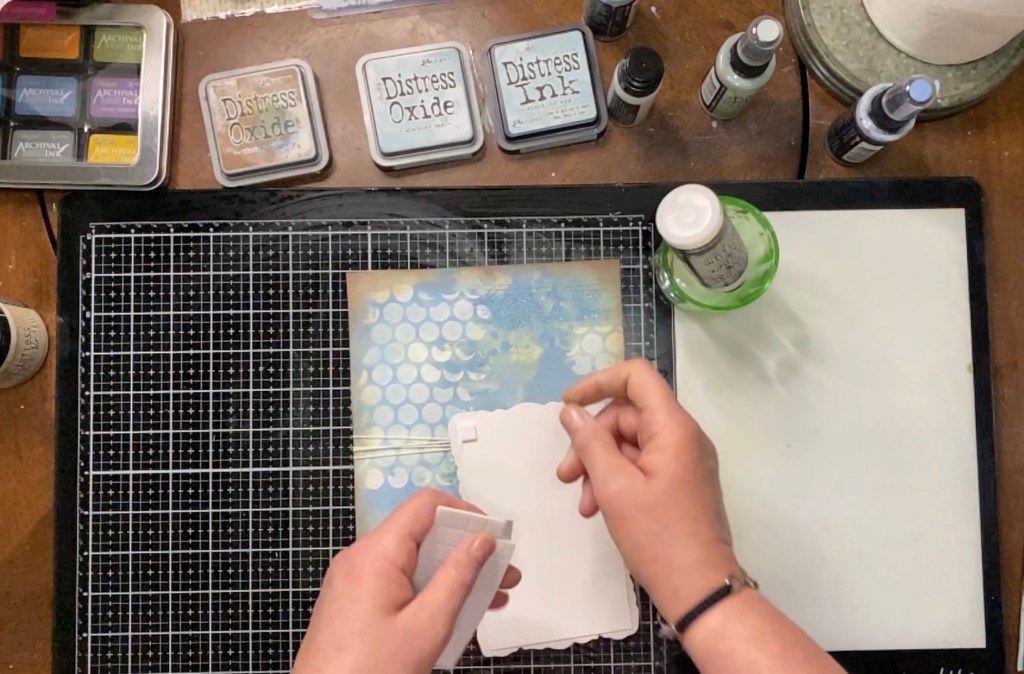
Last but not least, I added a ribbon to my tag. I wanted the ribbon to match, of course. I used white, seam binding ribbon by Hug Snug. I used my Distress Sprayer with water and soaked the ribbon on my glass mat. I then spritzed it with a light amount of the Distress Spray Stain Peeled Paint. It was a little dark for me, so I spritzed it with just a little more water to tone it down some. I soaked up the water and spray mix from the glass mat and made sure that the ribbon had a good, even coverage. Then I took a paper towel and squeezed the ribbon in it to soak up some of the water and ink mix. Then I took my Ranger Heat It tool and made sure it was good and dry. I then tied a regular old bow in the top of the tag. I snipped the frayed ends of my ribbon and then I was done.
I think this project reminds me that there is Joy in the ordinary. We have a few bird feeders and bird baths right outside my kitchen window. We just planted a few new rose bushes out there. I’m finding that the newly, replanted and redecorated “bird sanctuary” is bringing me a lot of joy these days. If I could just convince Humphrey the cat that the bird baths are not water bowls. What’s a cat to do??
I hope you enjoyed this make as much as I did. Here are a few up close pictures of the finished project.
Today’s theme for the Simon Says Stamp Wednesday Challenge was “Metallic”. I’m usually only a card maker out of neccessity, and even then, sometimes I just don’t take the time. I know, Say it ain’t so. I made one a few weeks ago and posted it on the Tim Holtz Addicts Facebook Page. A few ladies there said I needed to be making more. So, this Wednesday challenge should encourage me to make cards and create a stock pile of them.
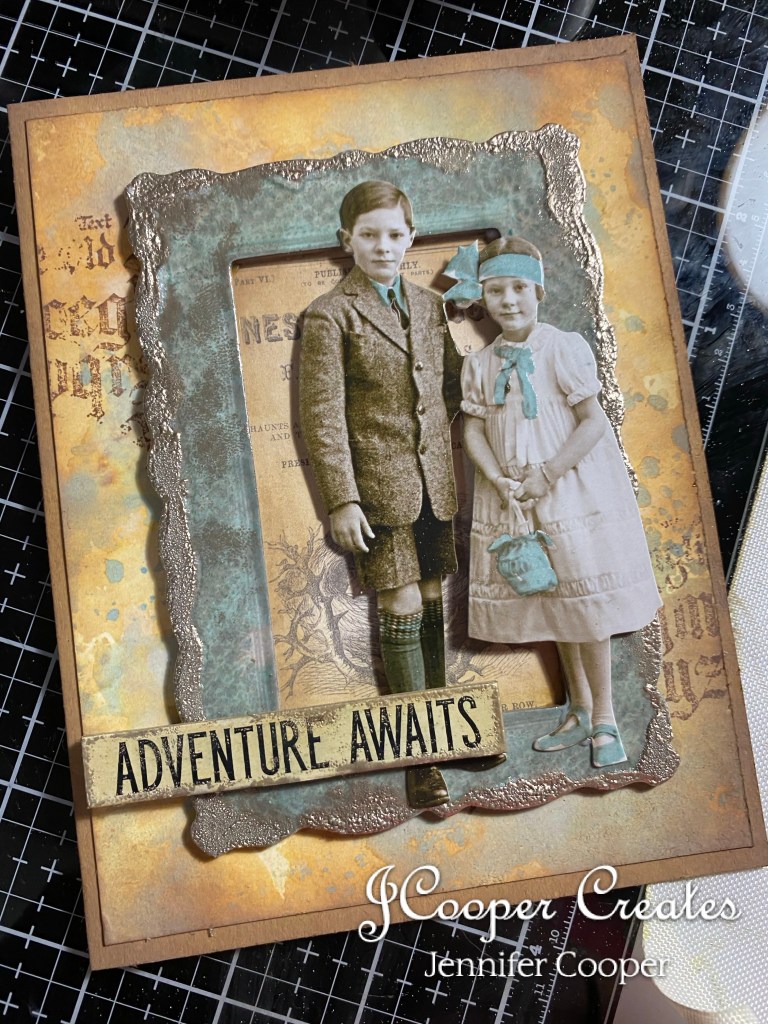
Next week is going to be my 30th Anniversary. When I saw this paper doll by Tim Holtz, I decided to make my card pertaining to that. After all, we were just children when we got married. Haha. No really, we were.
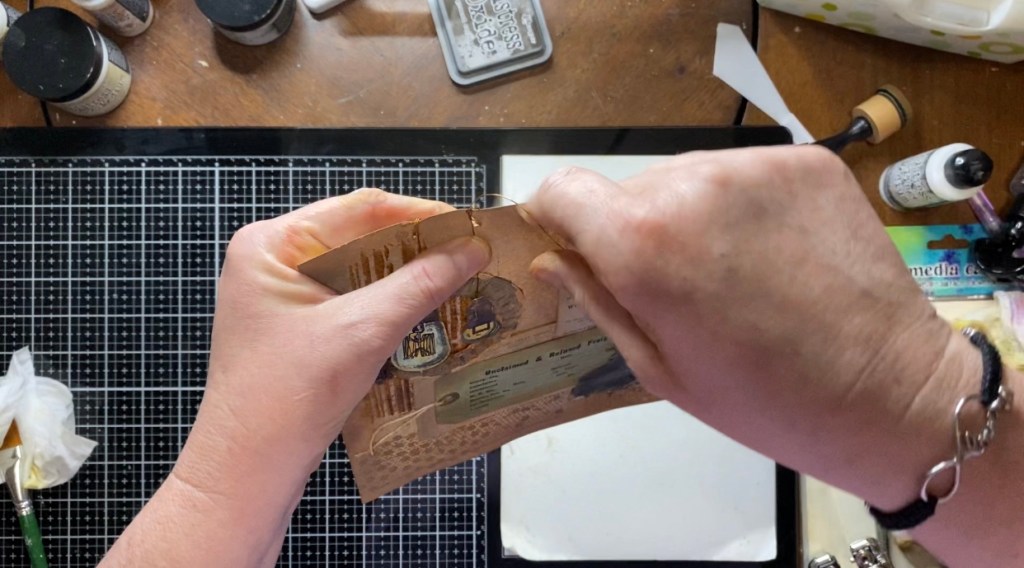
The first thing I did was gather up some goodies that I might could use to make this card. For someone who doesnt make many cards, I have tons of blank ones. So, I chose a blank made from kraft paper that was 5″ x 6-1/2″. I used Dylusions Mixed Media paper cut down to 4-3/4″ x 6-1/4″ for my background. I also went thru my Tim Holtz goodies and found this lovely paperdoll of the children, a journaling card that had speckled eggs on it, and a chipboard frame and a sentiment that says “Adventure Awaits”. Marriage is an adventure. Ain’t it the truth?
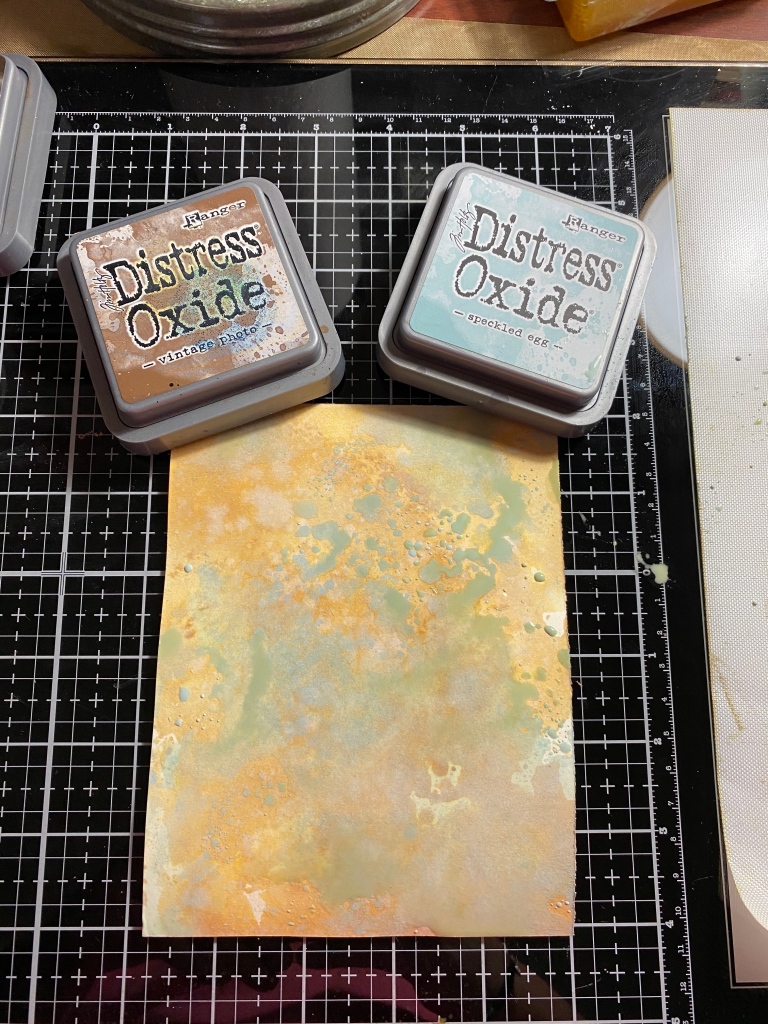
For my choice of inks for this make, I went with Distress Oxide Ink pads. The colors were Vintage Photo and Speckled Egg. I smudged a little of the Vintage Photo ink on the nonstick mat on my Tim Holtz Media Mat made by Tonic, and spritzed it with a little water for some nice big ink droplets. I then dabbed my paper in the mix until I was happy with the coverage. Next, I took my Ranger Heat It tool and made sure it was good and dry. I then did the same thing with the Speckled Egg. I used Speckled Egg last, because I wanted it on top. I then took my Ranger Blending Tool and distressed the edges of my background with some Distress Oxide Walnut Stain. I just love how distressing a background just frames it in nicely. It gives it that nice vintagey feel.
Once I was happy with the inks on my backgrounds, I used the stamp set Faded Type from the Tim Holtz Collection at Stampers Anonymous and stamped a little bit of writing. I used my X-Press it double sided tape to adhere the background to my card blank. But yes, I did distress the edges of the blank with my walnut stain before sticking it down.
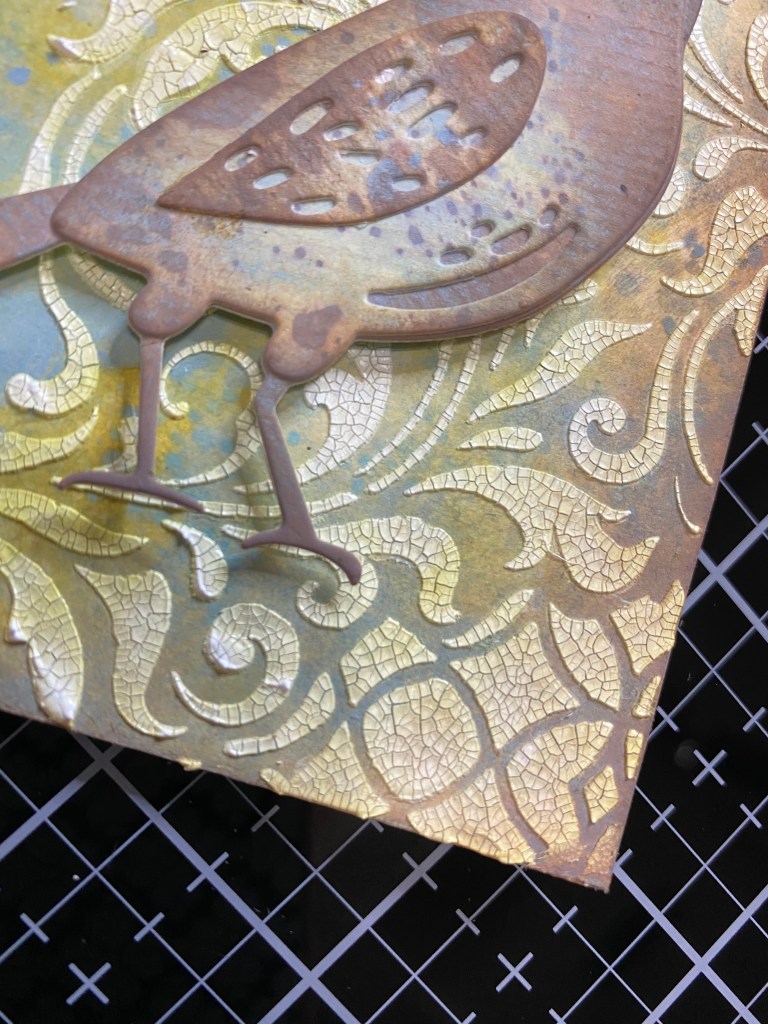
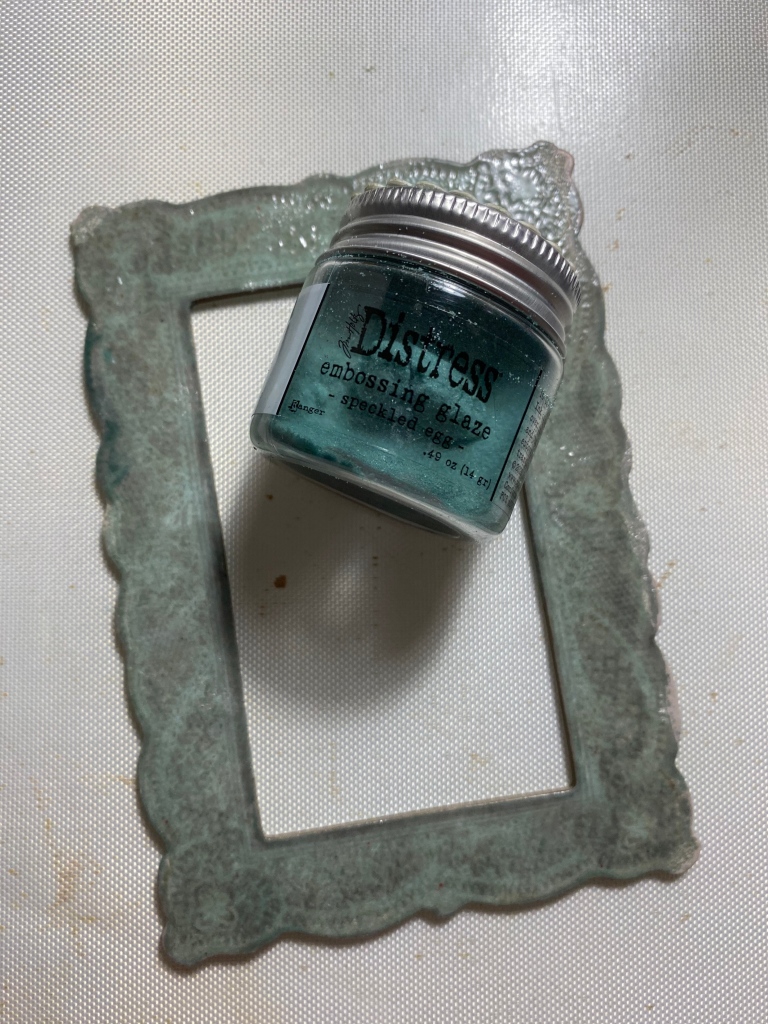
Here’s where the experimenting began. Haha. For the baseboard frame, I used my Distress Embossing Dabber and my Speckled Egg Distress Embossing glaze to give it that nice shade of blue that has become my favorite. I heated it with my embossing tool, and it gave it that nice shine that almost looks porcelain. Then, since the theme is metallic, I took my Translucent Distress Grit Pasete and just dabbed a tiny amount around the edges of the frame. Then, with the Liquid Platinum embossing powder from Ranger Ink, I embossed the edges. It gave it the NICE metallic shine. I think this is my favorite embossing powder, I’m not sure why I don’t use it more. I think this may be a new start, for sure. I love this new technique. If you’re not following the FB Live demos that Tim Holtz is doing on Saturdays, you should. I am learning so many new ways to use products that I have had for years. I’m also buying new, so there’s that. Haha. But now, I’m starting to drift. Back to the make.
I think that this next step has quickly become another favorite technique. I used my Distress Embossing Pen to highlight just a few areas on the paper doll and embossed it with the Distress Embossing Glaze Speckled Egg. I love how the little highlighted details just pop once the paperdoll has been adhered to the make. Don’t you agree?
And last but certainly not least, I did the same technique on the edges of my sentiment piece and hit it with my blending tool to give it a little color, as compared to the stark white that they come in. I really enjoyed making this card. It had a little sentimental value so that may have been what aided in the make.
Do you ever have one of those projects that just doesn’t cooperate with you? This one was one of those projects. Haha. Todays Simon Says Monday Challenge theme was “It’s a Man Thing”. Maybe that’s why it didn’t cooperate. Haha. Let me tell you how it went.
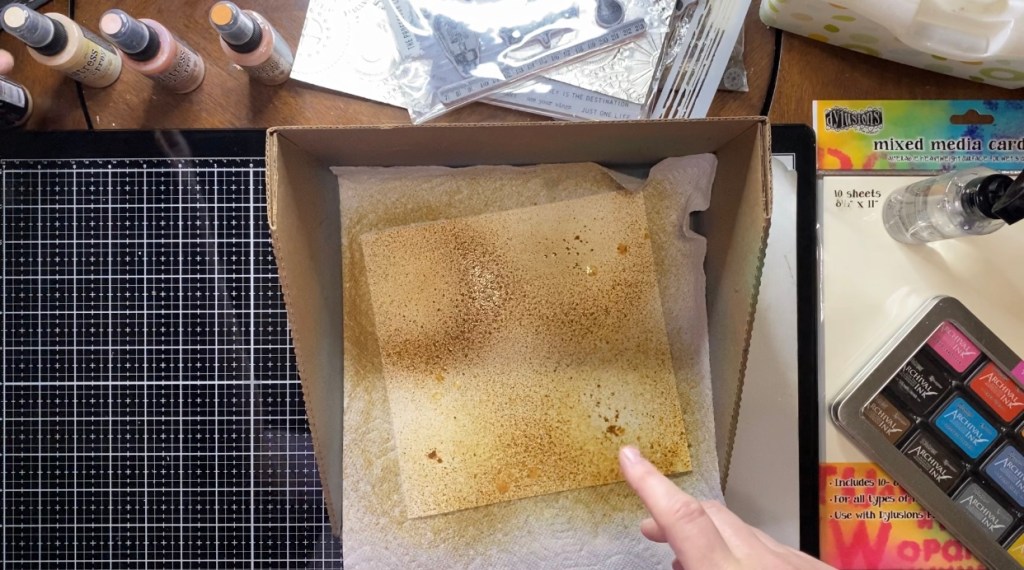
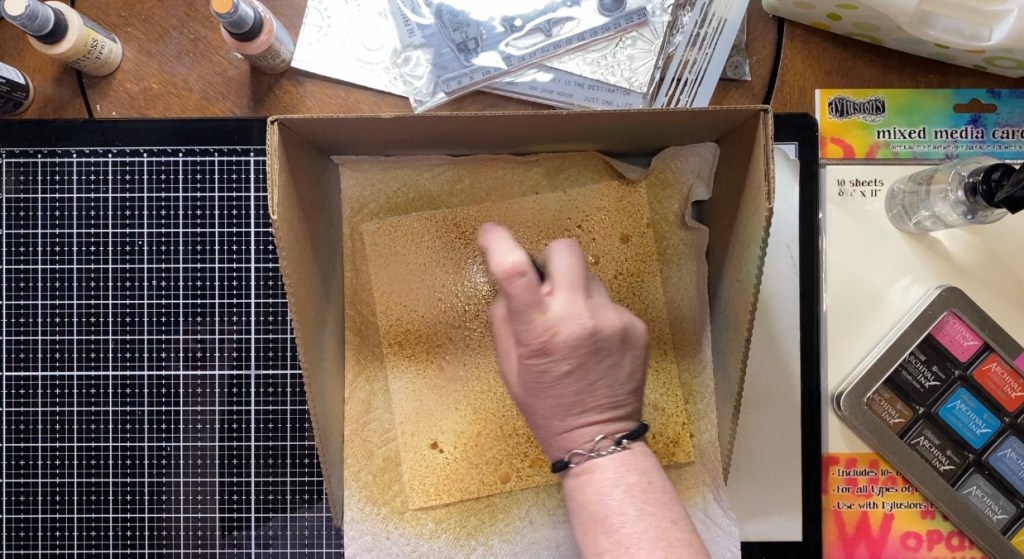
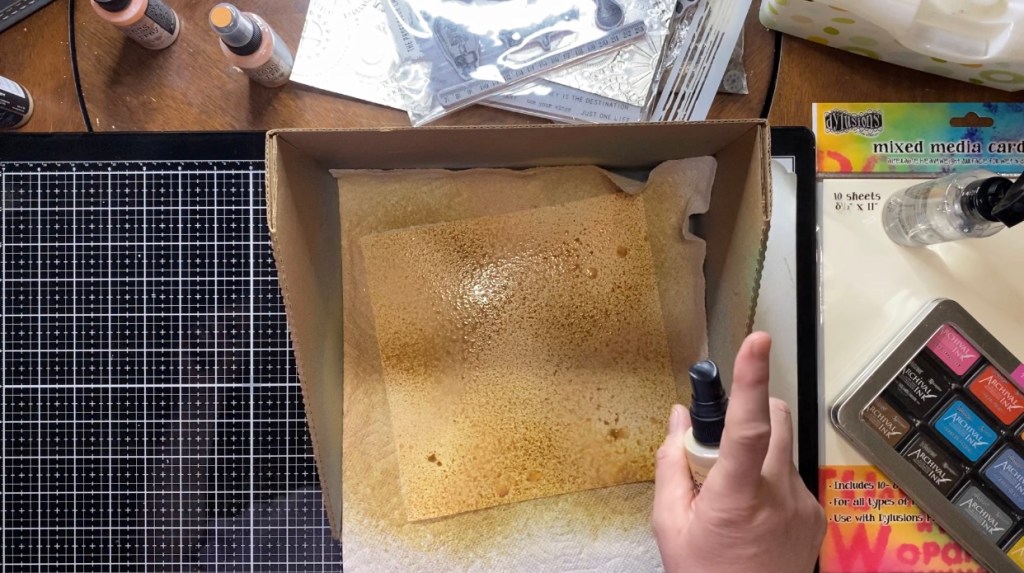
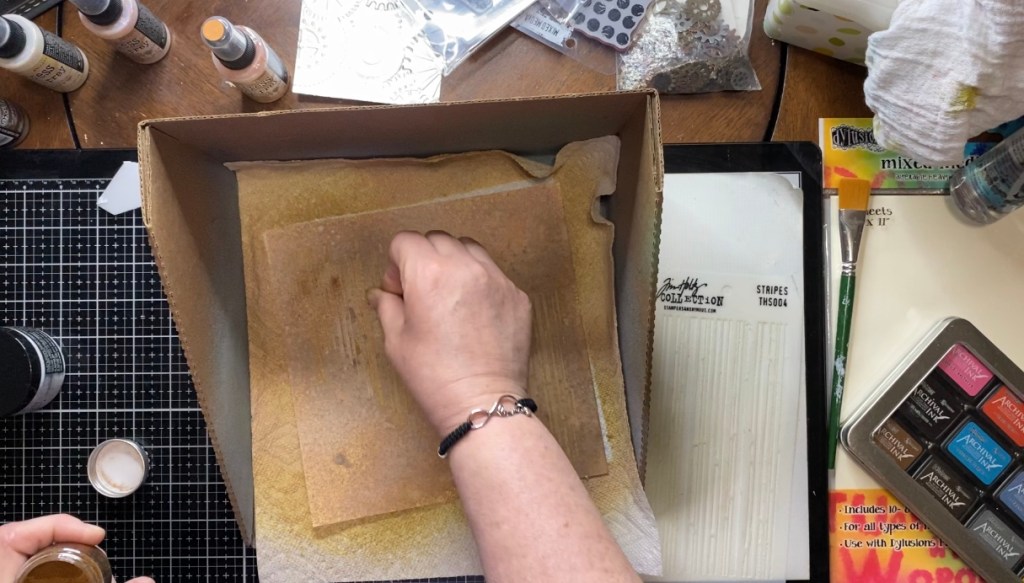
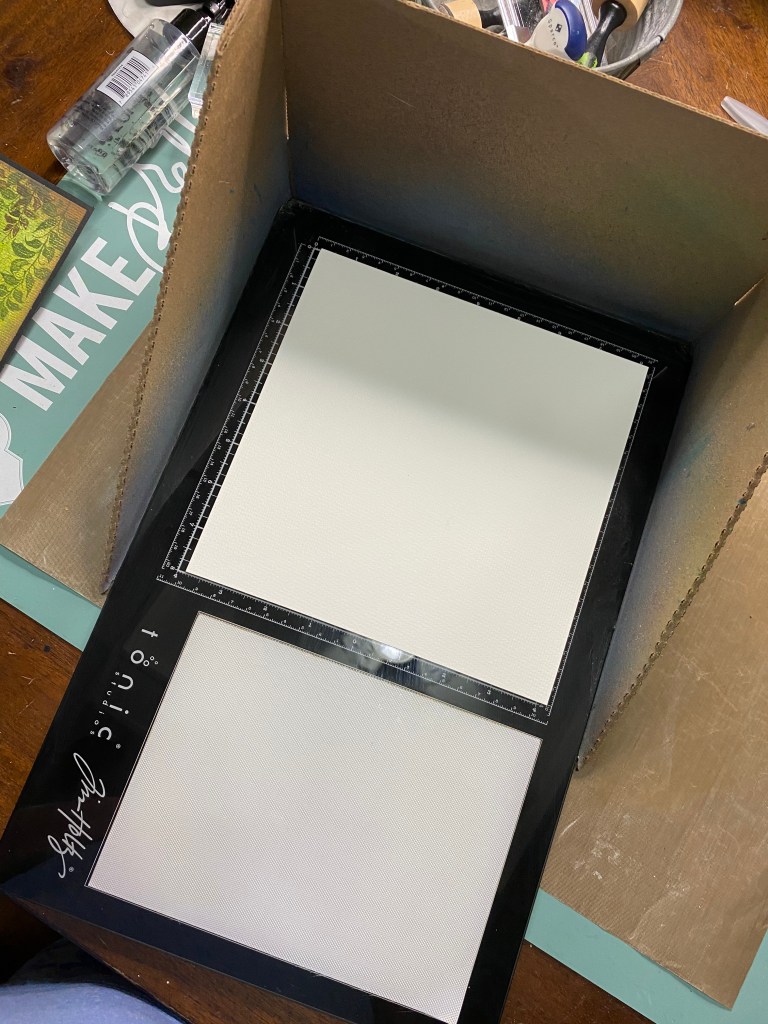
I decided to do an 8″x8″ art journal page. Today I used the Dylusions Mixed Media Cardstock. This is a great paper for mixed media projects. It comes in a pack of 8-1/2″x11″. It’s great for inking and stamping and those sorts of things. For my background today, I used Distress Oxide Sprays. The colors I used were Gathered Twig, Tea Dye and Antique Linen. I placed my paper in my Splat Box and spritzed it with a little water. I then sprayed just a little of each color until I was happy with the coverage. I used my Ranger Heat It tool to make sure it was good and dry.
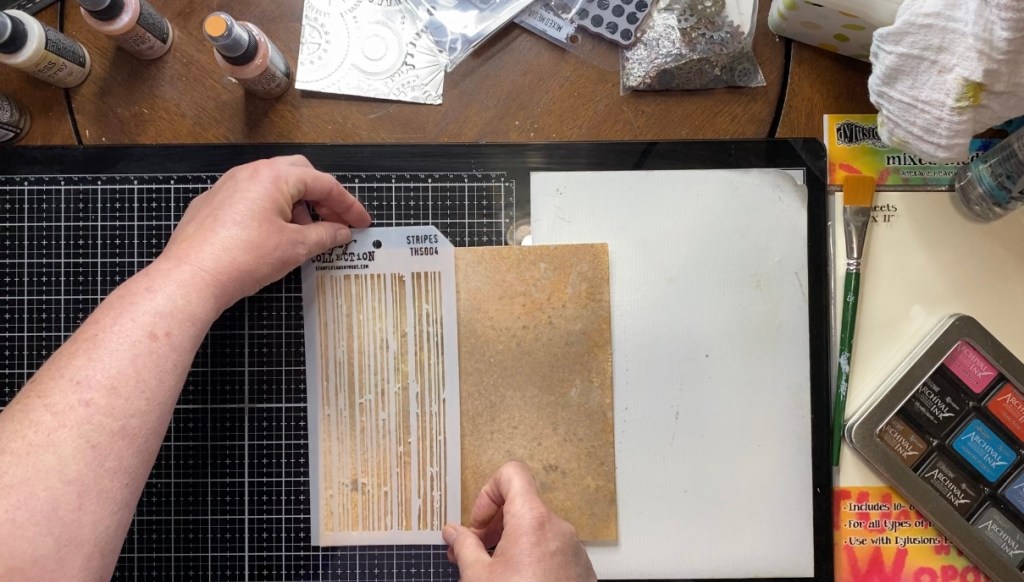
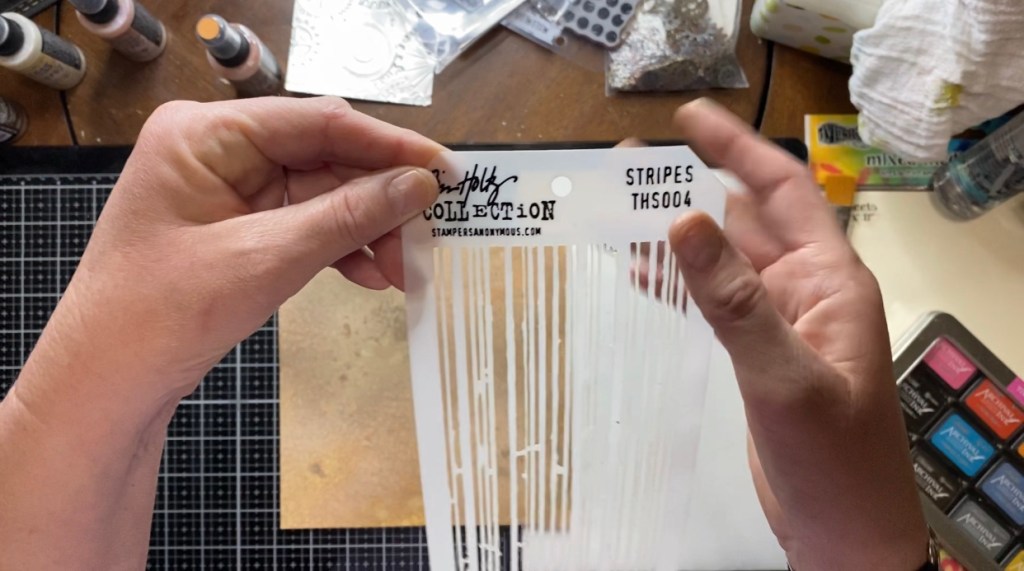
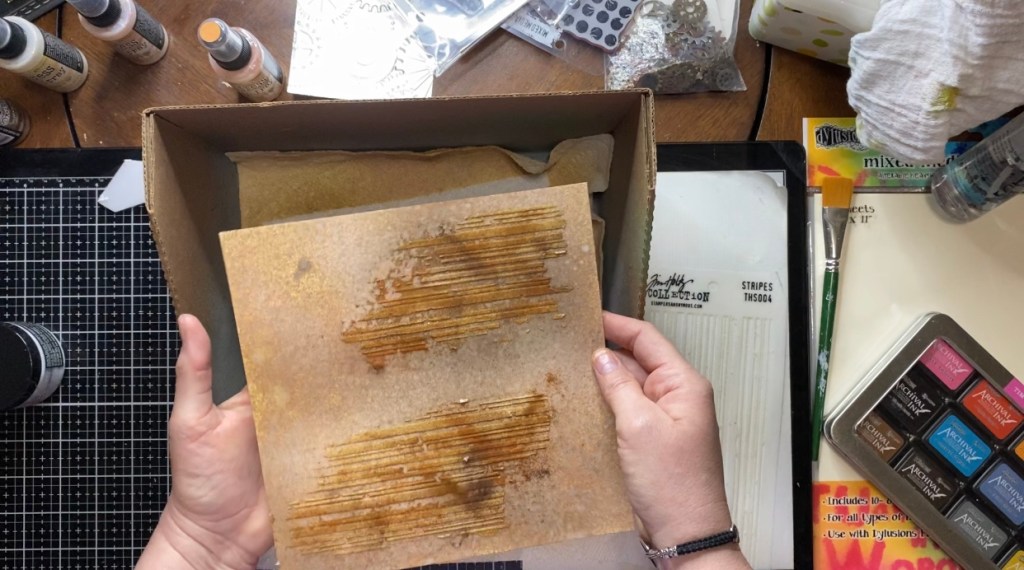
Next step was to do some texture paste and stenciling. For my stencil I chose the Stripes (THS004) layering stencil by Tim Holtz from Stampers Anonymous. I just received the translucent Distress Grit Paste in the mail this weekend. People have been doing some amazing things with it so I wanted to try it out.
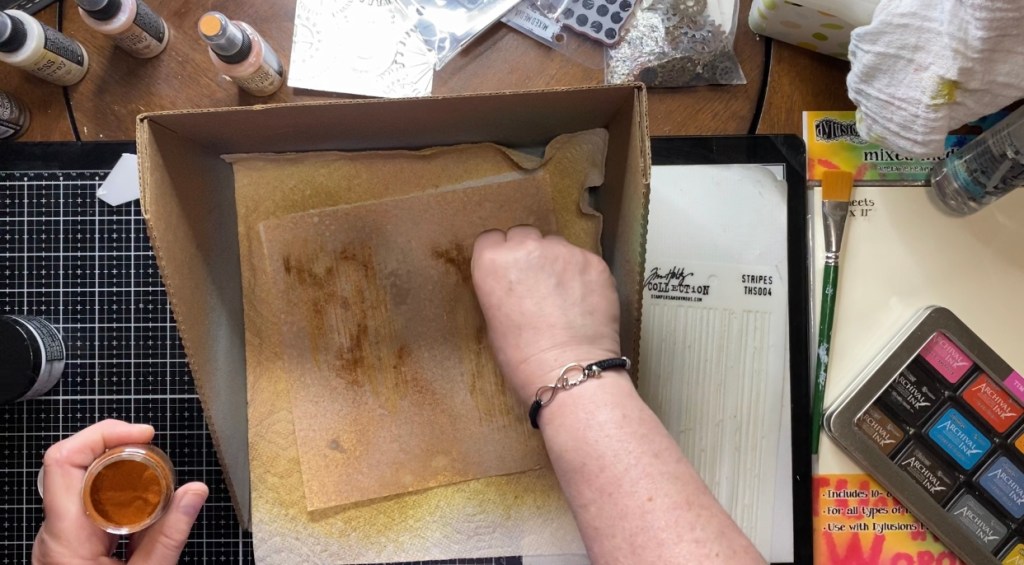
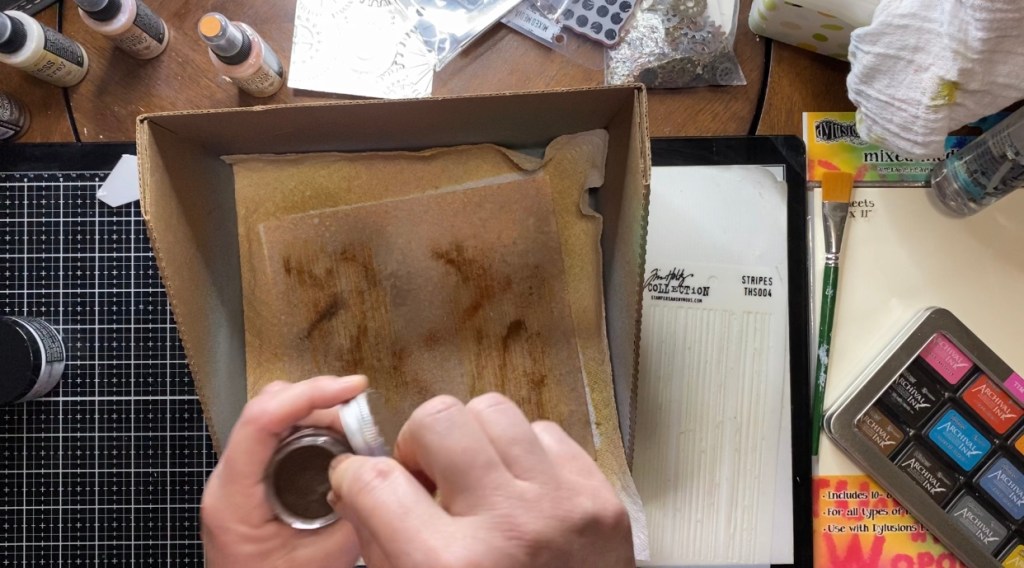
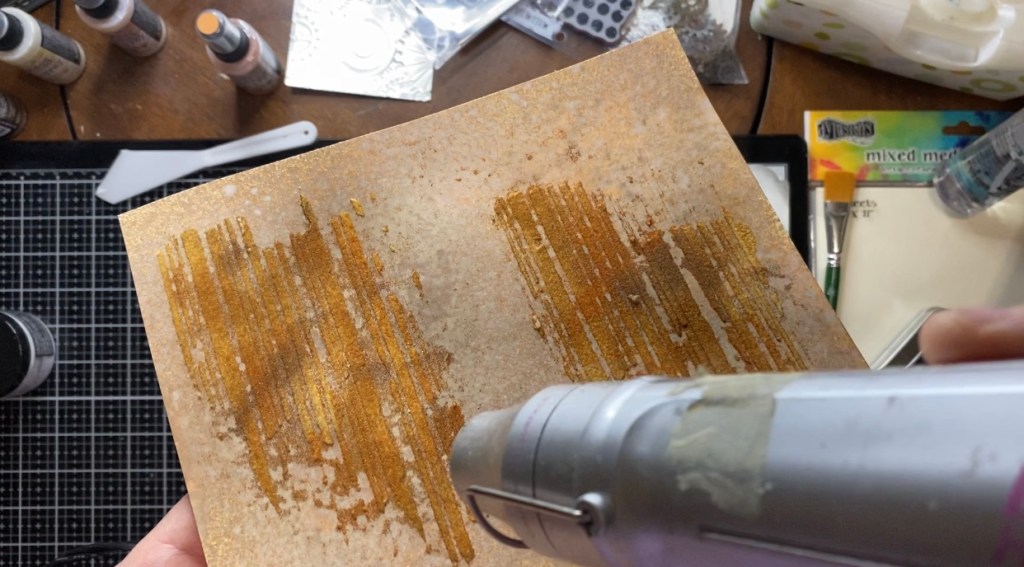
The next step, I think is where I started to go wrong. I attempted a technique I have seen Tim Holtz do on one of his Saturday demos. While the paste was wet, he took Distress Embossing Glaze and sprinkled it over the stenciled area. I think I’m remembering that right. If I’m not, that’s probably why it went wrong. Haha. I decided to sprinkle three different colors over the grit paste. The colors I used were Vintage Photo, Rusty Hinge, and Walnut Stain. I then used my embossing tool to melt the powder. Once I was done, I decided I might need a little more practice for that technique. Haha. The wonderful thing about mixed media and paper crafting is the ability to embellish.
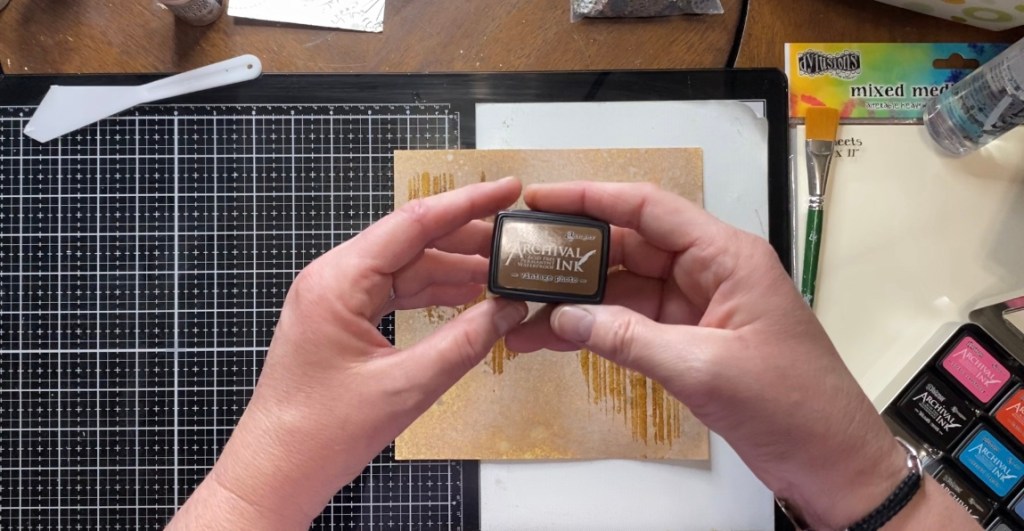
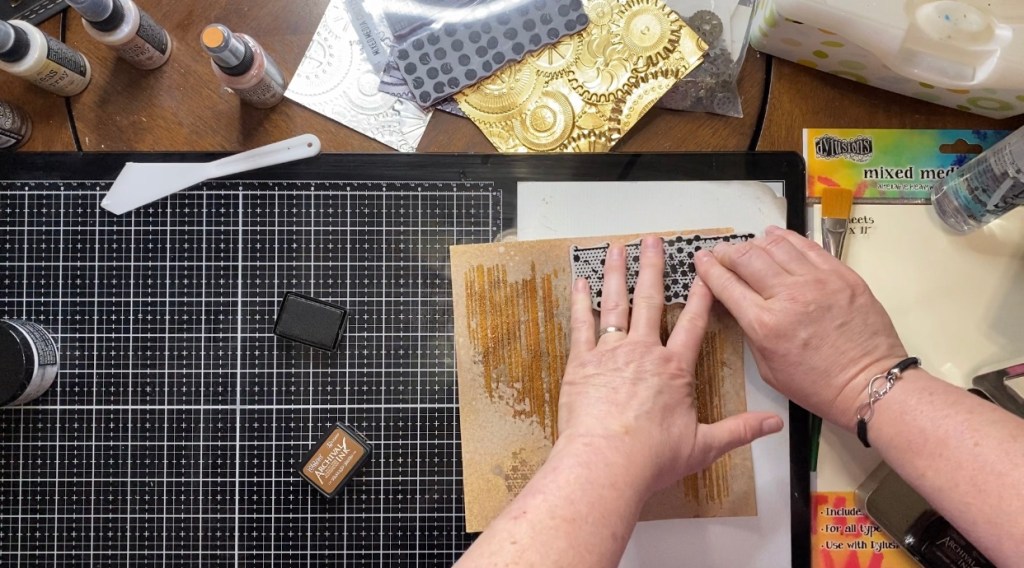
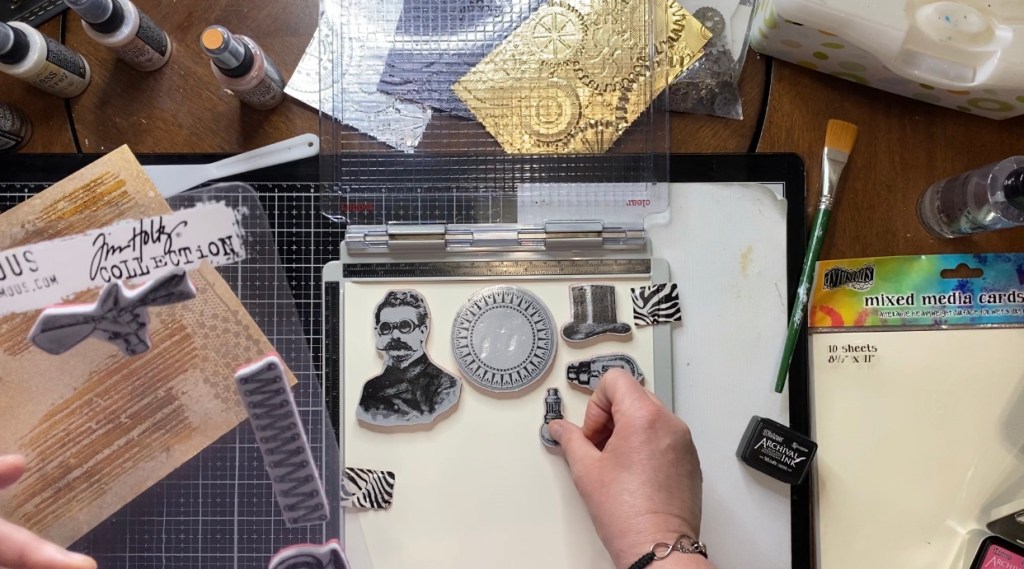
The next step was to do a little stamping. I chose two sets for my project today. The first set was Mixed Media (CMS125) from the Tim Holtz collection from Stampers Anonymous. I chose the stamp with the circles, and the Distress Archival Vintage Photo as my ink. This was the second thing I think that made me unhappy. But, I decided it was just a background and decided to keep on going. You can usually salvage a background by covering up the little things you may not be happy with.
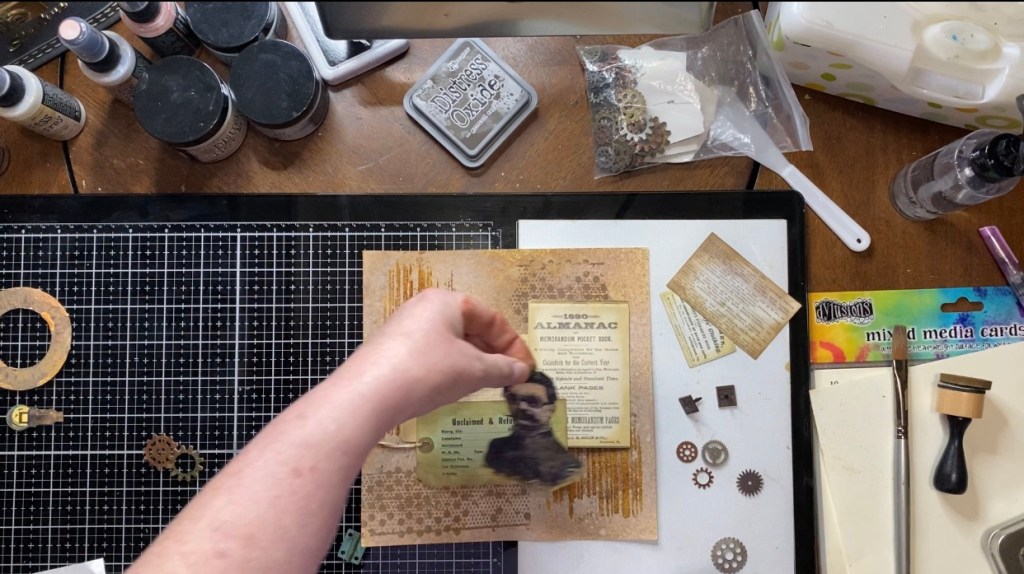
Once I got over myself, (haha) I moved on to the stamped images for my collage. I finally got in a set of stamps that I’ve been wanting for a while now. I’ve been seeing people do some amazing things with The Professor (CMS373) from the Tim Holtz collection at Stampers Anonymous. I knew that it would eventually be one I had to have so I finally broke down and ordered it. Lets face it, it wasn’t that hard of a decision to make. Using my Stamping Platform and my Archival Jet Black ink, I stamped the images that I wanted to use for my project. I then fussy cut them out.
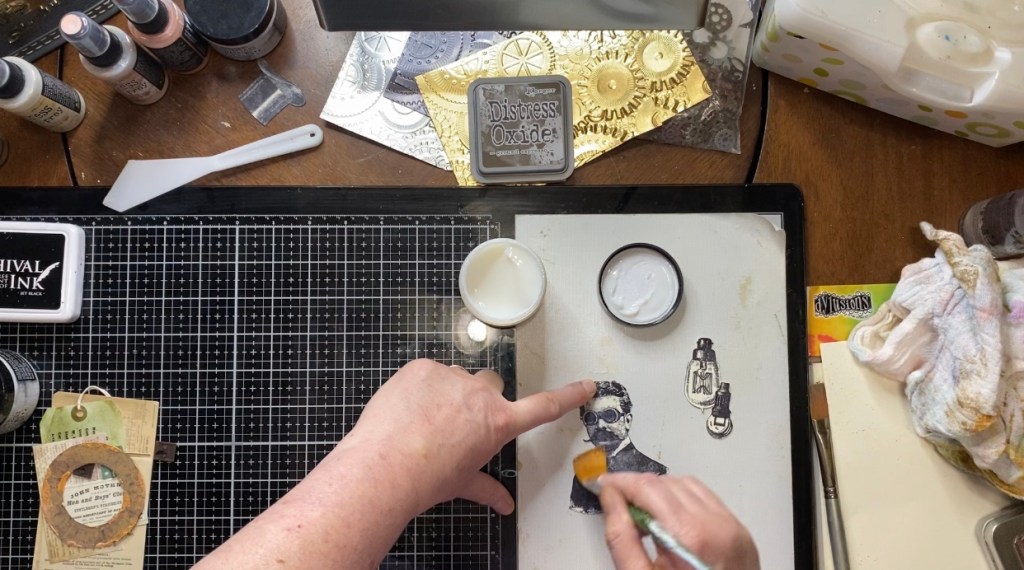
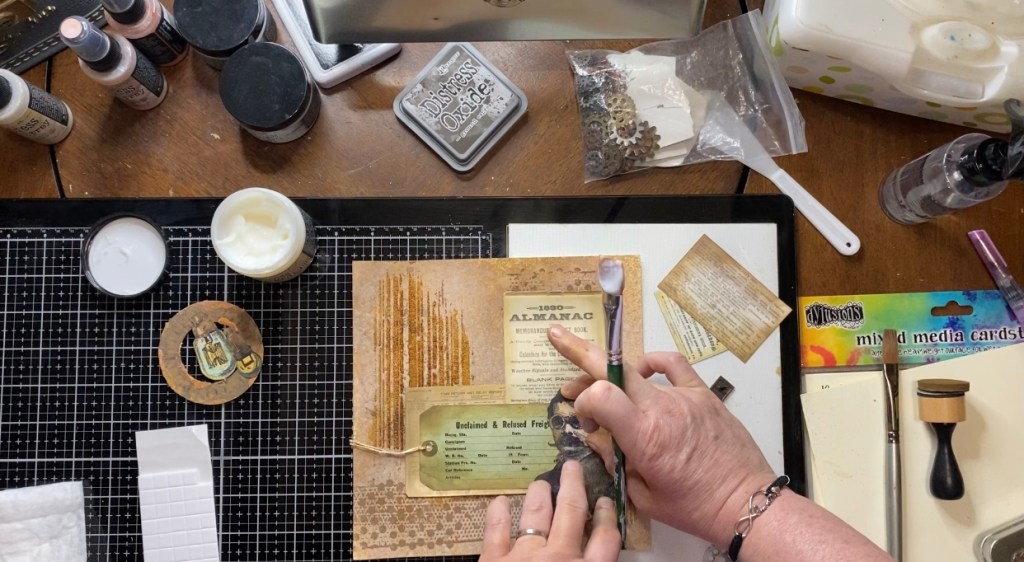
Next step was another one of those that was a mishap and probably not necessary but I’m including it because these things just happen. No sweat, really. You just get over it and move on to the next make. Anyway, drifting back, I used my Distress Collage Medium to cover my stamped images. Sealing your images makes them nonpourace and gives your ink a little movability while you’re coloring. The reason I used the matte medium was because I originally planned on using my Big Brush Markers. But, since Tim Holtz’ last demo was on his Distress Crayons, I decided to give it a shot. For this I did not need matte medium. Haha. So, my crayons didn’t want to participate properly. The Professor turned out okay, but the light bulbs turned out pretty cool.
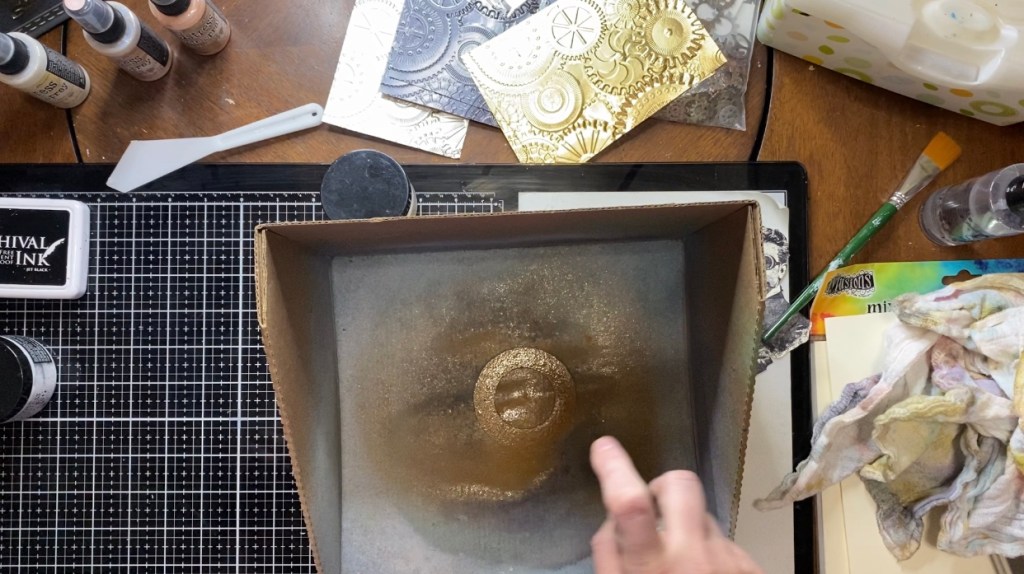
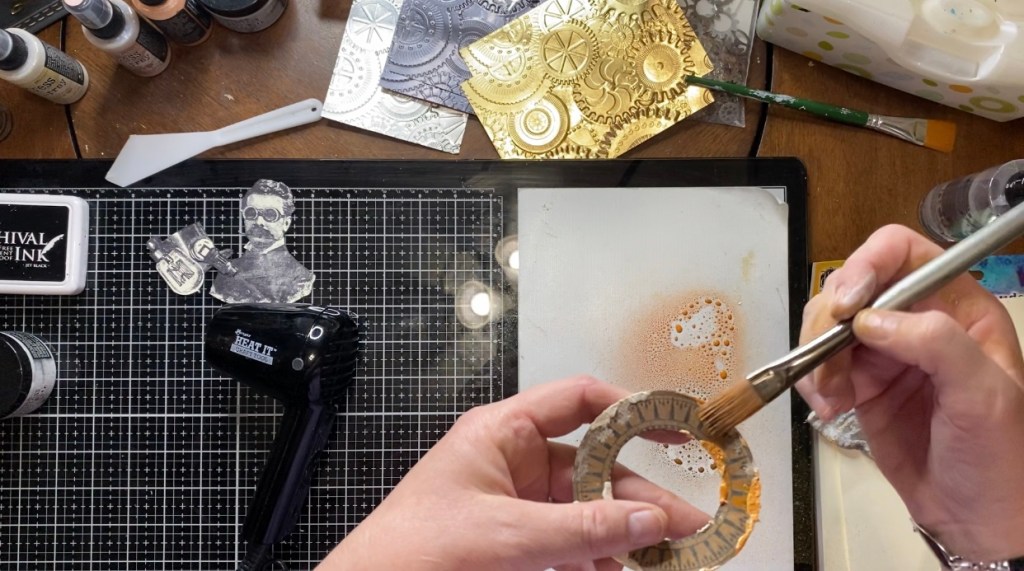
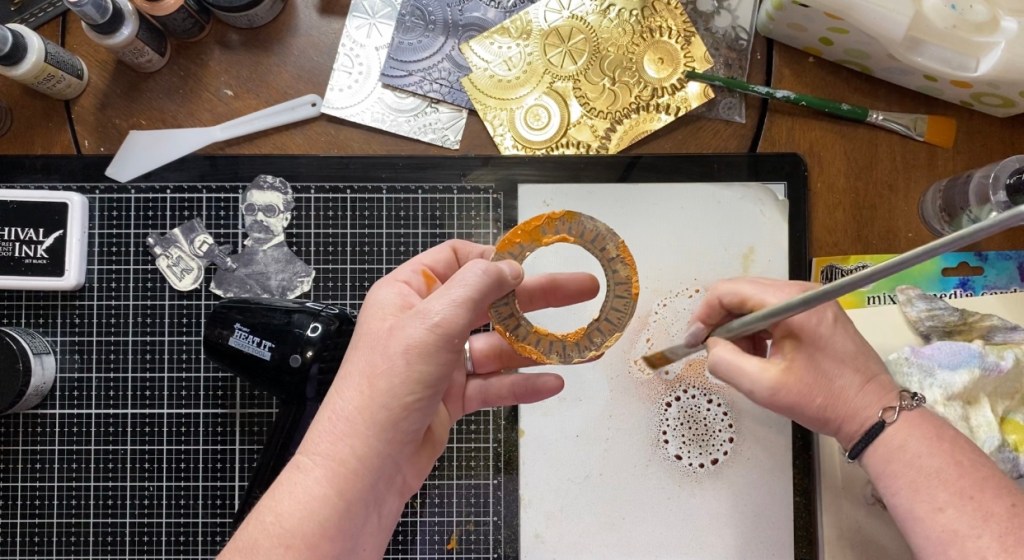
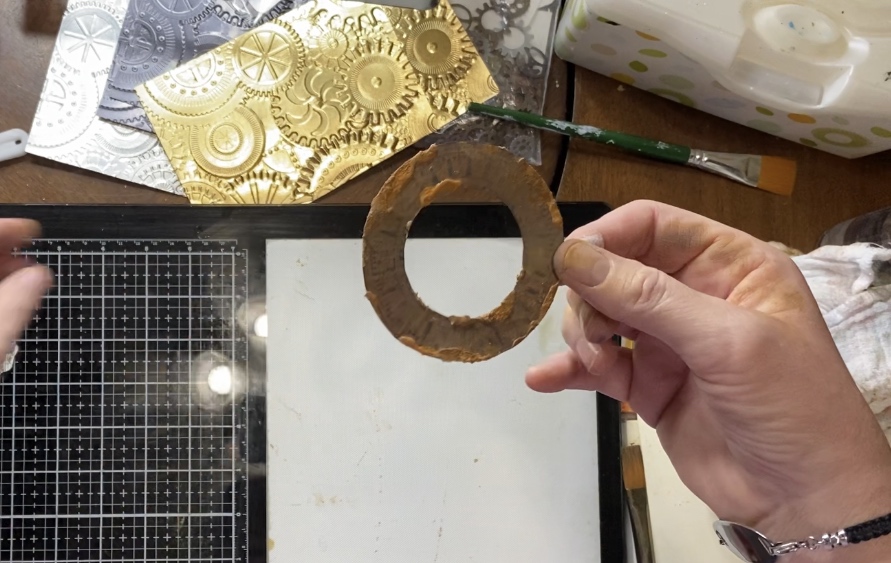
Next thing I did, was try a little rusty technique I saw on instagram. @STACYHSTAMPS is definitely someone to follow. I took the dial image that I stamped and sprayed it with the Gathered Twigs. Then I took my Distress Grit Paste and grunged it up a little. To color the paste, I sprayed a little Rusty Hinge and Gathered Twig on my nonstick mat. I used a paint brush to dab it until I was happy with the color. This is definitely a technique that will require more practice. It will get there.
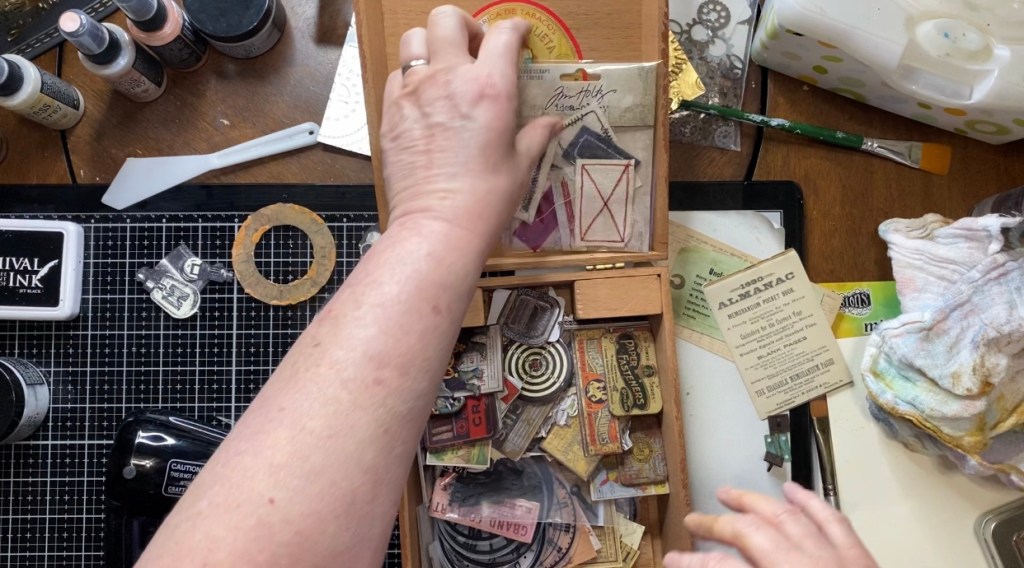
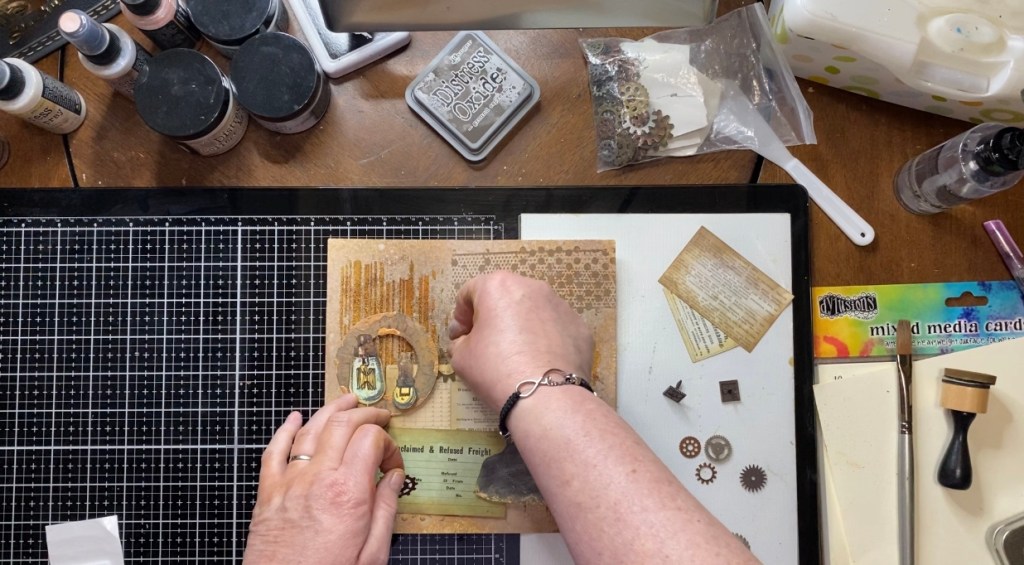
Once I was somewhat happy with my stamped images, I pulled out my cigar boxes and dug for a few more items to add to my page. I found some journalling cards, a tag, some brads, and a few gears.
Once I picked out all my embellishments, I played with it a little while to figure out the placement of everything. It’s really a process of just playing with it until you’re happy with the way it looks. Once I was happy with the placement, and sure that I had covered anything that didn’t make me happy, I used my Distress Collage Medium to glue everything into place.
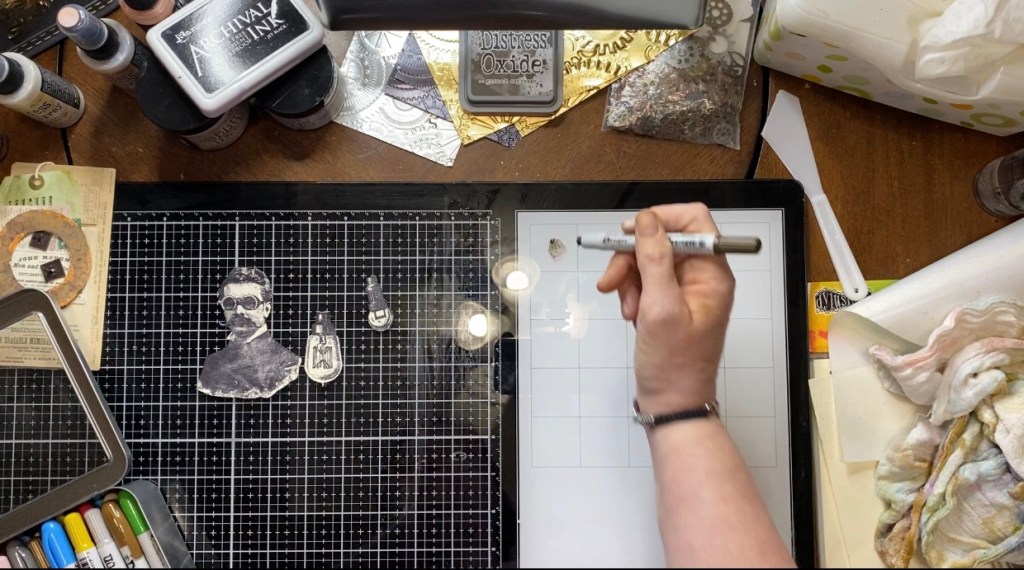
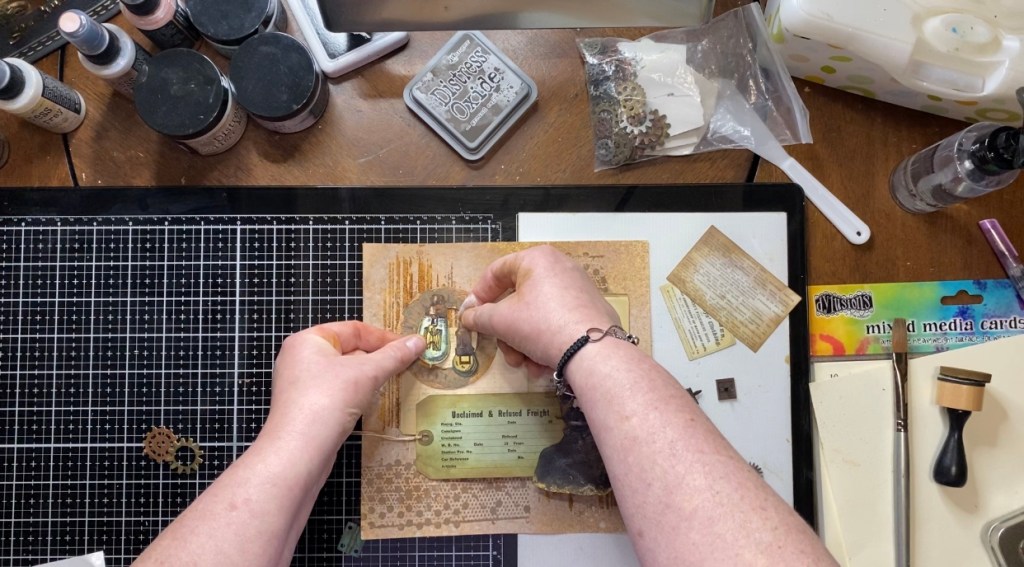
I think the thing that made me most unhappy about this project was an idea I had in my head didn’t make it onto the paper. Once I placed the light bulbs into the dial, I decided, “Wouldn’t it be cool if they had wire?” Yeah, uh, No! I’ll spare you the detail of the mishap and tell you how I somewhat fixed it. I took two eyelets and my Crop-a-Dial and put the eyelets where I had messed up my paper by just feeding the wire through a hole. Then, I restrung the wire from the light bulbs through the eyelets and to the back of the page. That little step could have been left out altogether. Oh well, it happens. I then took my Tonic Distressing Tool and distressed the edges of my page. I also took the Distress Oxide Vintage Photo and inked the edges.
All in all, I think it turned out okay. Could it have been better? Yes. But I guess this is one of those times when you just have to get over yourself. It’s not always going to be perfect. I have definitely found some areas to practice on. But that’s the thing about mixed media, you’re always learning new things. I hope that this post has taught you some new things, even if they are what not to do. Sometimes, that’s important, too.
“Make your own background”. That was the theme for Simon Says Stamp’s Monday challenge this week. I made a card last week using the new Distress color, Speckled Egg, and I liked it so much that I decided to do something similar this week, but in a little larger size and put it on something so I could display it in my craft room. In fact, I was very pleased with the outcome of this make, so it is actually on display in my living room. My house has a somewhat vintage style so it fits in nicely. Let me tell you how I made it.
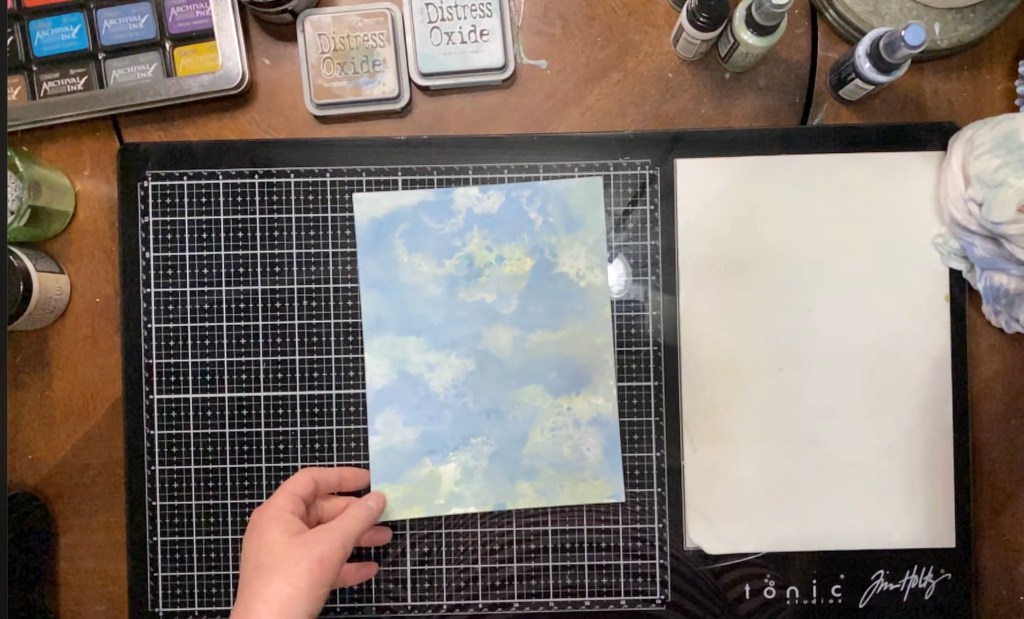
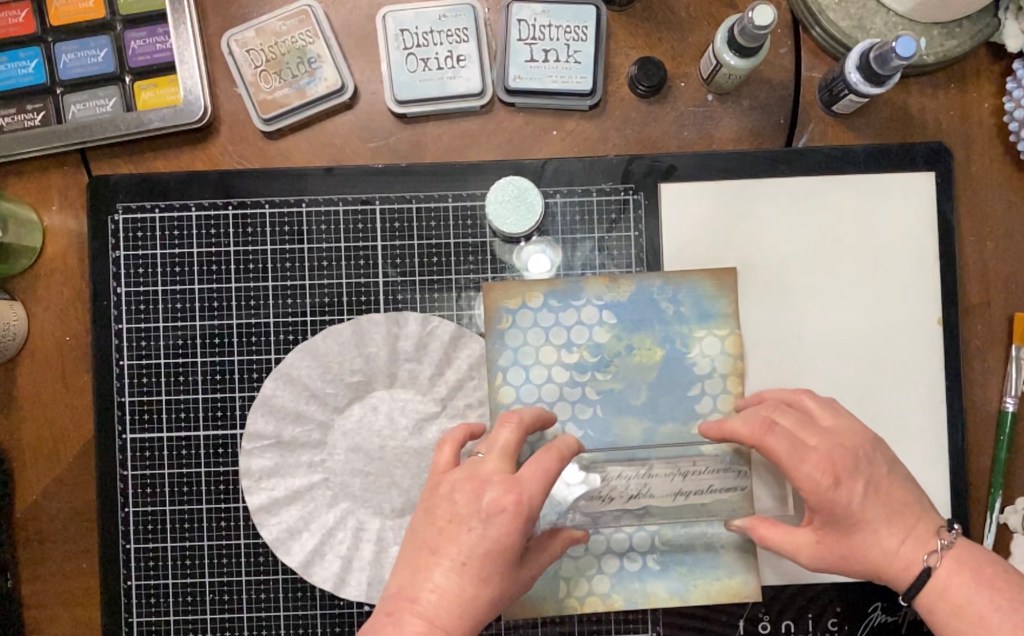
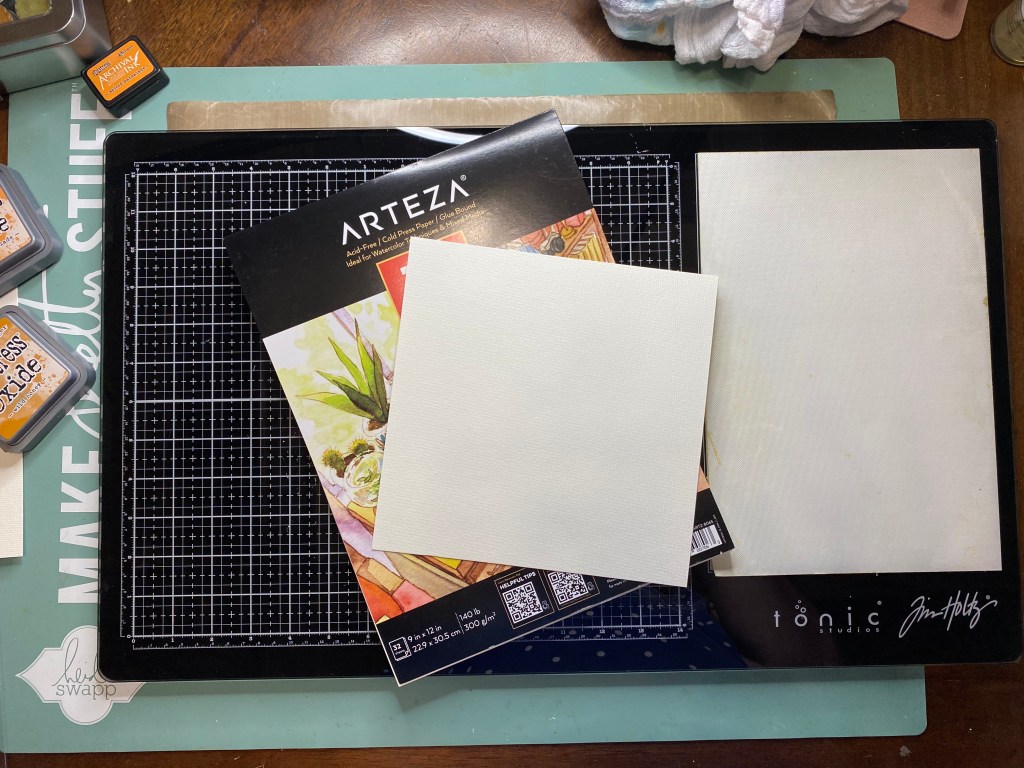
First, I started with my paper of course. I used Arteza, 140 pound, watercolor paper. I was planning on mounting my page on an 8″x10″ canvas so that it could be displayed. I cut my page down to 7″x9″ to give it a nice border of canvas around it. The first step to my background was my inks. I used Distress Oxide sprays on this make. The three colors I used were, Speckled Egg, Faded Jeans and Bundled Sage.
If you follow my blog, or YouTube channel, you have probably discovered that I use this technique quite a lot, or one similar to it. It’s very simple really. You will need your paper, your sprays or ink of choice, and a good working surface. I love working on my Tim Holtz glass media mat by Tonic. It’s a really nice surface if you do a lot of mixed media, and I do. It’s something about the glass. This mat also has a nonstick mat that just makes the inks do so well.
I took the speckled egg first, and sprayed some on the nonstick mat. I then took my Distress Sprayer bottle and spritzed the ink with some water to make it form nice big droplets. I then took my paper and repeatedly dabbed it into the ink and water mixture until I was happy with the coverage on my page. I then dried my page with my Ranger Heat It Tool, cleaned up the leftover ink and went on to the next color. I repeated this same process with the other two colors until I was happy with my background.
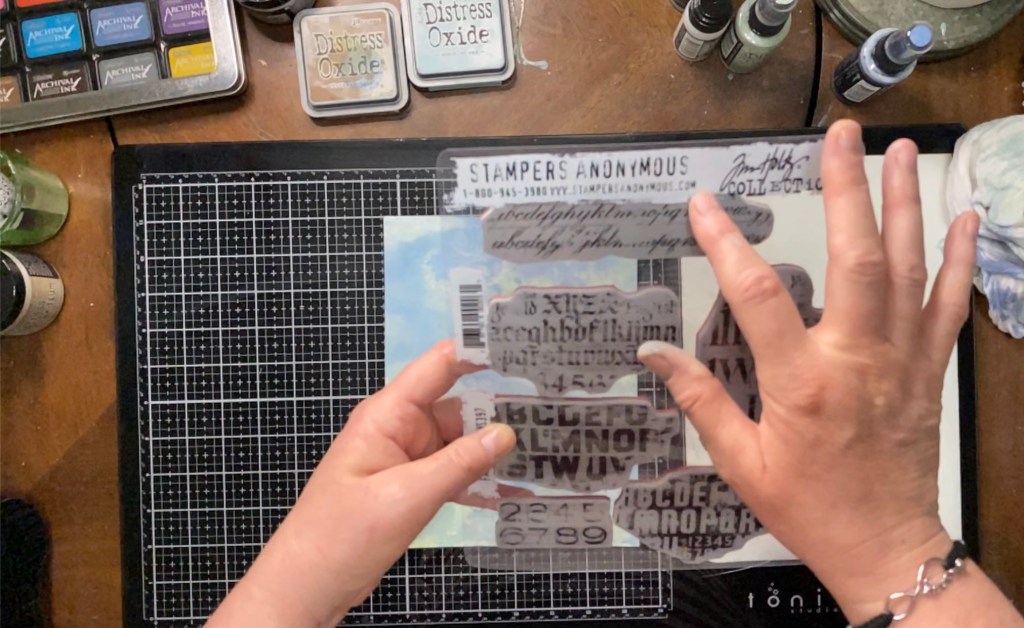
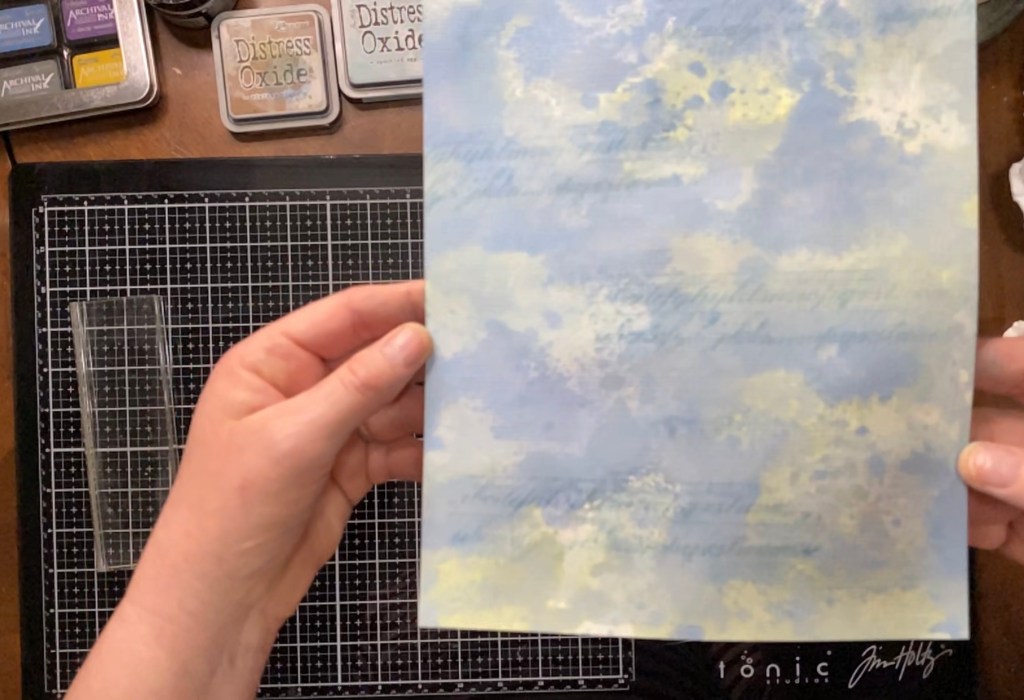
Once I was happy with the inks for my background, I added some stamping. My favorite, go-to background stamps these days is a set by Stampers Anonymous in the Tim Holtz collection. The name of the set is Faded Type and the number is CMS397. This set has some great alphabet stamps in several different fonts. I chose one that has a vintagey, scripty feel (yes, I may have just made those words up), since my make was going to have that vintage look. I used the Speckled Egg in the Distress ink for stamping the image. It gave it a faint script in the background; a nice touch.
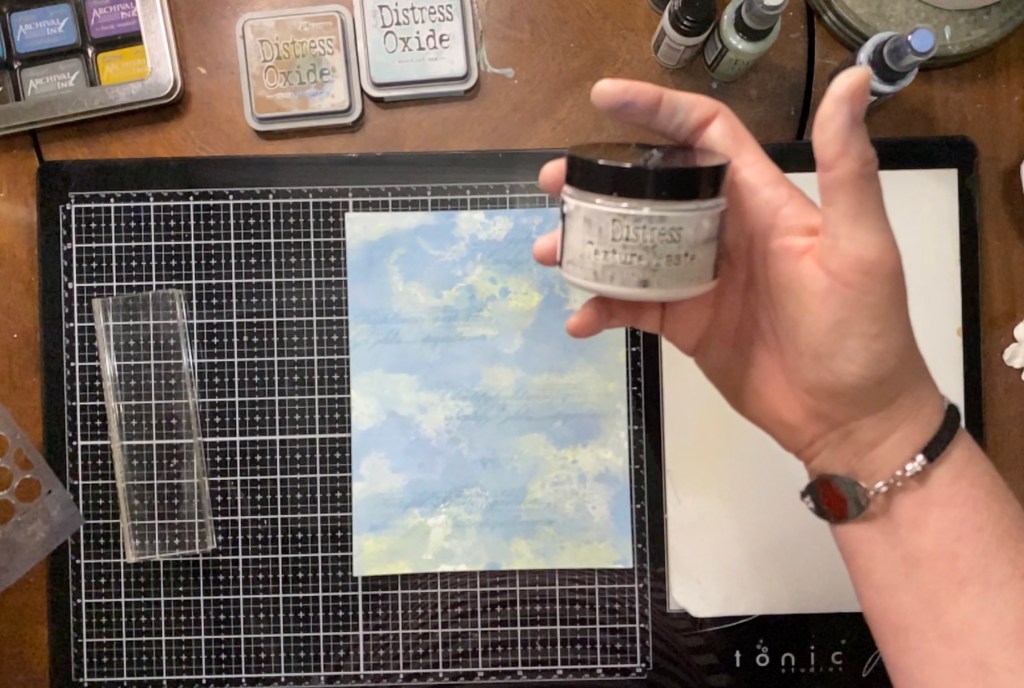
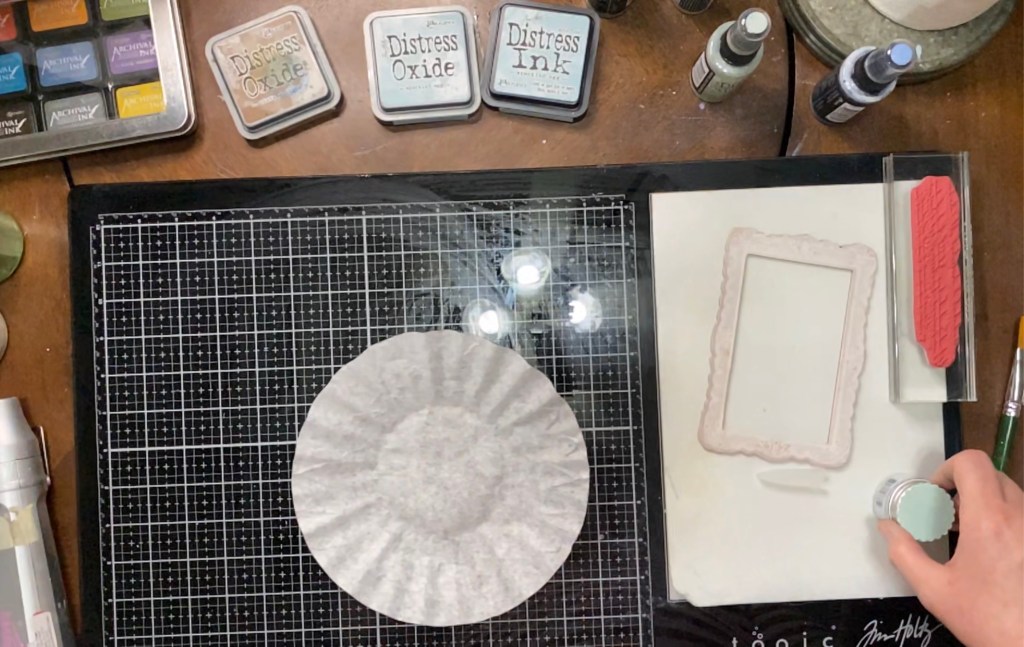
Next, I decided to add another layer to my background so that it had a little texture. I took a circle stencil that I’ve had forever, and my Distress Crackle Texture Paste. With a spatula, I spread the crackle paste over the stencil in a thin layer that was smooth with the edges of the stencil. Once that dried, it had that nice, crackle look. It reminds me of an antique piece of furniture that’s been painted so many times that it has loads of cracks in it. Love it!
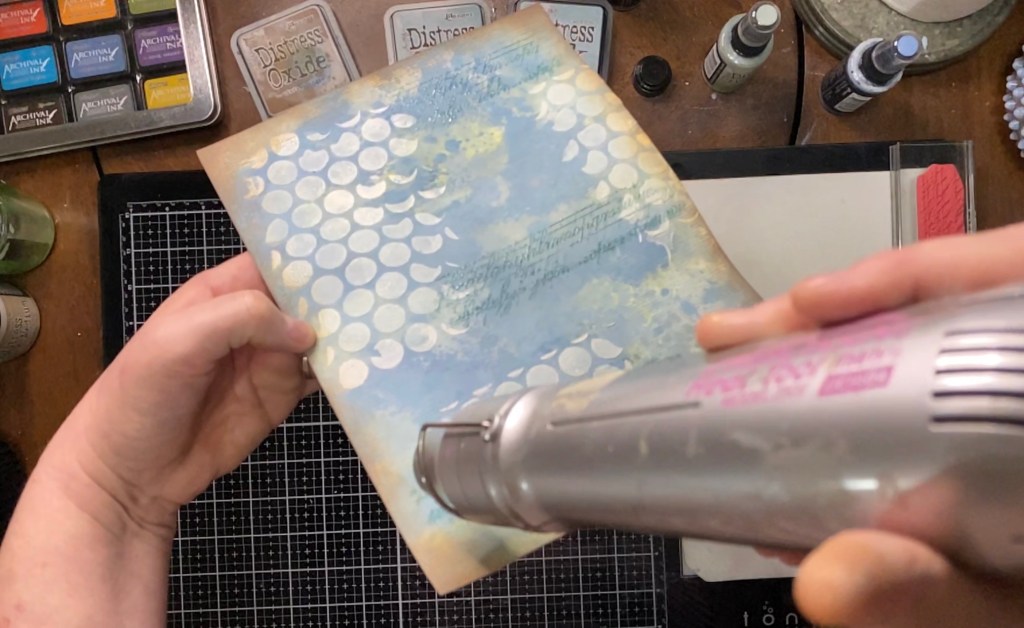
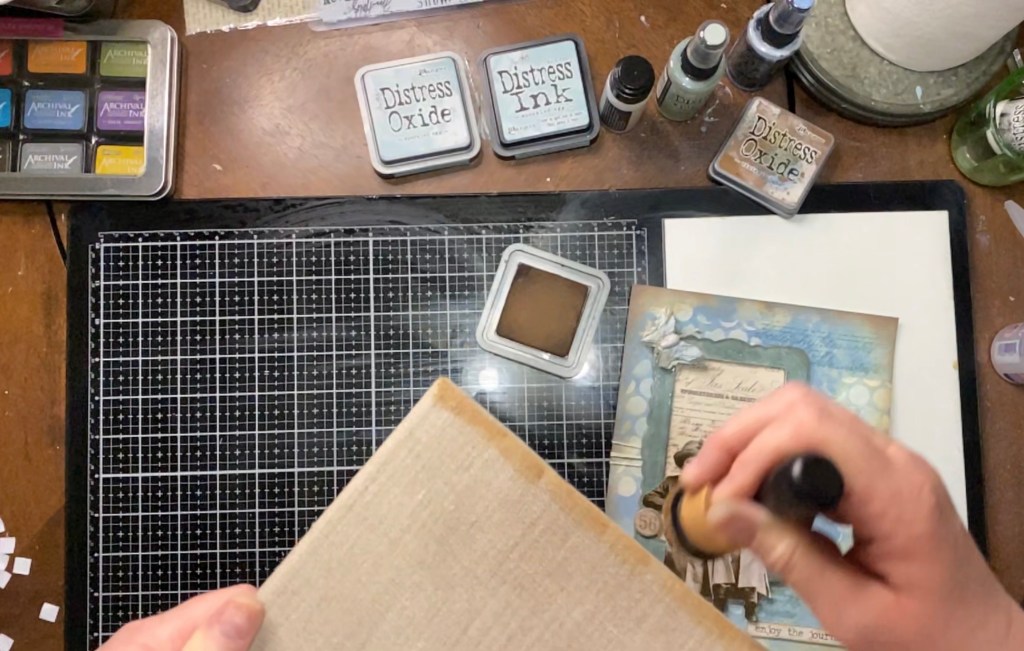
The next step, and one of my favorites for any vintage looking make, was to distress the edges of the page. For this, I took my Distress Oxide ink in Vintage Photo and a blending tool. A blending tool is just what it says, a tool used for blending. The tool has a wooden handle and a piece of Velcro stapled to the business end of the tool. this end holds a blending foam that has a Velcro backing. I have a blending foam for each color of my inks and they are stored nicely on the bottom side of the ink pad with a piece of Velcro. To “distress” a project, you simply work your blending tool in a circular motion, while turning your page or project to ink the edges. I just love the effect it gives the page. It frames it in nicely.
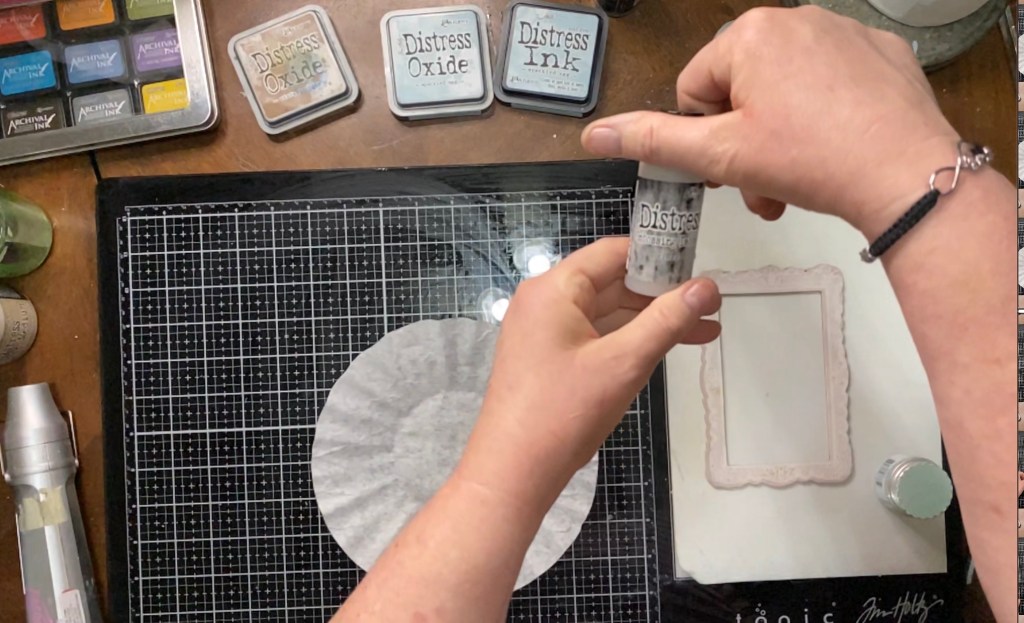
I felt like the font stamp needed to be a little bit darker, so I used a relatively new product from the Distress line, called Distress Embossing Glaze. I of course used the Speckled Egg. Distress Embossing Glaze works just like embossing powder. To emboss, you need an embossing ink of some kind, a stamp of your choice, an embossing powder of some type and an embossing tool. For this step, I used the Distress Embossing Dabber, the embossing glaze, the same stamp as before, and my embossing gun that I purchased years ago. First, you apply the embossing ink to the stamp. Then you stamp the image where you want it to be embossed. Sprinkle the embossing powder, or in this case embossing glaze, over the inked image. Then heat the image with your embossing tool until the powder melts and the image becomes shiny.
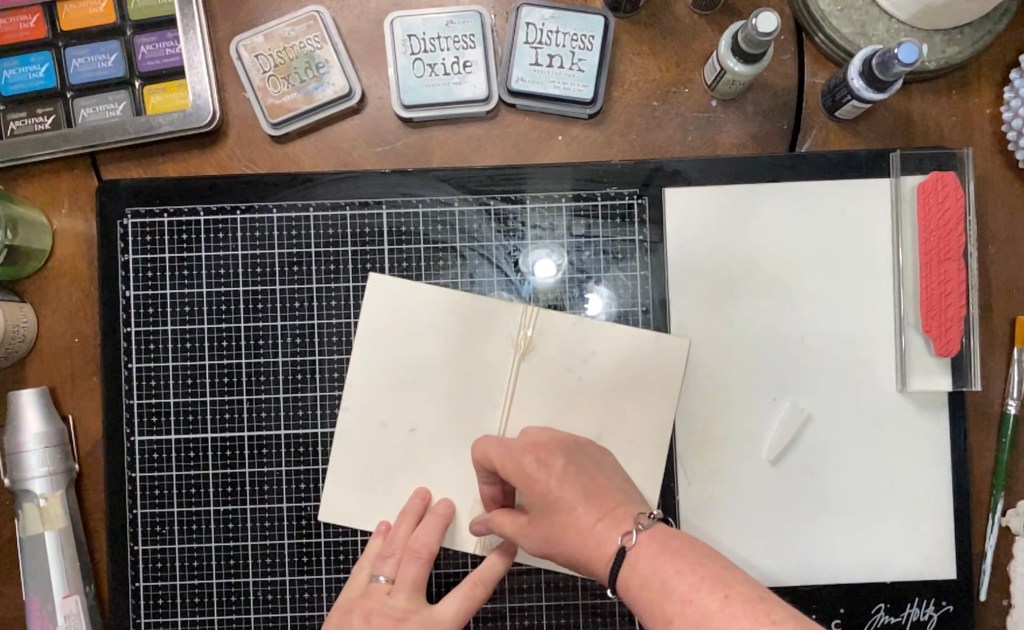
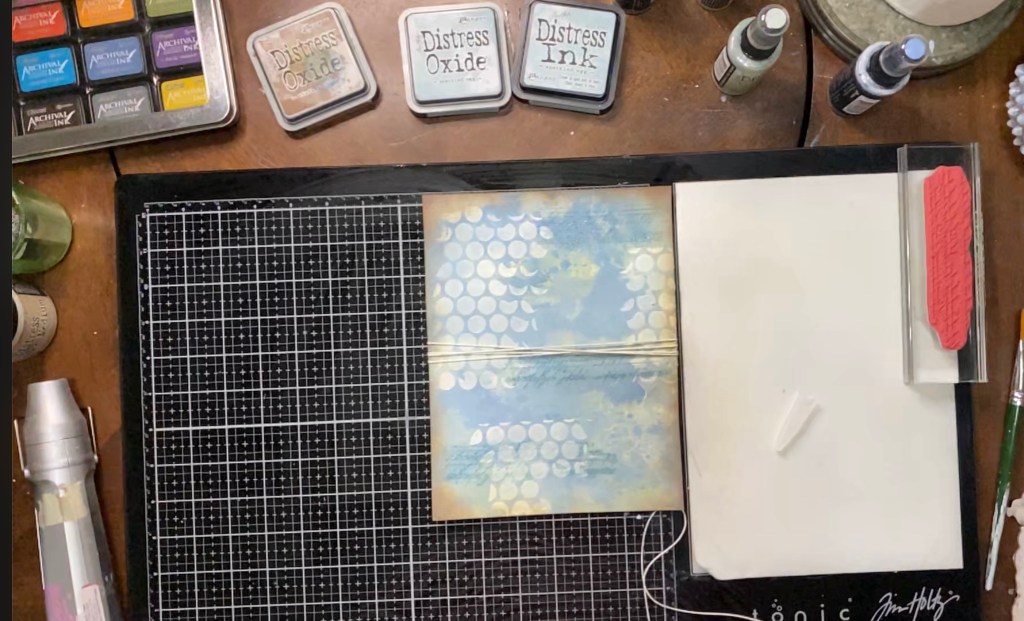
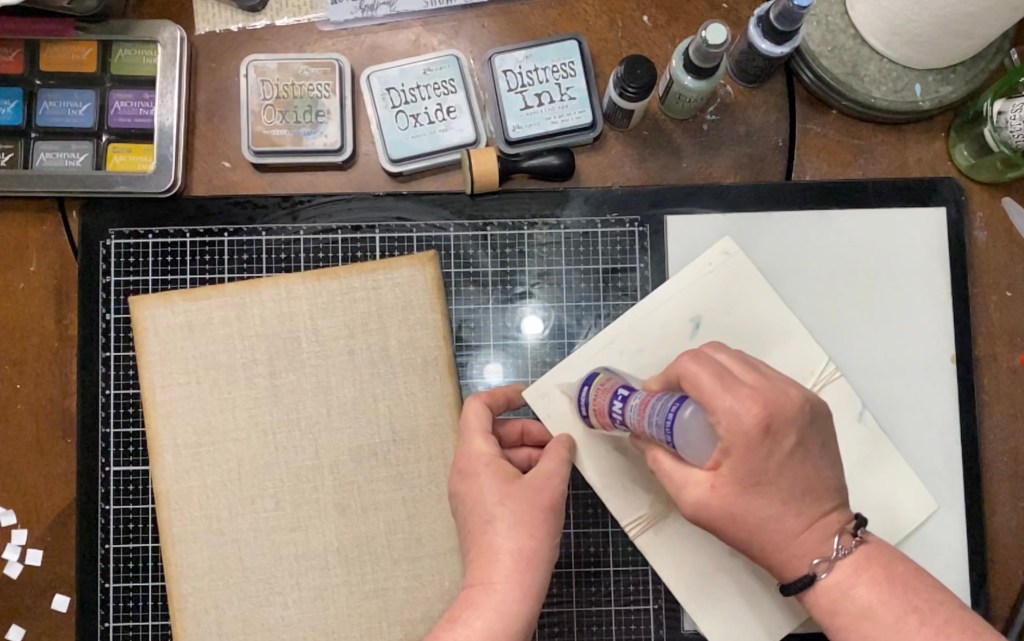
The next thing I did was add just another layer for dimension. I love bakers twine, don’t you? I think I would have it in every color, and I think I almost do. This make, I used a natural twine that matched just perfectly. For this, I like to add two glue dots to the back of the make and just wrap the twine around the page for a few times until I’m happy with it. I think I only wrapped it four times, but it may have been more or less. Just do what makes you happy. I did save the little papers for the glue dots and put them back on them so that the glue dots didn’t bother me while I finished the make.
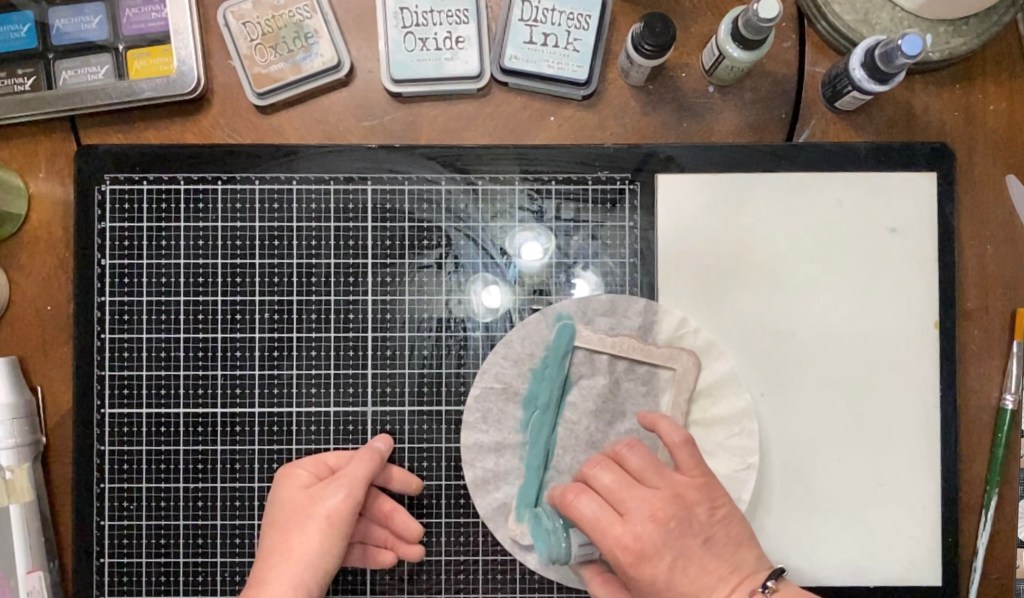
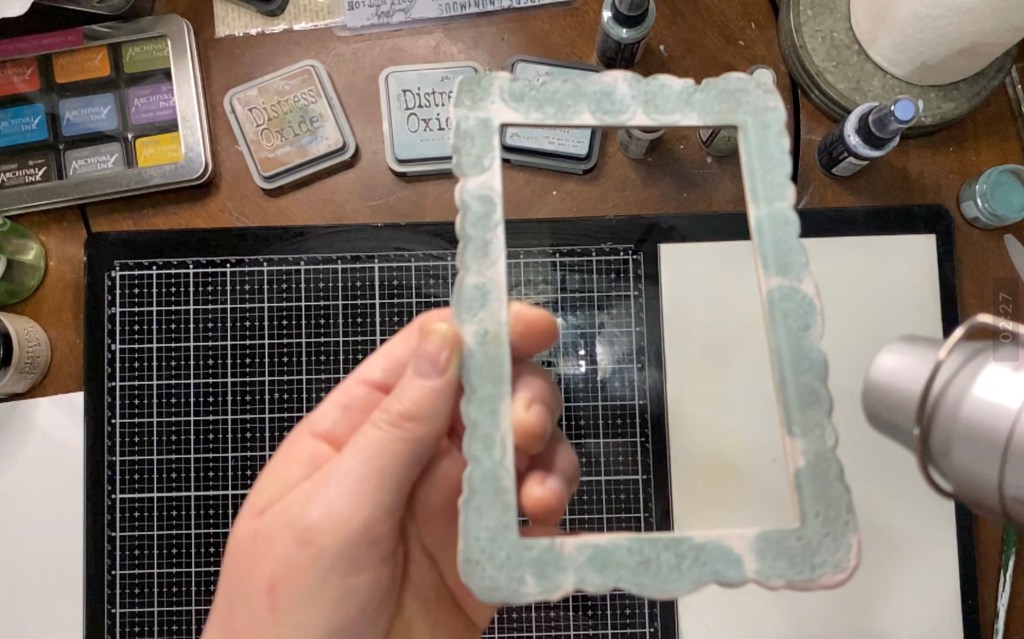
I added a Tim Holtz Lace Printed Baseboard frame to the mix, but not before I embossed it with the distressed embossing glaze also. And yes, It was Speckled Egg! I had to do it twice though, because the first time didn’t get a very good coverage. I was going for something that I just didn’t accomplish. Haha. It happens sometimes. But, once it was done, the shine made it look like as if it was an actual porcelain frame. Love it!!
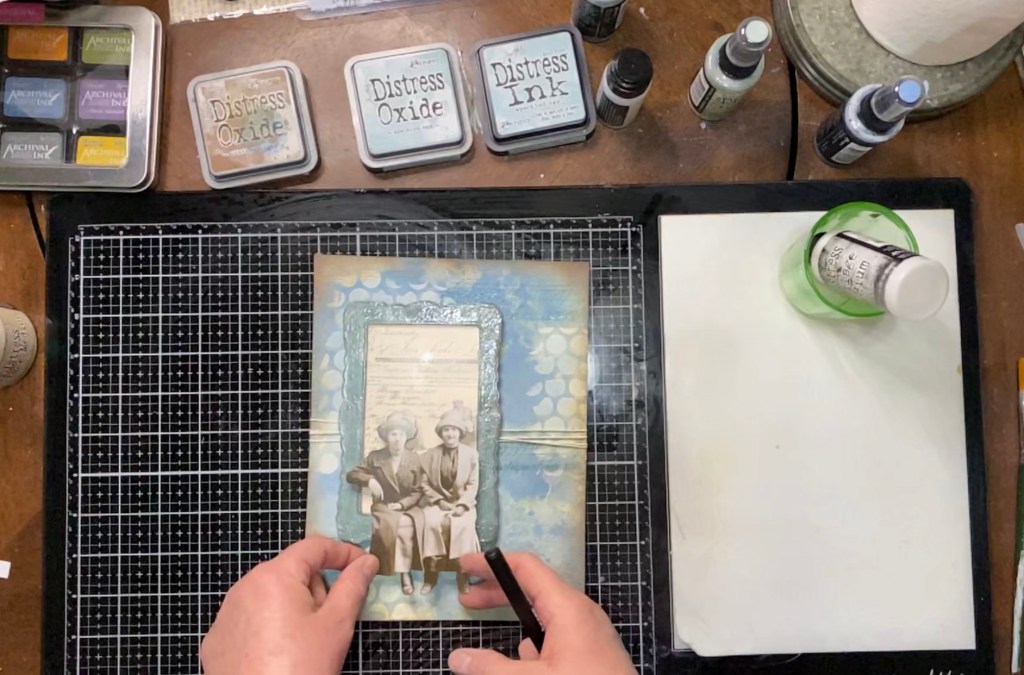
I took one of the Tim Holtz journaling cards and cut it down to fit inside the embossed, baseboard frame. I used my Distress Collage Medium to glue it in . Then, I took some foam, pop dots to make the frame stand out on the page. I usually like to use some type of glue to add to the pop dots, before I adhere my items to a page. The extra glue gives you an extra few seconds to adjust your picture before it becomes stuck down to the make.
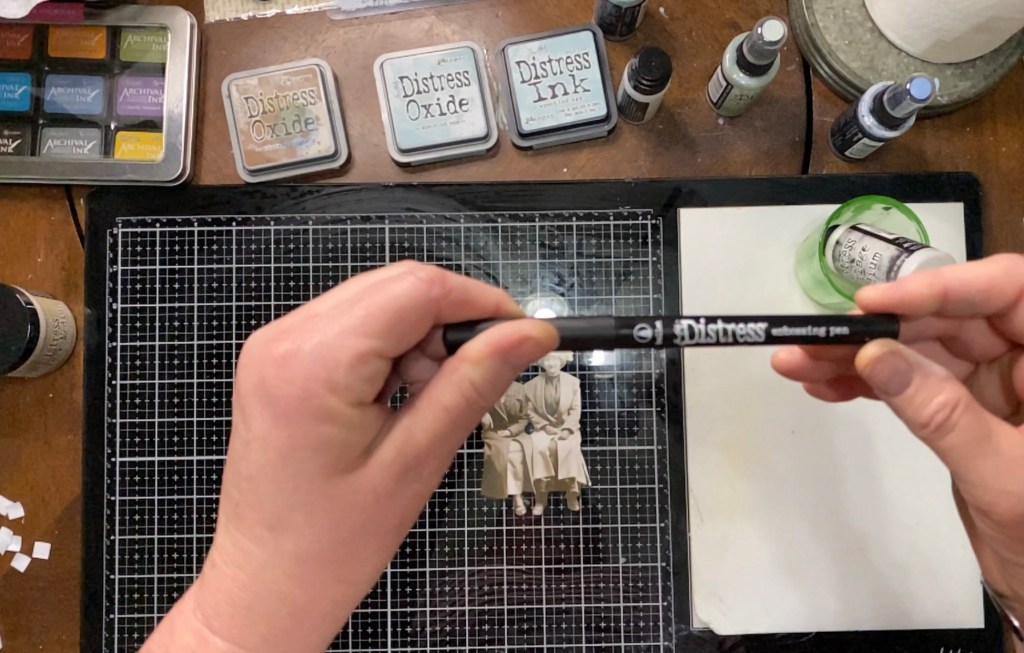
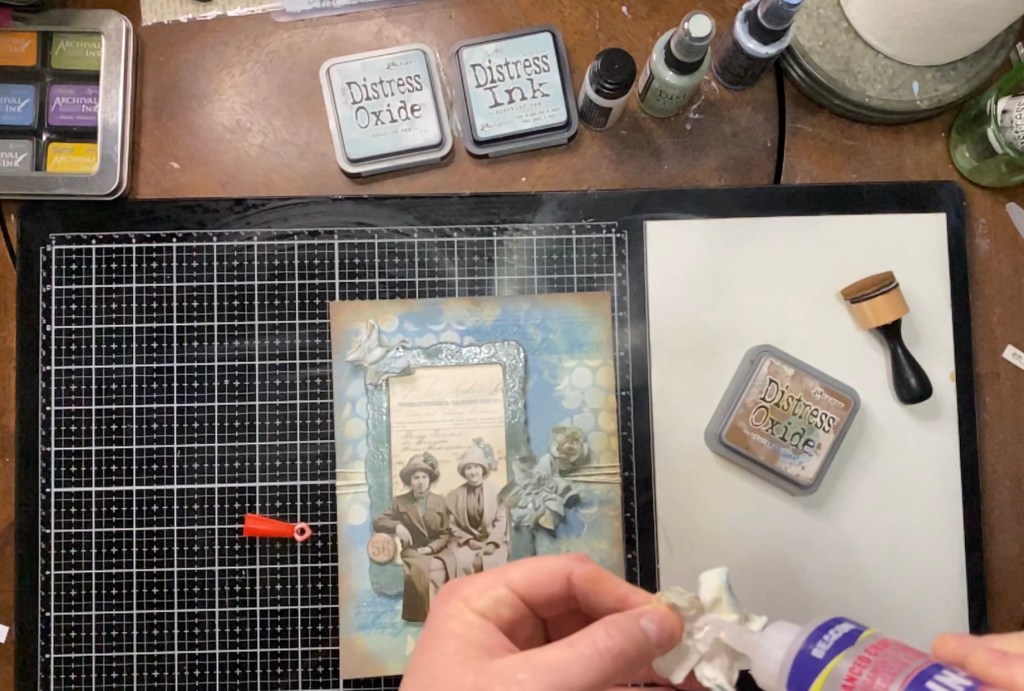
I chose one of the paper dolls from the Tim Holtz collection. This particular paper doll is of two ladies that look like what I would call “shelf sitters”. They are a perfect fit for the frame. I used my Distress embossing pen (glue in pen form) to emboss just a few details to give it a little extra pop. As you can see, the blue details really pop on this make.
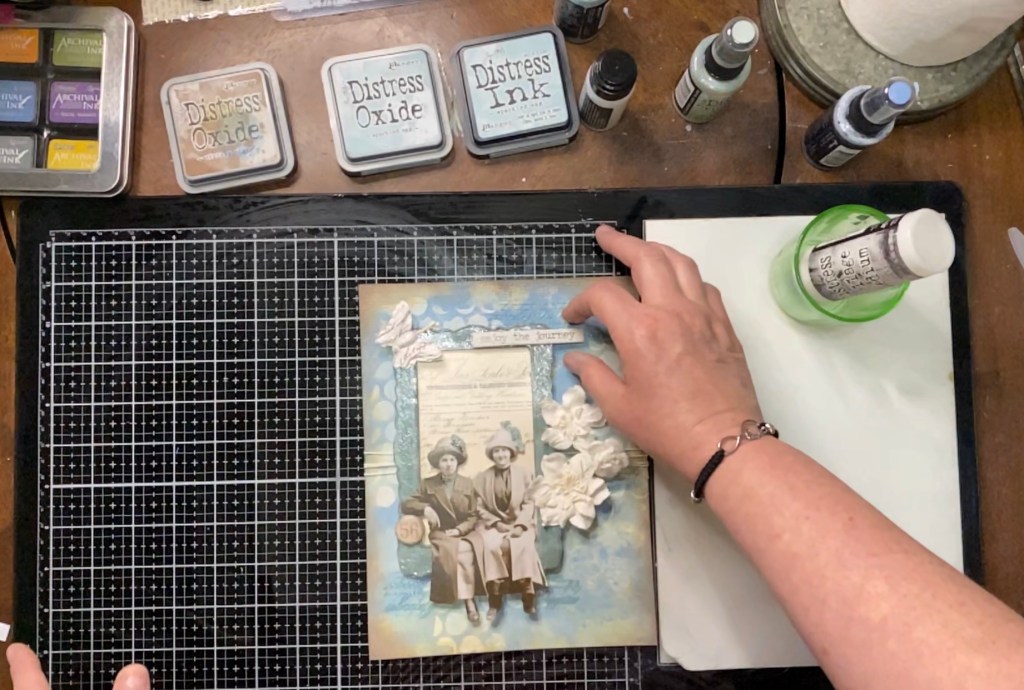
One of the little “shelf sitters” needed something to prop her elbow on, so I pulled out my cigar box full of little Tim Holtz goodies to see what would work. I settled on this little game piece that had that same blue in it. Just Perfect! This particular piece came in the Idea-ology pack called Junk Drawer Baseboards by none other than Tim Holtz. Haha. Are you seeing a pattern here?
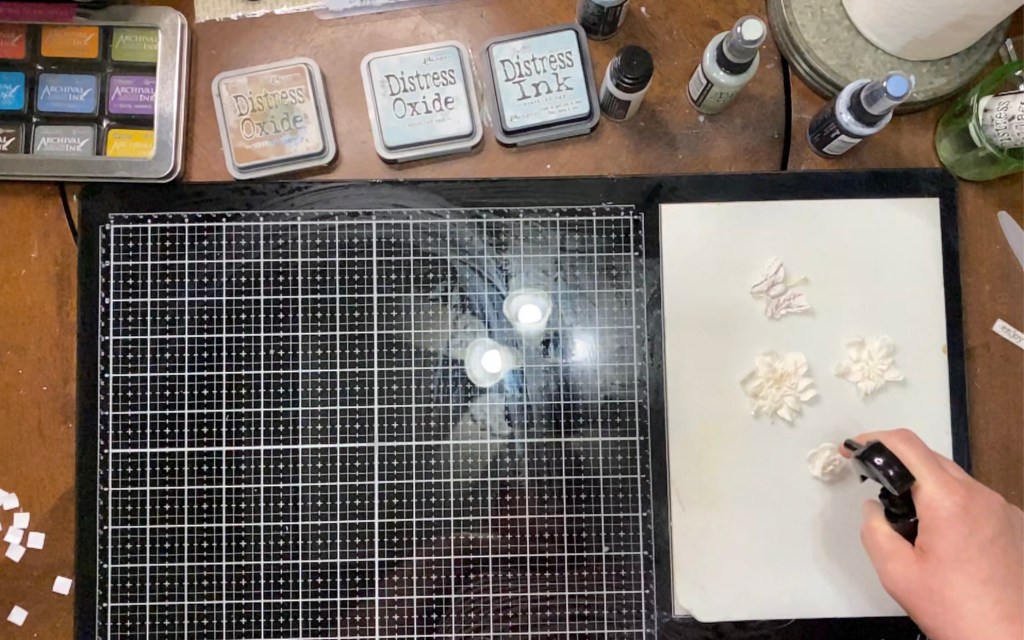
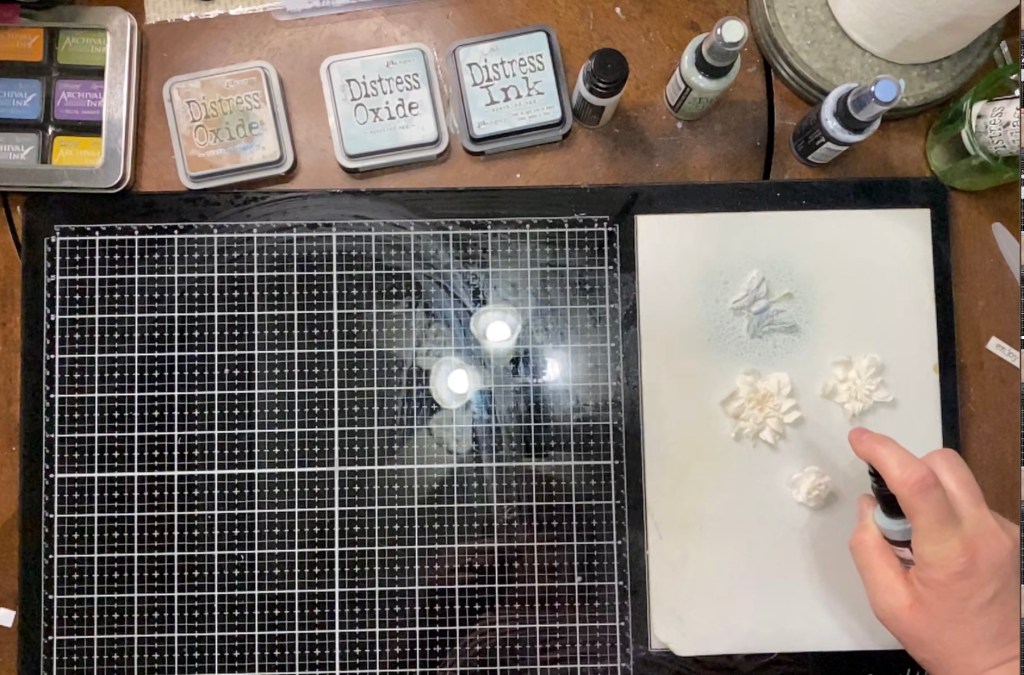
Hang in there, we’re almost done! I chose some DIY flowers. DIY just means you can color them whatever color you want as long as you have some ink, or sprays. And we’re in luck because I have a few. First thing I did was spritz them with some water, and then sprayed them with, you guessed it, Speckled Egg Distress Oxide Spray! Haha. I am really loving this color! Can you tell? I dried them with my Ranger Heat tool, and used my 3-in-1 adhesive to glue them onto the page. I “dirtied” them up a bit with some Distress Ink Vintage Photo first, though. Then I distressed the edges of the canvas with the Vintage Photo, also. Next, I used the 3-in-1 to adhere the page to the canvas. And that, my friend, is a done make. I was rather pleased with the turn out. I’m a sucker for a vintage make. I think they’re my favorites.
I hope these instructions were detailed enough to explain every step. If not, please feel free to ask questions in the section provided. If you’d rather, you can check out the video on my YouTube channel.
Talk to you soon!
Jennifer
Here is a list of the supplies used in Monday’s make:
I know, kinda corny but it works! Haha. Yesterday was a pretty, amazing day. Let me explain a little. For the past few months, during this whole “shelter in place” , I have been following Tim Holtz on his FaceBook lives. Every Saturday, since April, he has been doing a live demo of his Distress products. It has basically challenged me to get back in my craft room and use all those yummy products that he designs. Since the beginning of that time, I have been posting more on FB and Instagram and have since given into the peer pressure from my husband and son to create a YouTube channel as well. If you haven’t yet, you should check it out. (Shameless plug there) Anyway, Tim Holtz has been encouraging people to post on Instagram and use the #timholtzdemo when you post, just as a confirmation to him that his demos are inspiring people to get in their craft rooms and MAKE! Well, for those of you that follow J Cooper Creates on Facebook, and @jcoopercreates on instagram, you know I have been making up a storm. Haha! Once a week, Tim picks three people from the instagram posts as winners and sends them a package of goodies and something that he made during the demos. I was so excited yesterday, when I received the notification from Instagram! I must admit there was a little fan geeking! Haha.
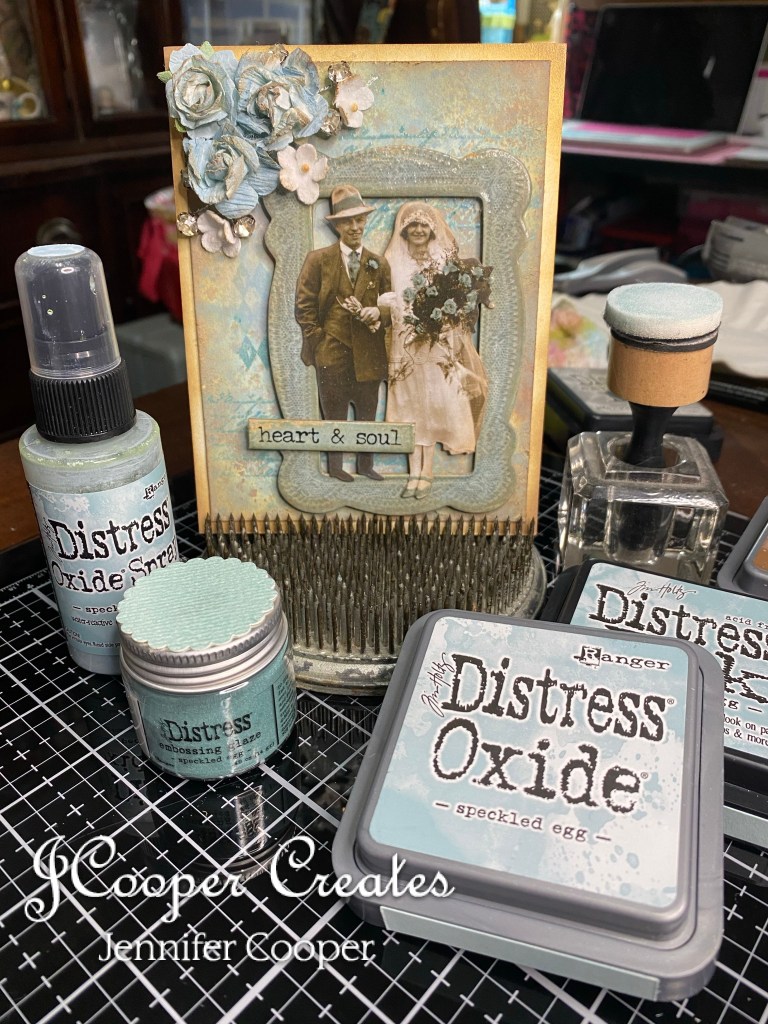
Then, as if that wasn’t enough, I received what I like to refer to as “Happy Mail”. That’s anytime I receive crafting supplies in the mail. Haha. I received the new Distress Color I ordered from Simon Says Stamp. The name of the new color is “Speckled Egg”, and YES! I needed one of every medium. Needless to say I couldn’t wait to see what I could do with it. So, Simon Says Stamp does a Wednesday challenge, as well as the Monday one and today they were showcasing whimsy stamps and “anything goes”.
Above is a pic of my entry. I am loving this new color. I didn’t quite get the whole “whimsy stamps” thing. I am hoping paper dolls count as whimsy. It’s definitely any thing goes. Haha. Unfortunately, I did not take any process photos, but I do have the products used in the picture. I hope that helps. Please, feel free to ask any questions. I will be happy to answer.
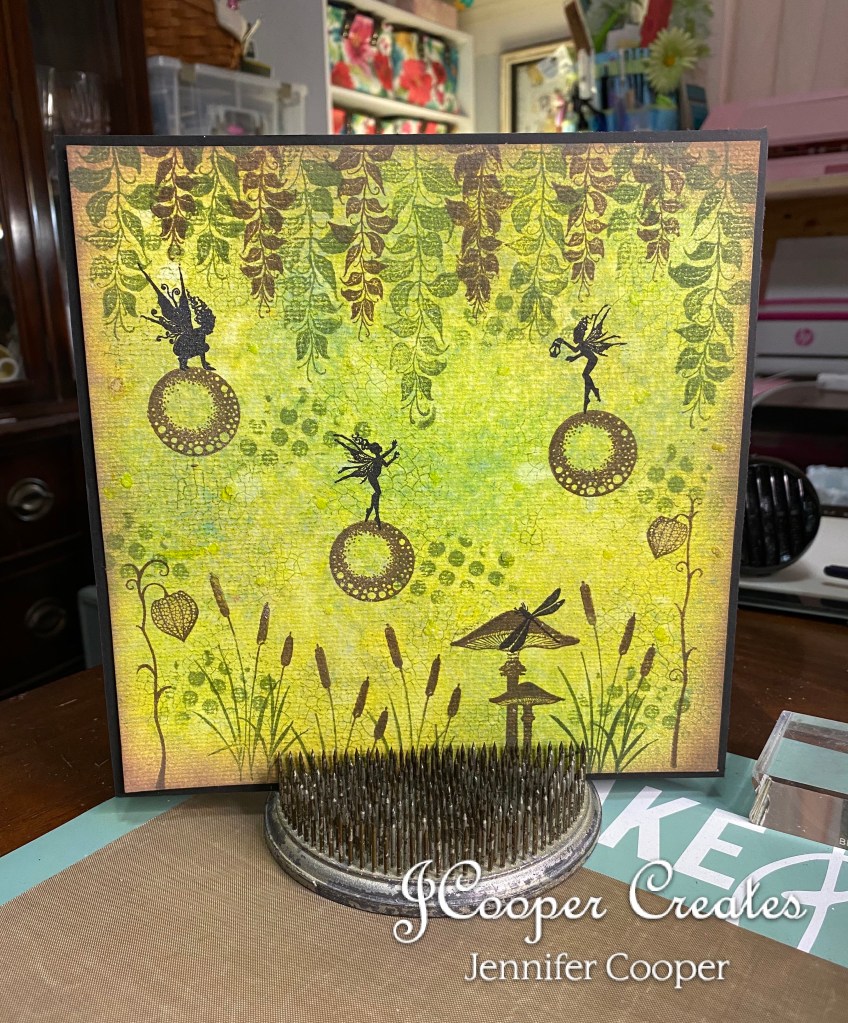
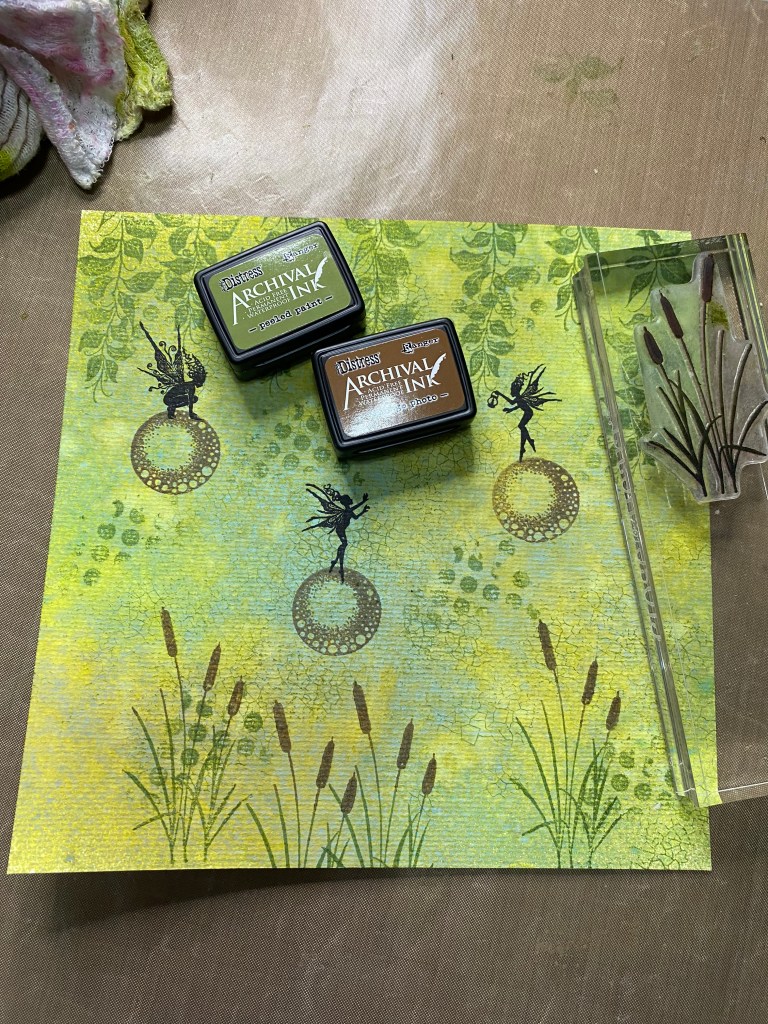
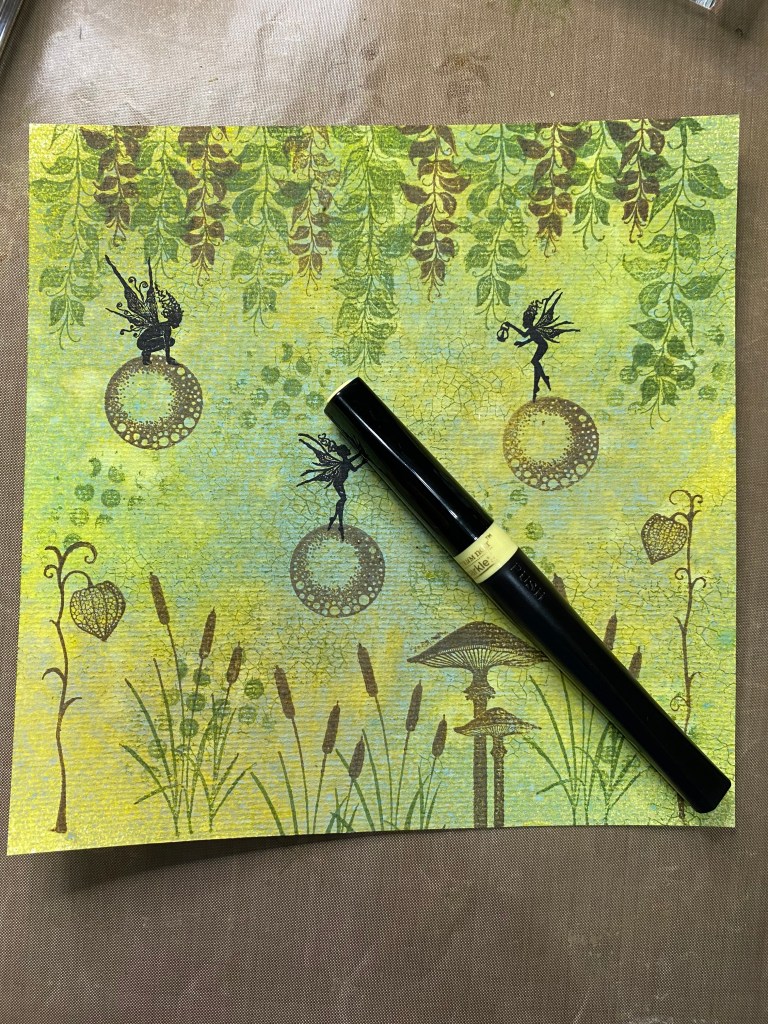
Todays theme for the Simon Says Stamp Monday Challenge was “We’re Going Around in Circles”. Immediately I thought of my Lavinia Stamps Fairy Orbs (LAV377). However, my design literally turned out going around ON circles. The thing I love about Lavinia Stamps is the whimsical, fairytale vibe. They are just amazing. I’m very pleased with how it turned out. And that is really what it is all about, whether you are pleased with your finished make. I hope you enjoy following along in this step by step process of how I made my art journal page.
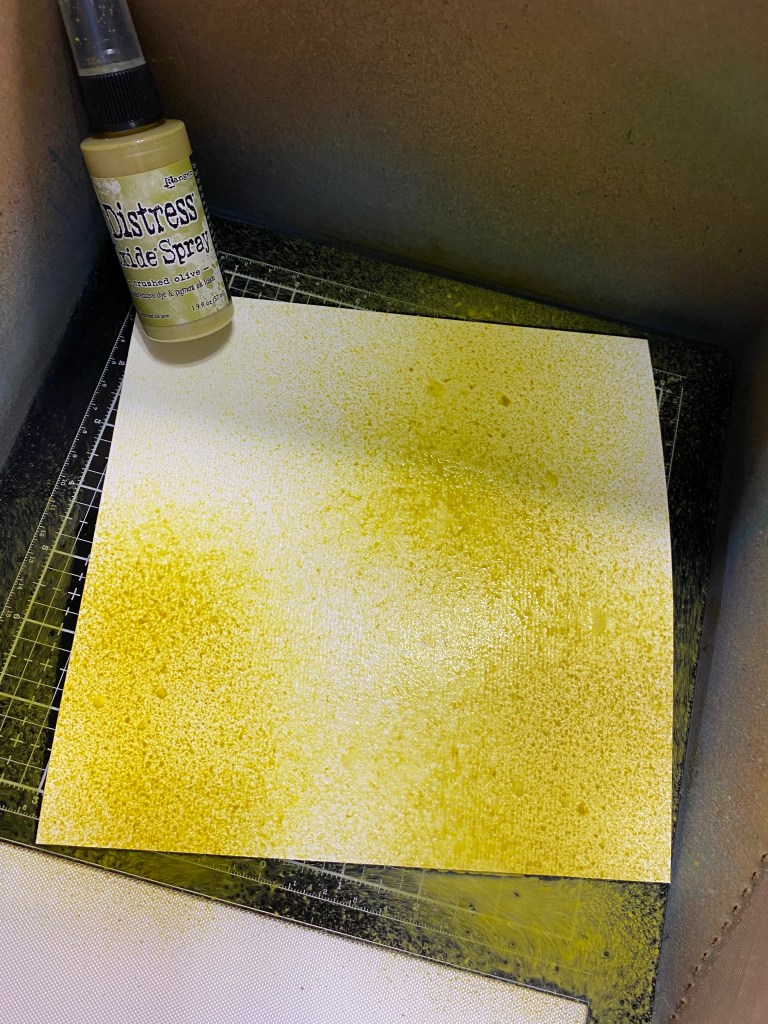
Todays entry was a page for my 8″ spiral art journal. I started with Arteza brand watercolor paper that I cut down to 8″x8″ For the colors in my background I chose Distress Oxide Sprays by Tim Holtz. The colors were Crushed Olive, Mowed Lawn, and Peeled Paint. I placed my paper on top of my travel size Tim Holtz Media Mat and placed that inside of my Splat box. I spritzed the paper with some water to assist in the blending of the colors. I spritzed just a little of each shade of green until I was pleased with the coverage. Then I used my Ranger Heat It craft tool to dry the paper. As I was drying the page, I spritzed it with a little water to give it that speckled, water drop look that is just so groovy.
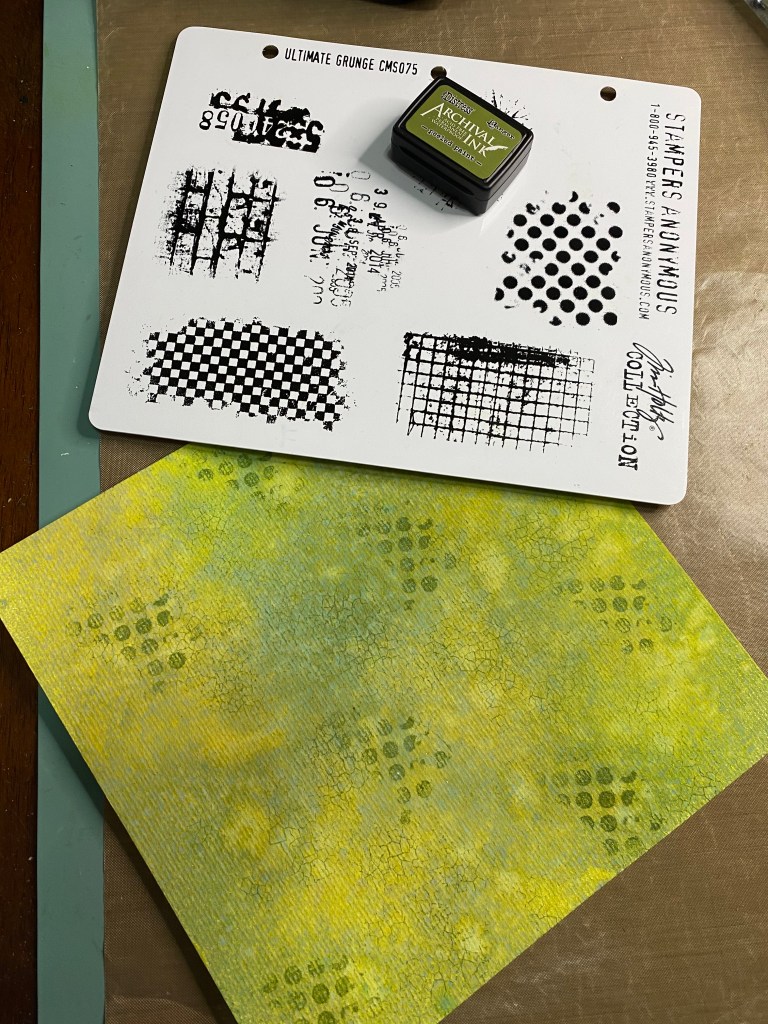
Next, I used two different stamp sets made by Stampers Anonymous. They were Craze & Planks (CMS344) and Ultimate Grunge (CMS075). I think these are two of my favorite goto stamp sets when doing backgrounds. I stamped the images with the Distress Archival Ink Peeled Paint by Tim Holtz. I think that crazing and crackle look is one of my favorite additions to backgrounds. I may use it too much! I don’t think that’s possible tho. HaHa.
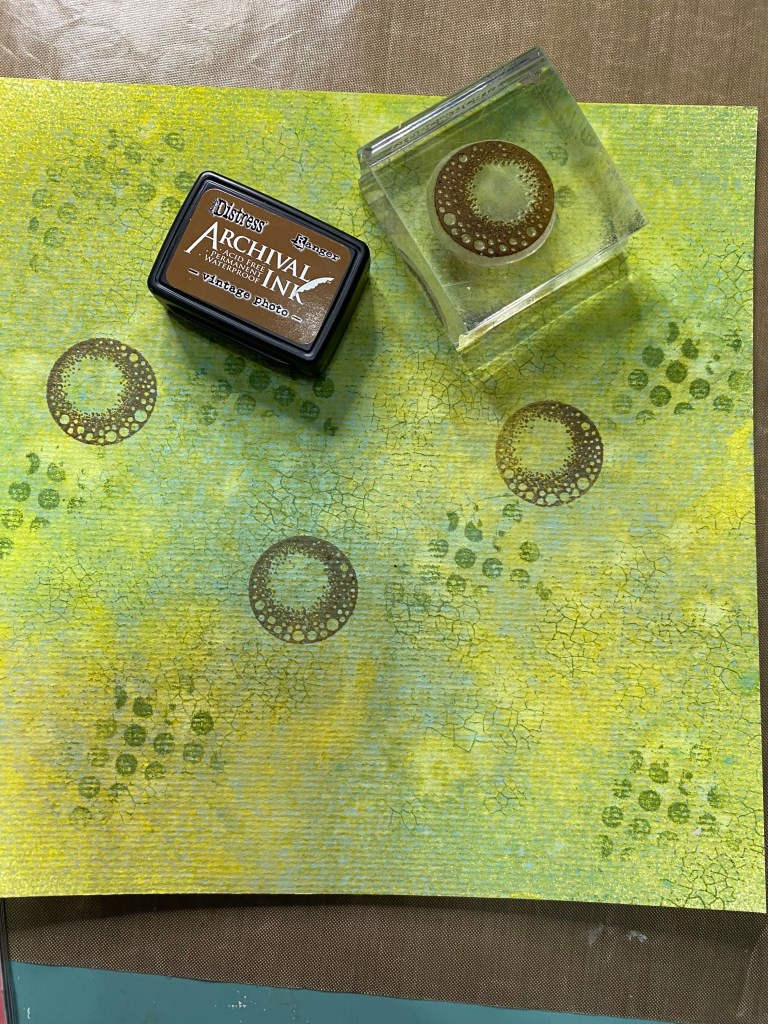
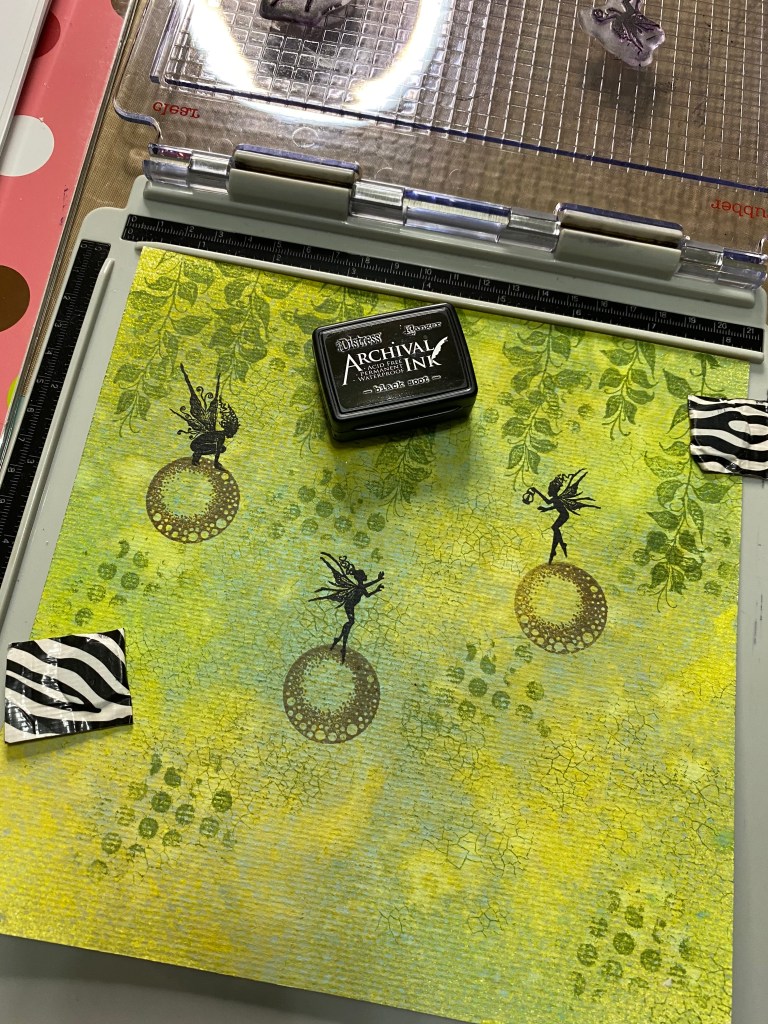
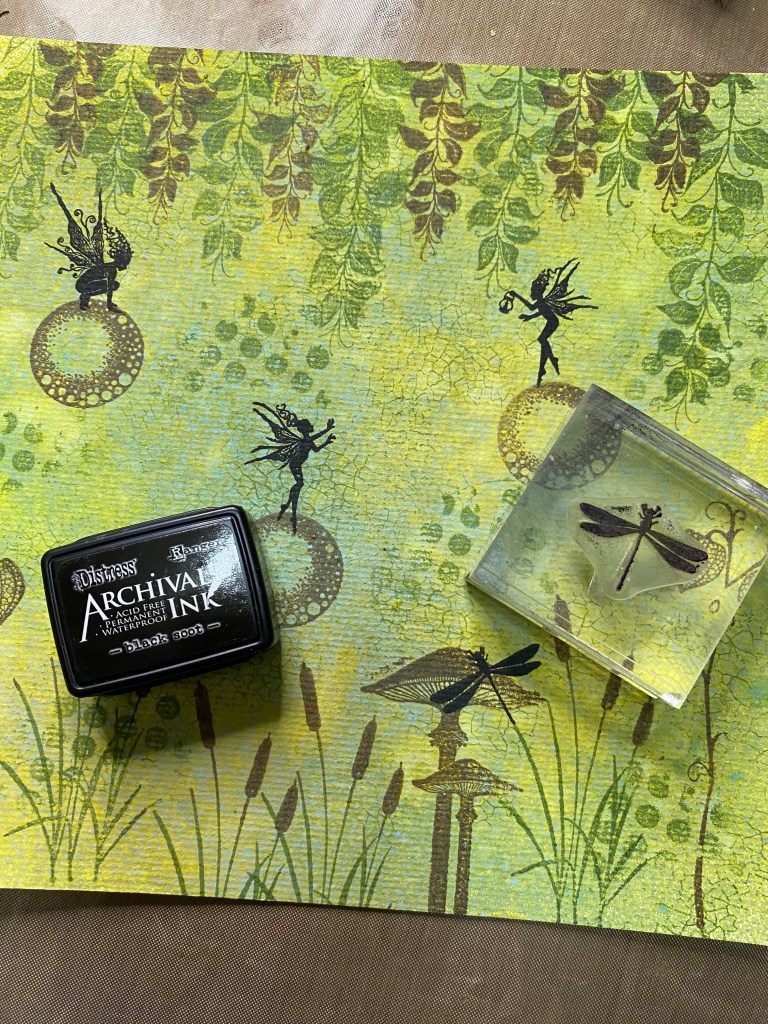
Next step, after you are pleased with your backgrounds, the main attraction, The Fairy Orbs (LAV377) and the Fairies of course. The Fairy Orbs come in a set of three different sizes, but I only used one today and the Fairy set that I used is called The Fairy Foragers (LAV498). This set comes with four fairies, but I only used three. They’re so cute! I am really loving the silhouette stamping. Ok back to details, sometimes us crafters tend to wander. The next step was the fairy orbs. I stamped the orb image with another Distress Archival Ink Vintage Photo. I used the Tim Holtz Stamping Platform for the fairies. The thing about the stamping platform is you can use the magnets to hold your paper in place and stamp the image as many times as you need to to get a clear, sharp image. With silhouette stamping, a clear and dark image is important.
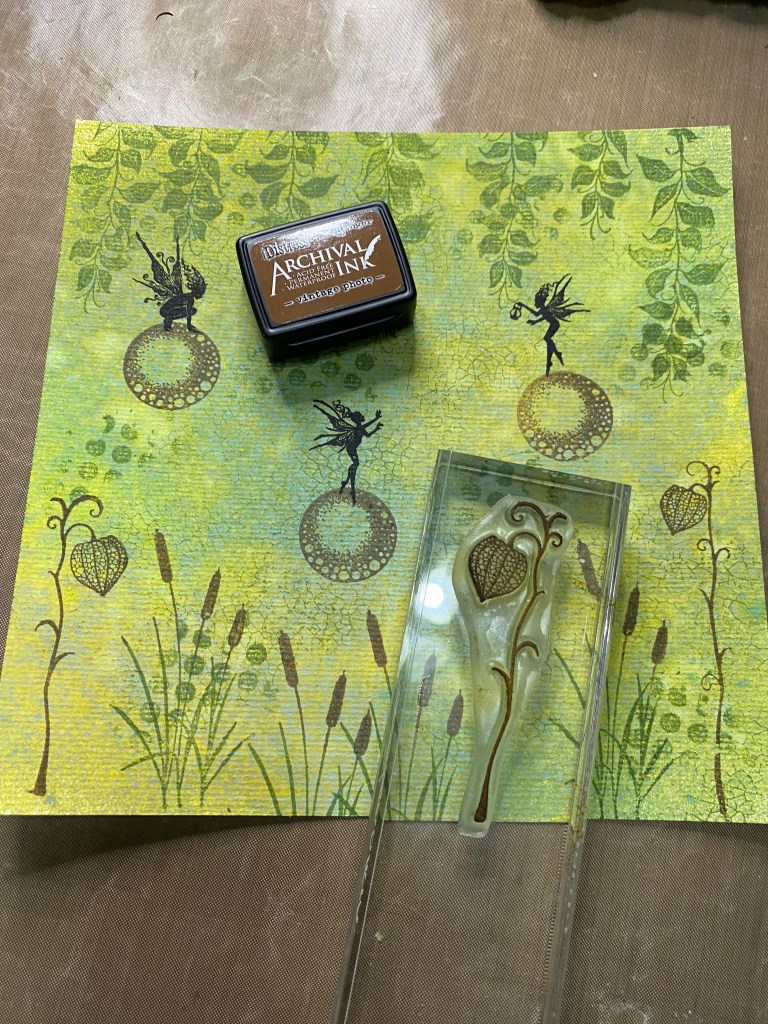
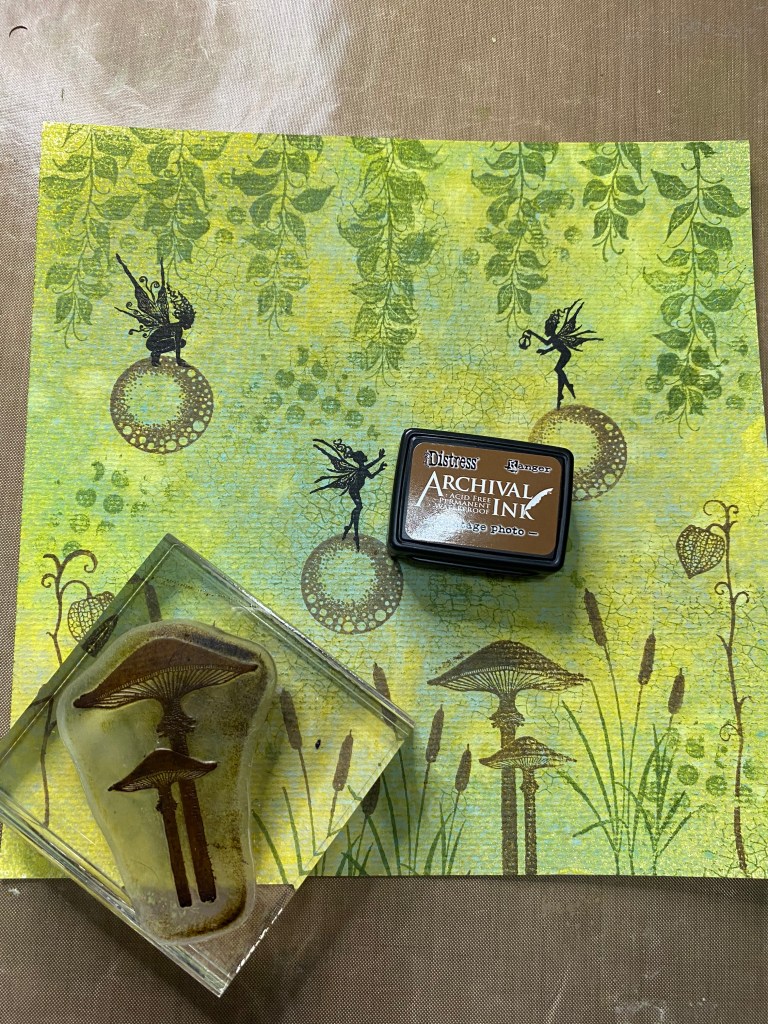
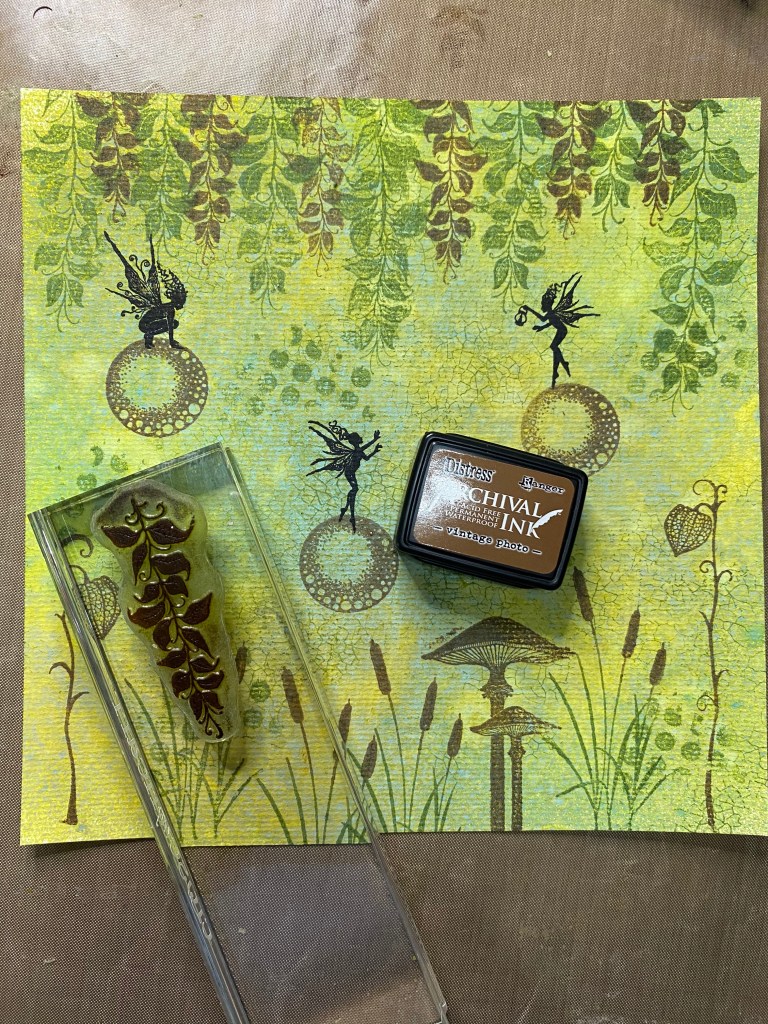
Once I was done with the focal point, aka fairies and orbs, I could finish up the scenery. Lavinia Stamps has a wide range of plants, trees and leaves to choose from. I’m from Louisiana and we have bullrushes in ditches everywhere, so Bullrushes (LAV003) was one of the first ones I chose. I decided to get fancy with those, haha, so i used two colors. I used Distress Archival Ink Peeled Paint and Vintage Photo. I through in a few fairy lanterns from the Fairy Lanterns Set (LAV586) and the Meadow Mushroom (LAV563) for good measure. I added some of the Berry Leaves (LAV577) to the top of the page. I used alternating Peeled Paint and Vintage Photo to stamp them. I also used the dragonfly from the Fairy Bugs Set (LAV471). No outdoor scene in Louisiana would be complete without a dragonfly. Plus, they were my Mom’s favorite. I used the Distress Archival Ink Black Soot to stamp him on the meadow mushroom. I tried to lighten up the lanterns with a Spectrum Noir Sparkle pen called Moonlight. It wasn’t really as noticeable as I would have liked for it to be, but it gave it a nice shimmer.
And last but certainly not least, I added a little distressing with Distress Oxide Ground Espresso and my blending tool. Distressing is really simple. It’s just a technique for blending ink around the edges of your project to kind of frame it in. I really felt like it needed a little something else so I took my Distress Collage Medium and spread a few droplets of glue around the fairies and added Distress Glitter Clear Rock Candy with my Glitter Duster from Stampers Anonymous. It added just a little bit of fairy dust to make it complete. I did mat it on a piece of black cardstock to really make those fairies pop. I really enjoyed making this project. I hope you enjoyed it as well. Be sure to watch for the video that will be showing up on my youtube channel in a few days.
See you next time!
Jennifer
Here is a list of the supplies used in today’s make:
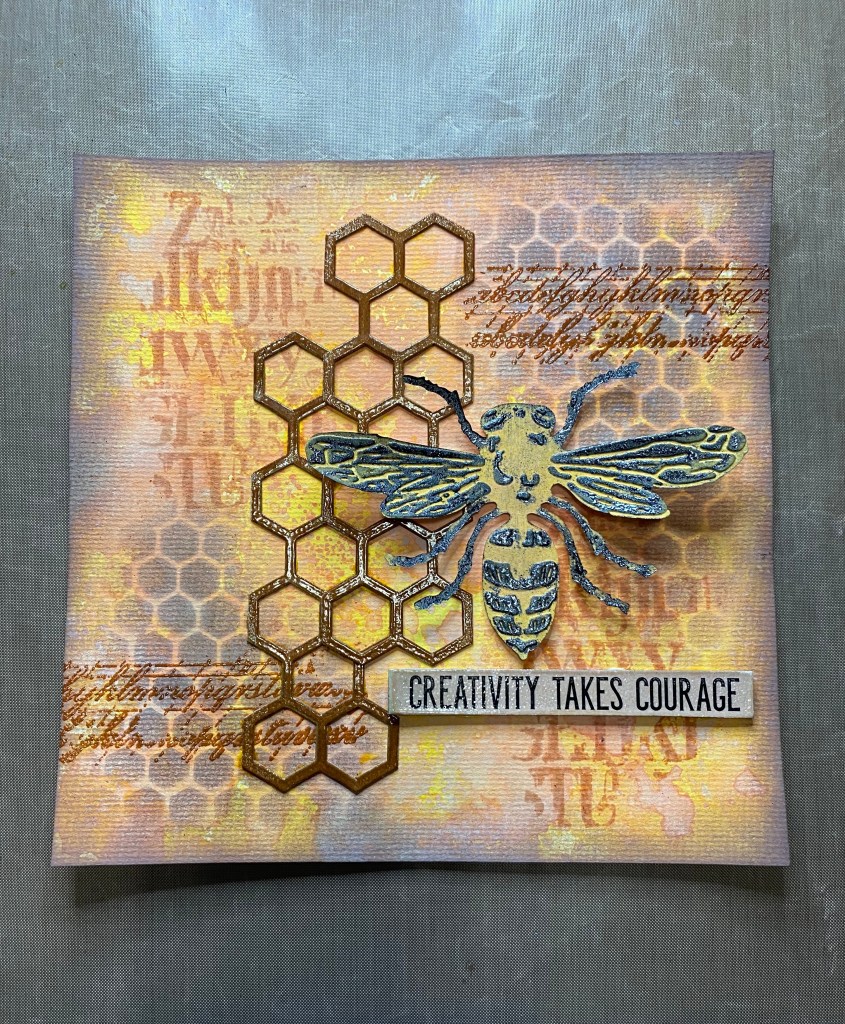
“We’re all A-Buzz” about my new blog! See what I did there? HaHa. For my first Blog post, I decided to take Simon Says Stamp up on their Monday challenge. Today’s theme was “We’re All A-Buzz”. Well, naturally that made me think of bees and honey. I wasn’t 100% pleased with the outcome, but with mixed media you get what you get and you don’t sweat it. There is no crying in mixed media! Bare with me as I try to walk you through the steps I took to get to this outcome.
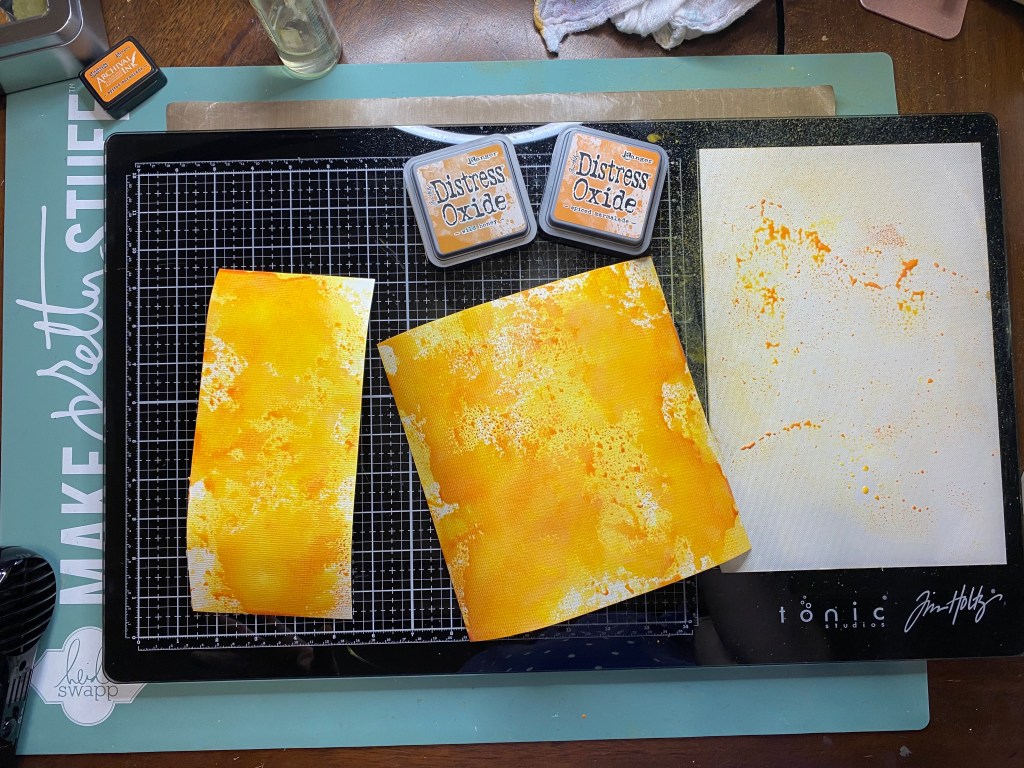
The paper that I worked with today was a water color paper from Arteza. It is 140lb. so it is a pretty good paper to use with mixed media. I cut the page 8″x8″ and I will use my Happy Planner hole punch and rings to bind it into a nice little art journal when it’s all done.
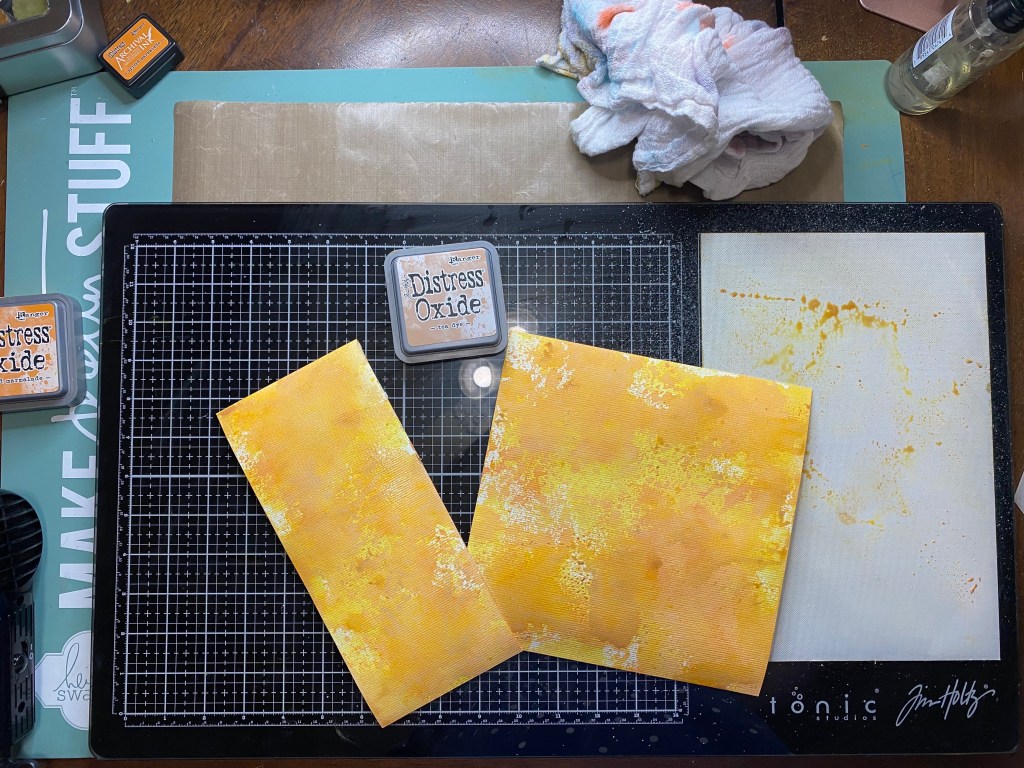
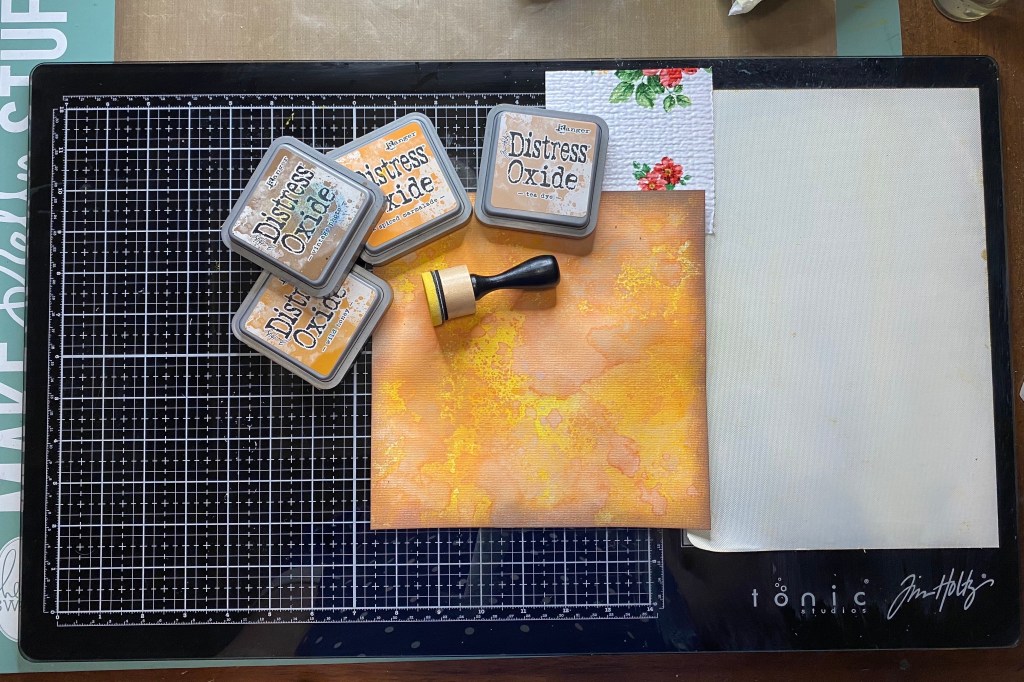
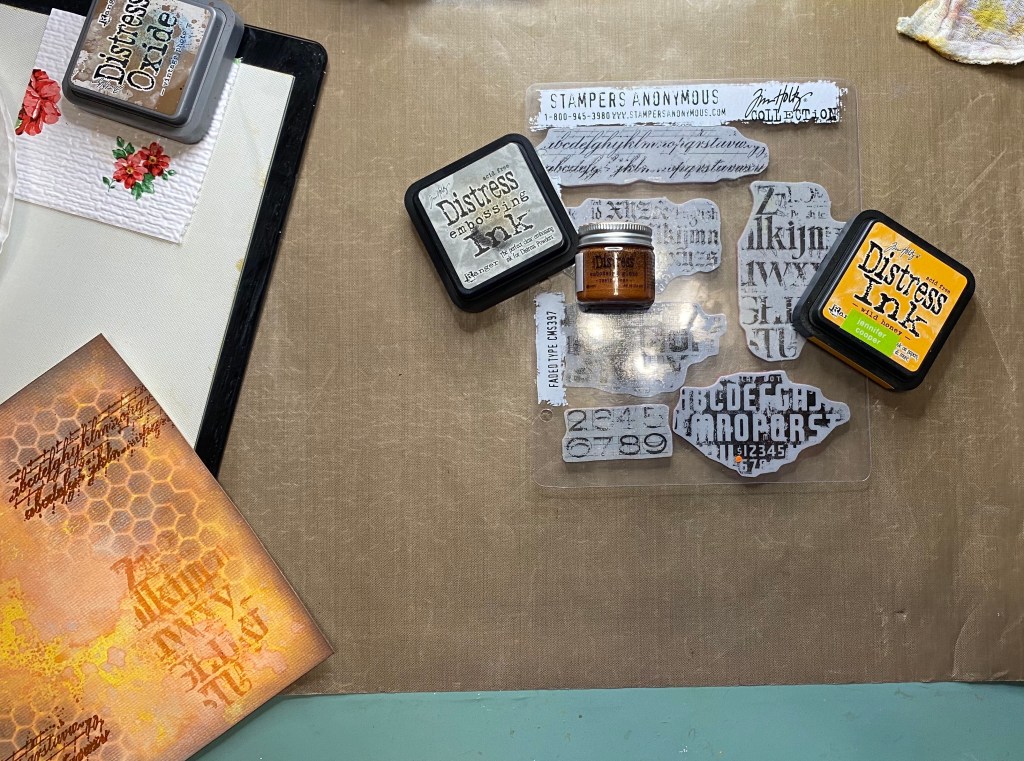
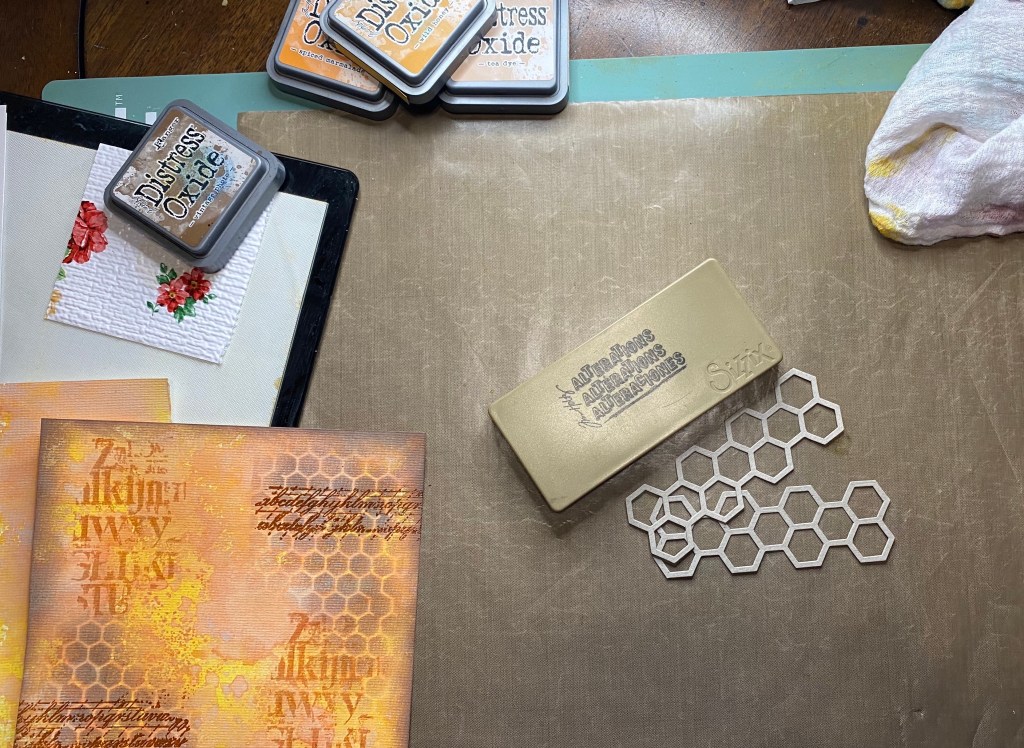
In the pictures above, I used Tim Holtz Distress Oxide Ink: Wild Honey, Spiced Marmalade, and Tea Dye. The process for these colors was simple. I used the ink pad to smudge some ink on the nonstick mat of my Tim Holtz media mat and used my spray bottle to spritz some water so that I got some nice droplets to press my paper in. The first color I used was Wild Honey. I dabbed my paper into the ink droplets until it was covered to my liking. Once I was pleased with the Wild Honey, I used my heat tool to dry my project in between color applications. The next color was Spiced Marmalade and I used the same steps, dried with my heat tool, and then used Tea Dye in the same way.
The next step for the Distress Oxide Inks, was to use my blending tool and the Wild Honey and blend in any white spots that were left. Then I used the blending tool with Vintage Photo and distressed the edges of my page.
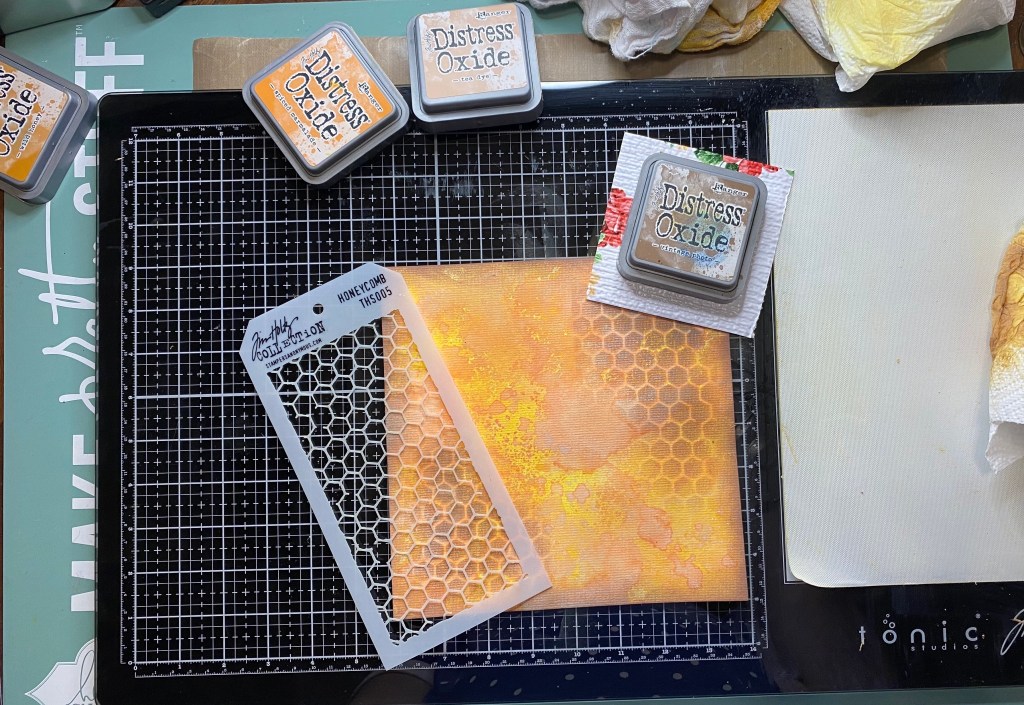
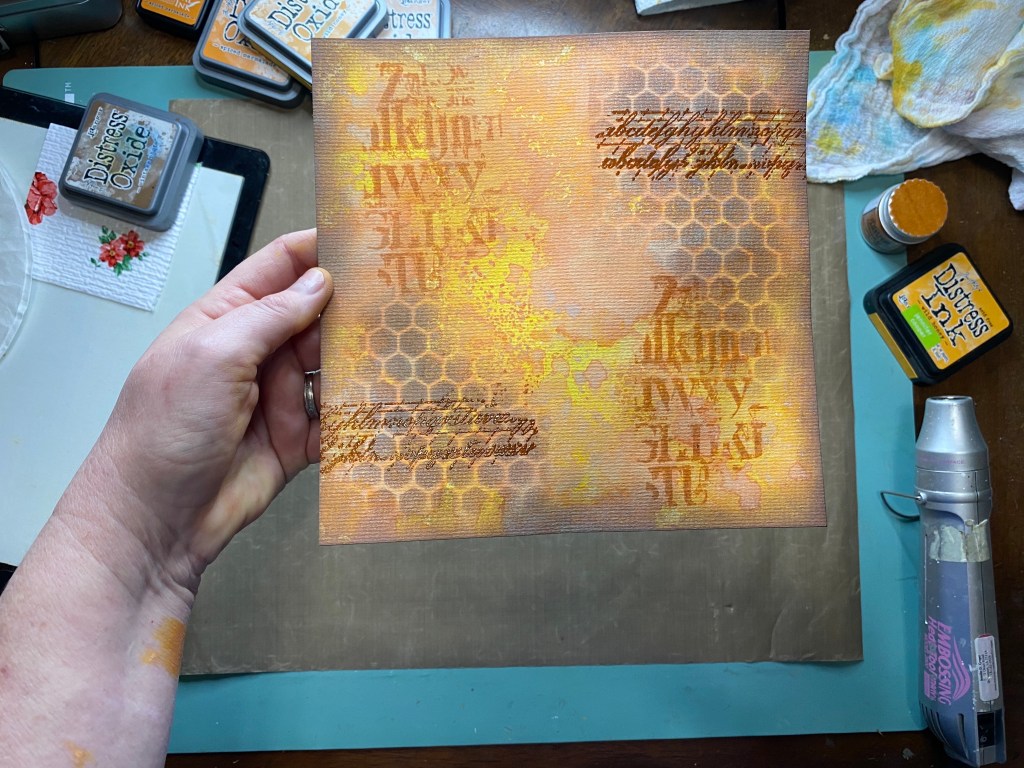
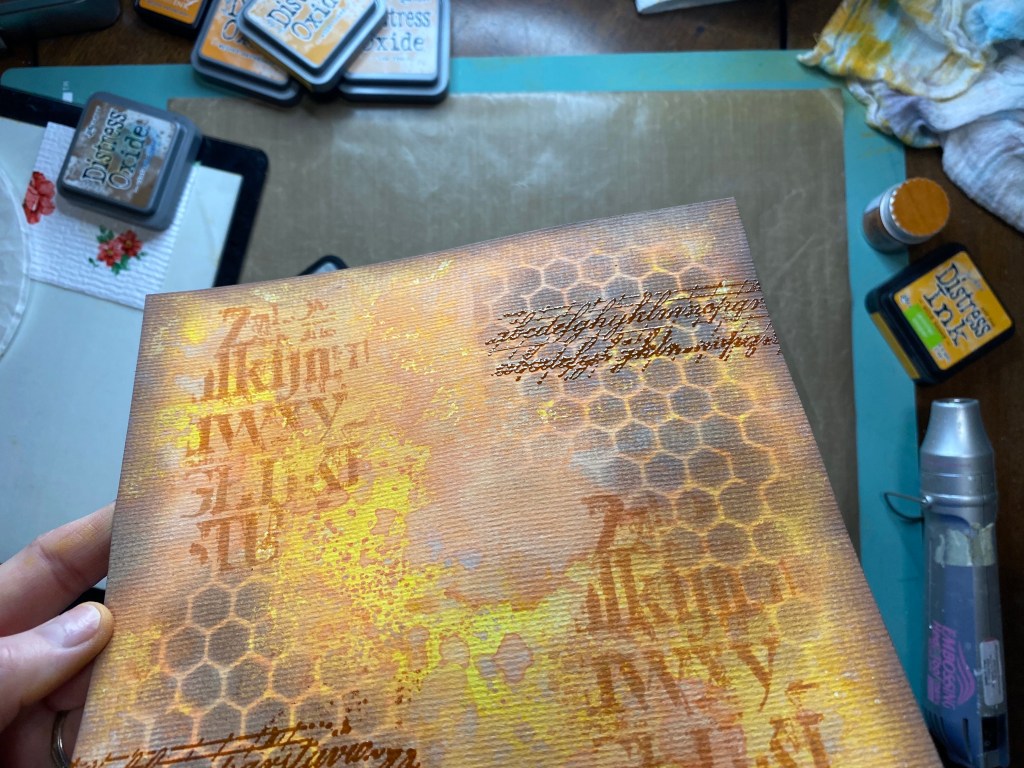
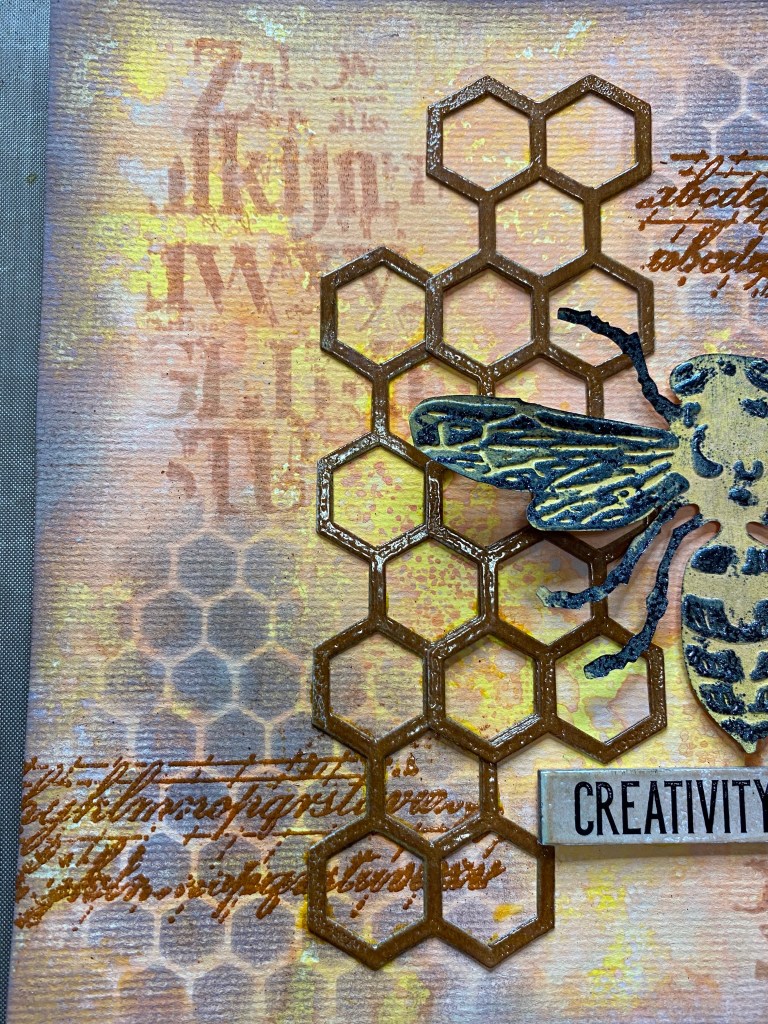
Next, I took my Vintage Photo, a blending tool and the Stampers Anonymous Layering Stencil THS005 and blended the ink over the stencil for this nice honeycomb pattern on my background. Then, I took the Stampers Anonymous Fade Type stamp set and the Wild Honey Distress Ink and stamped the alphabet images. Next, I took my Distress Embossing Ink and my Rusty Hinge Distress embossing Glaze and used another one of the stamps from the Faded Type set, and embossed the image on my background. Embossing is really easy. You simply take the stamp image that you want to emboss and stamp it in the embossing ink, just like you would any stamp ink. Then, you cover your image to be embossed with the embossing powder, or glaze in this case, by sprinkling the powder over the entire stamped image. It’s best to do this over a coffee filter or a piece of paper so that the excess can be salvaged and put back in the jar. Then you use your embossing heat gun and heat the image until the embossing powder melts.
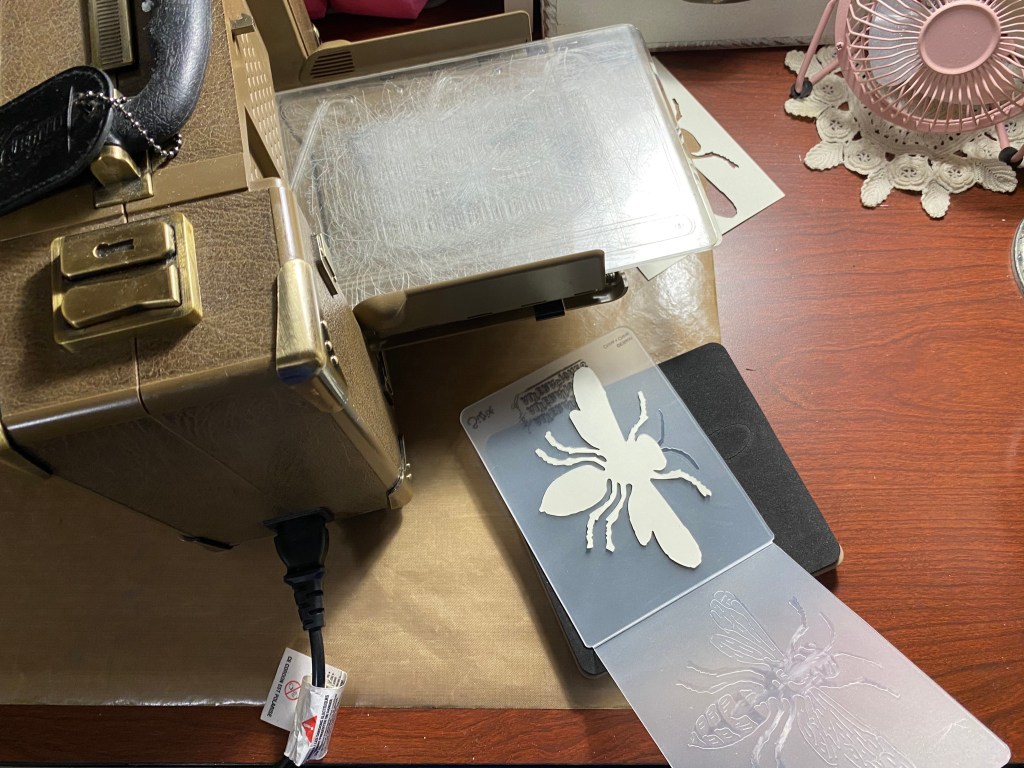
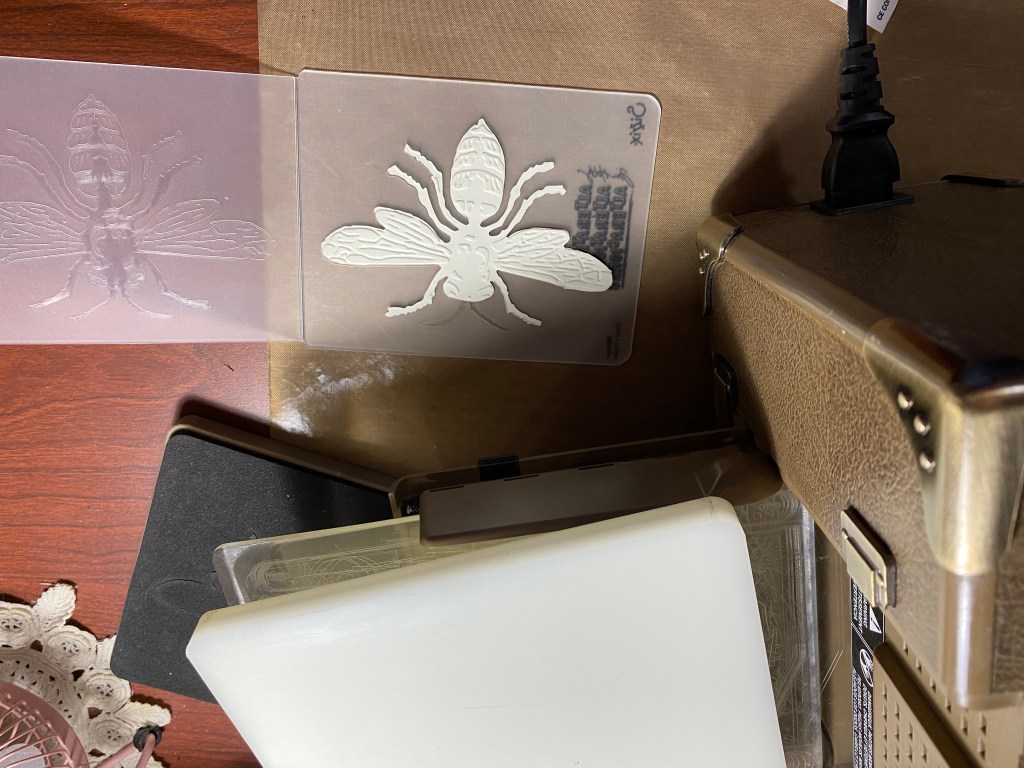
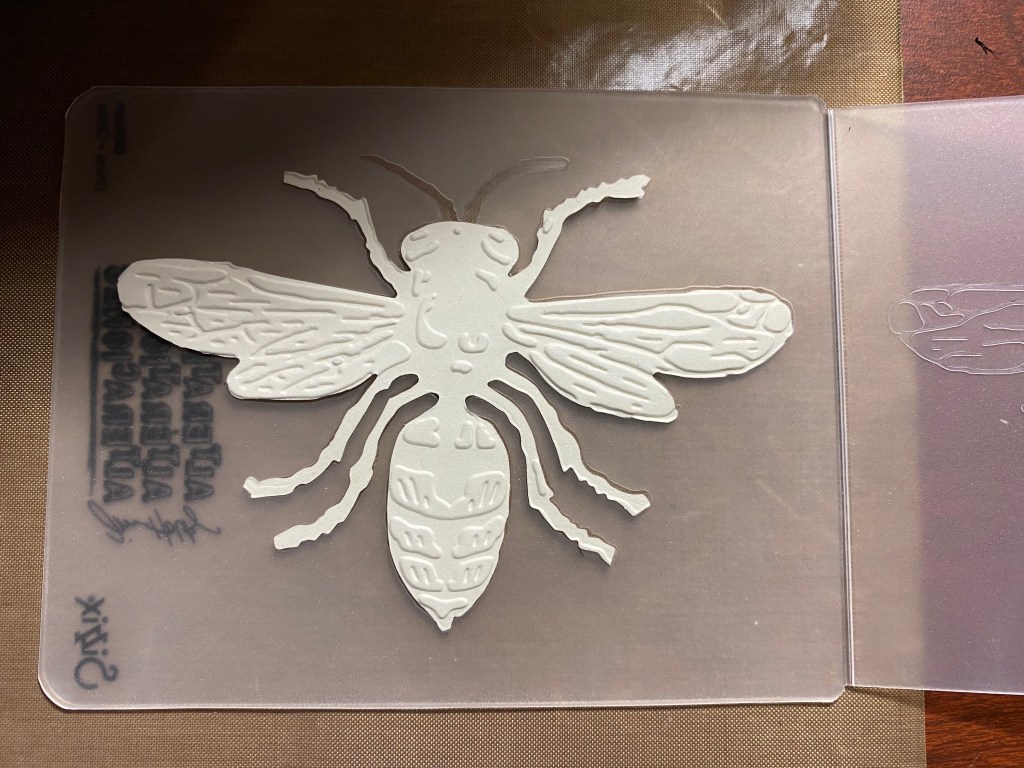
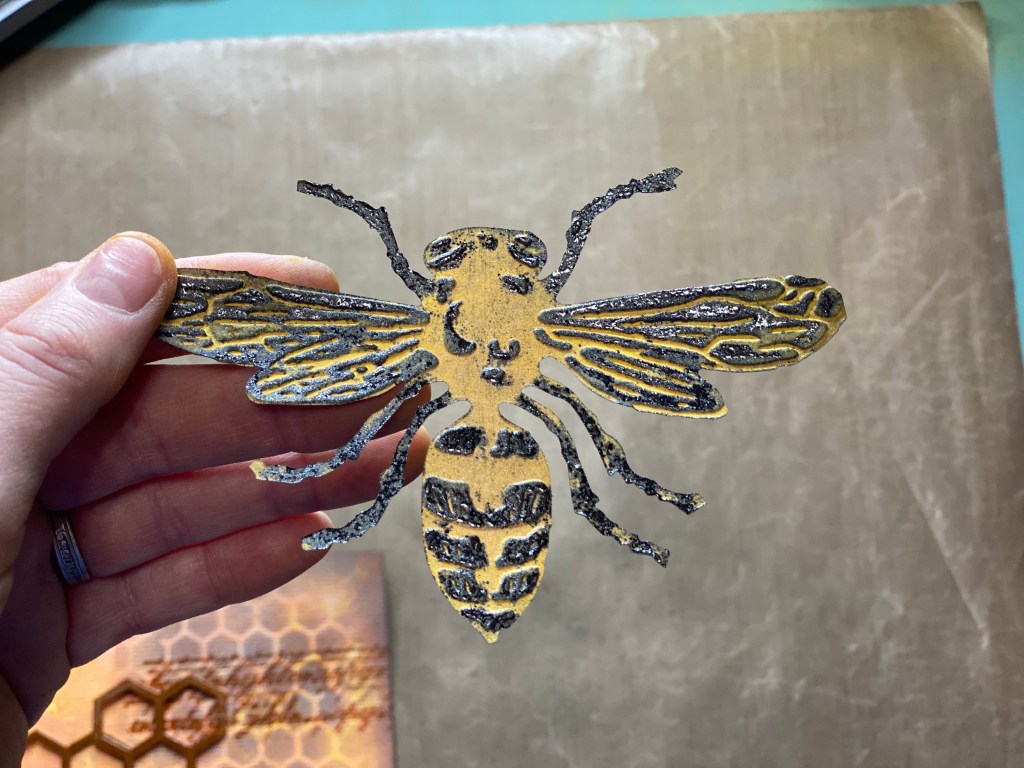
Next thing I did was use my Sizzix Vagabond to cut out and emboss my bee with the Layered Bee Sizzix die, and cut out a few pieces of honeycomb, with the Honeycomb die.
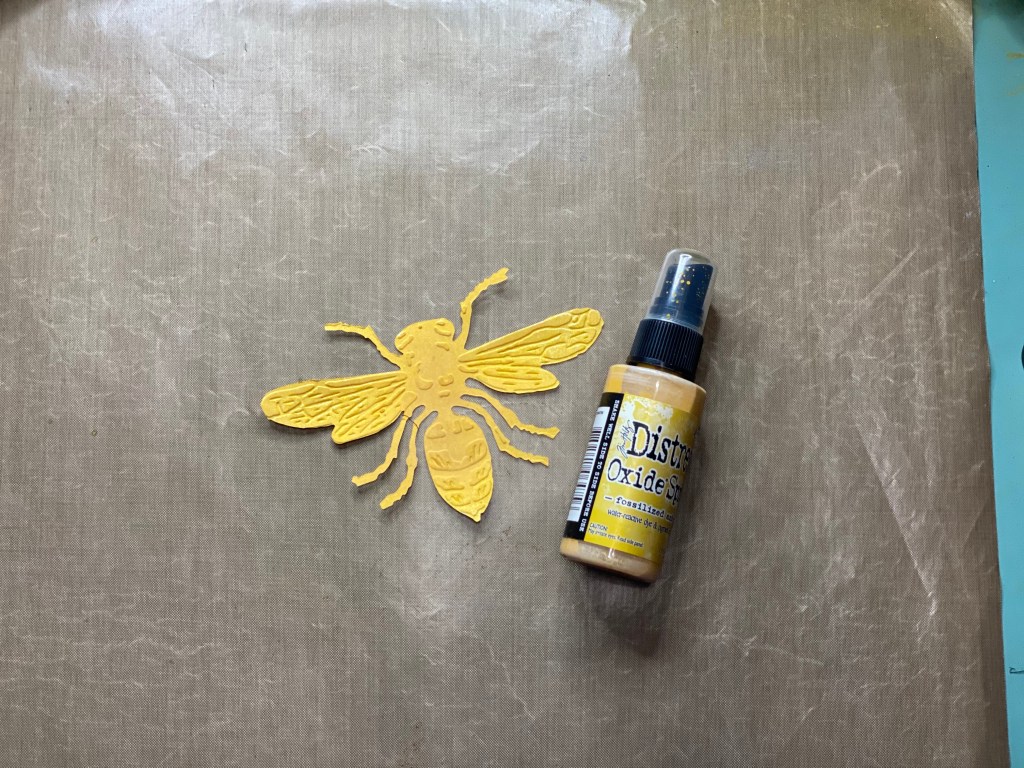
For my bee, I used Fossilized Amber Distress Oxide Spray to give it that lovely shade of yellow. Next, I used a blending tool and the Black Soot distress Oxide Ink to lightly color the raised parts of my bee. I wasn’t quite happy with that, so I used my Distress Embossing Ink again and used Lindy’s Stamp Gang Midnight Pewter Obsidian (black shimmer) embossing powder.
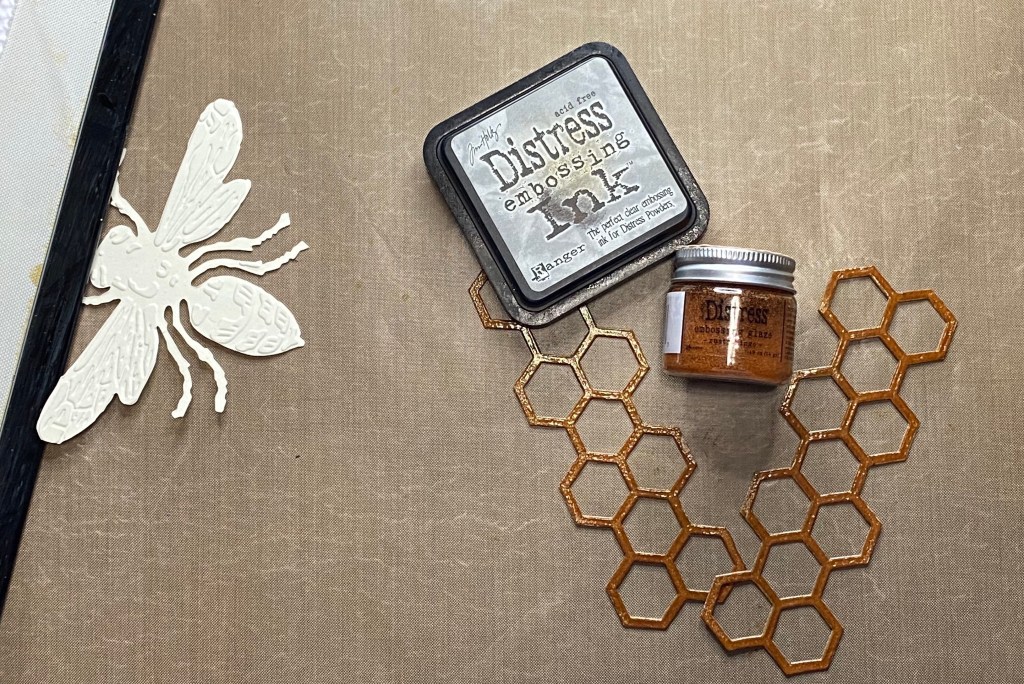
I used the Distress Embossing Ink with the Rusty Hinge Distress Embossing glaze to color my pieces of chipboard honeycomb. Embossing the honeycomb pieces was basically the same as embossing the stamped image, only this time the ink is dabbed onto your chipboard or die cut image. Then you sprinkle the powder over the entire surface. Don’t forget the coffee filter or a piece of paper so that the excess can be salvaged and put back in the jar. These Distress Embossing Glazes are a precious commodity! Haha.
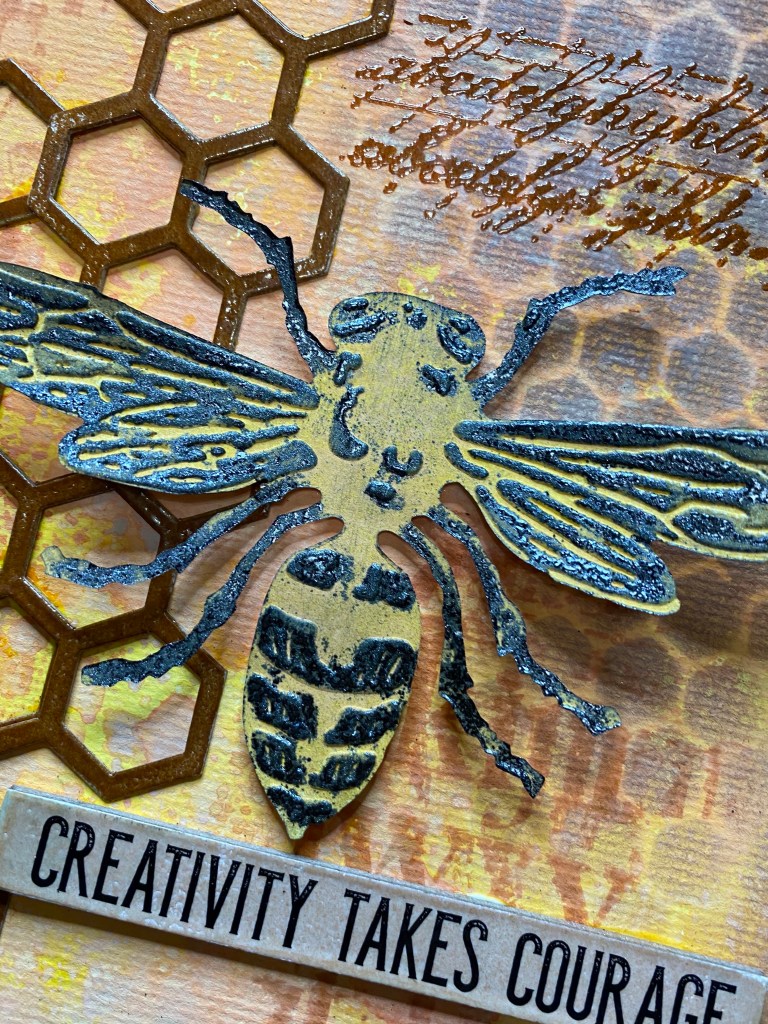
I finished up my project by deciding where to place my embossed objects. I went with stacking the two pieces of honeycomb on top of each other to make it seem like a bigger piece. And then I added the bee with a few foam dots to give it a little more dimension. Last but not least, I added a chipboard piece that I had embossed with the Tattered Rose Distress Embossing Glaze. I am including more close up pics of the finished project.
I hate that the only bee I had to make this challenge was a die cut. I love the the layered bee, and I think he worked out well. One thing I did learn from this challenge, is that I need to be on the hunt for some bee stamps. HaHa. Not that I really need an excuse to shop for stamps.
I hope you have enjoyed this little tutorial on my brand new blog. I hope you found it helpful and it inspired you to take on a challenge or two yourself. Please feel free to ask any questions or leave comments in the space provided, and if you enjoyed this “how to” please subscribe.
I’ve been following Tim Holtz and his Saturday Live demos and got inspired to make this “Tim Holtz” themed scrapbook. I hope that you enjoy it. Remember to like and subscribe to my YouTube Channel!