
Ok, so of course most of my tutorials include tons of products from Tim Holtz. For those of you that don’t know, he is a designer in the crafting world. If you know, you definitely know. There is a whole FaceBook group called “Tim Holtz Addicts” with over 3000 members, and yes, I am one. LOL. Anywho, I think the reason I am drawn to his products is that he is a junker like me. Actually, he’s a pretty hard core junker. LOL. Most of his products are geared towards creating vintage things, or making new look vintage. Take this card for instance, it started out as a blank piece of white paper, but it looks like it could have come out of your Grandma’s desk drawer. With the right tools, it looks like a vintage greeting card. Zoe, the groups creator, has started issuing weekly challenges. This weeks challenge is “Stamp & Stencil week”. I decided to take part in the fun and make this handmade greeting card. Let’s get into the process.


First is the inking process. It’s really simple. People have started calling this the “smooshie” process. That’s literally what it is. You take your desired colors and smoosh them on the nonstick mat part of your glass media mat. Then you spritz it with a little water and them dab your paper into the ink mix until you’re happy with the coverage. You dry your paper in between each application. That is what gives it that layered look. If you’re a follower, then you know I use this process quite a lot. The colors I chose for this card’s background were Distress Oxide Tea Dye, Distress Oxide Antique Linen, and Distress Oxide Speckled Egg. I used the same smoothie process with each color, making sure to dry between each application. If you don’t dry between the applications, you could end up with mud. Not pretty in my opinion.
Once my background was good and dry, I used Distress Oxide Vintage Photo to distress the edges. Distressing the edges gives it that nice, vintagey look. (It’s a word, I just made it up. Ha.)


Next, STAMPING! I used a brand new set of stamps from Stampers Anonymous. They were designed by Tim Holtz and released in his Halloween release just a few weeks ago. I bought this set for these flowers. The set is called Exquisite (CMS453). I stamped the font stamp with the Distress Ink Tea Dye, and then I stamped the flowers with the distress Archival Ink in Vintage Photo. Distress inks react with water. Archival inks do not. I was planning to watercolor these flowers so I wanted an ink that would not run when water was introduced to it.

To color my stamp, I used my Distress Crayons and a water brush to give it that watercolor effect. The color I used for the roses was Festive Berries and the color for the leaves was Rustic Wilderness. Process was simple. I scribbled some of the crayon onto my glass mat and used my water brush to pick up the color. Then I colored like it was a marker.


The last step for the background was a little bit of stencil work. I used the Stampers Anonymous layering stencil designed by, you guessed it, Tim Holtz. The stencil number is THS158. I used Distress Oxide in Speckled Egg with my Simon Says Stamp blending brush. I used a little bit of painters tape to hold the stencil in place while I ran the brush over the stencil. This is a relatively new stencil. It gives me that Midcentury vibe, but it kinda gives the hint of a trellis for the flowers. Last but not least, I added a sentiment. I used another piece of white paper and did the smooshie technique again. For the sentiment, I used a set from Sweet and Sassy Stamps. It’s designed by Korin Sutherland and the name of the set is Timeless Hymns (SNS-18-018).
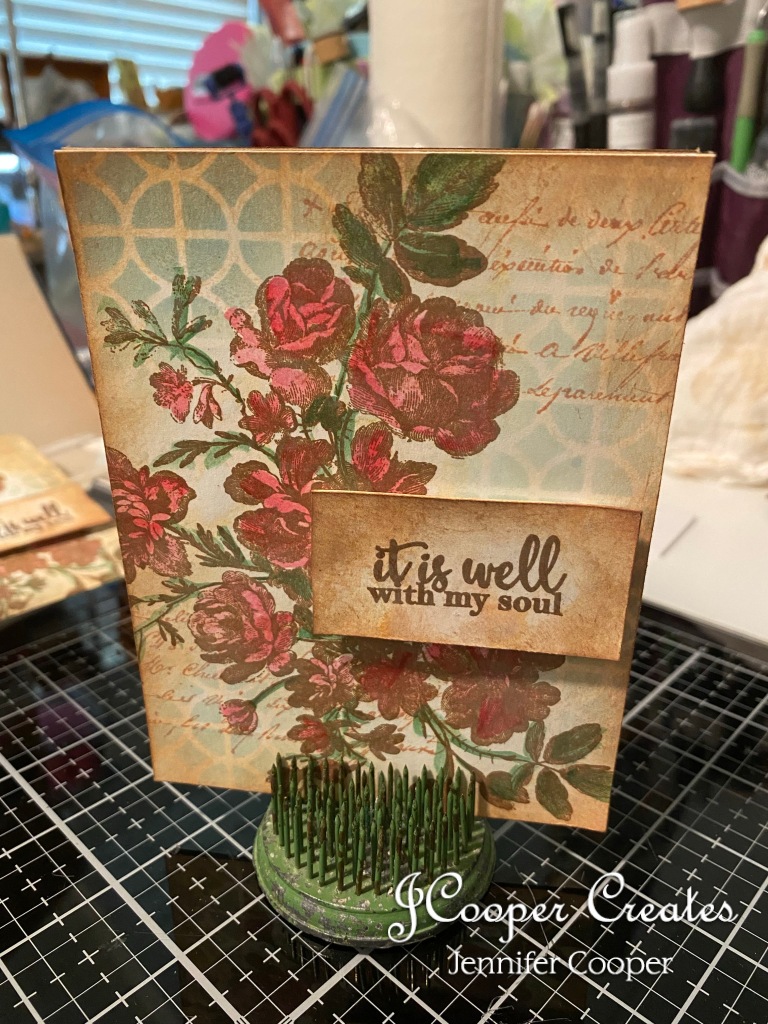
Again, the challenge this week was “Stamp & Stencil”. I think the requirements were met. LOL I am in LOVE with this new stamp set. I’m a sucker for flowers and who doesn’t love coloring??
Well, I hope that this little tutorial was helpful in some way. It doesn’t have to be Tim Holtz stamps or stencils. You could use whatever you have in your stash. The inks however, his inks are the only ones I’ve found that can give you that GREAT VINTAGe look. Amazing inks!
Until next time,
Jennifer
