
Oh my goodness, y’all! Where has the time gone?? I’ll tell you where it’s gone. It has been sucked up with buying a new house, working with a contractor and packing the current house. Well, as much as I can pack and still live here. LOL. we just purchased a mid-century home a few months back and it is in need of a little rehab. LOL. I have, however, left the craft room for last because I have NO idea how long the rehab will take. We are praying that we can be in there by Christmas. I think October was the last time I can remember getting my fingers inky. Horrible, I know. I have, however, been collecting a lot of the new Tim Holtz holiday items. So many in fact, that it has taken me forever to figure out what I wanted to do for my Christmas cards this year. I figure December 1st made it time to start on them. LOL.
I feel like sending Christmas cards has become a lost tradition for most. I just love getting them in the mail and clothes pinning them to my Christmas garland that hangs over my door into my dining room during the holidays. I do feel, however, that they are becoming fewer each year. I just love making them and sending them. I hope that they bring a smile to whoever’s face when they open them and see the time and care that went into them. Anyway, Here’s a quick tutorial of what I did.

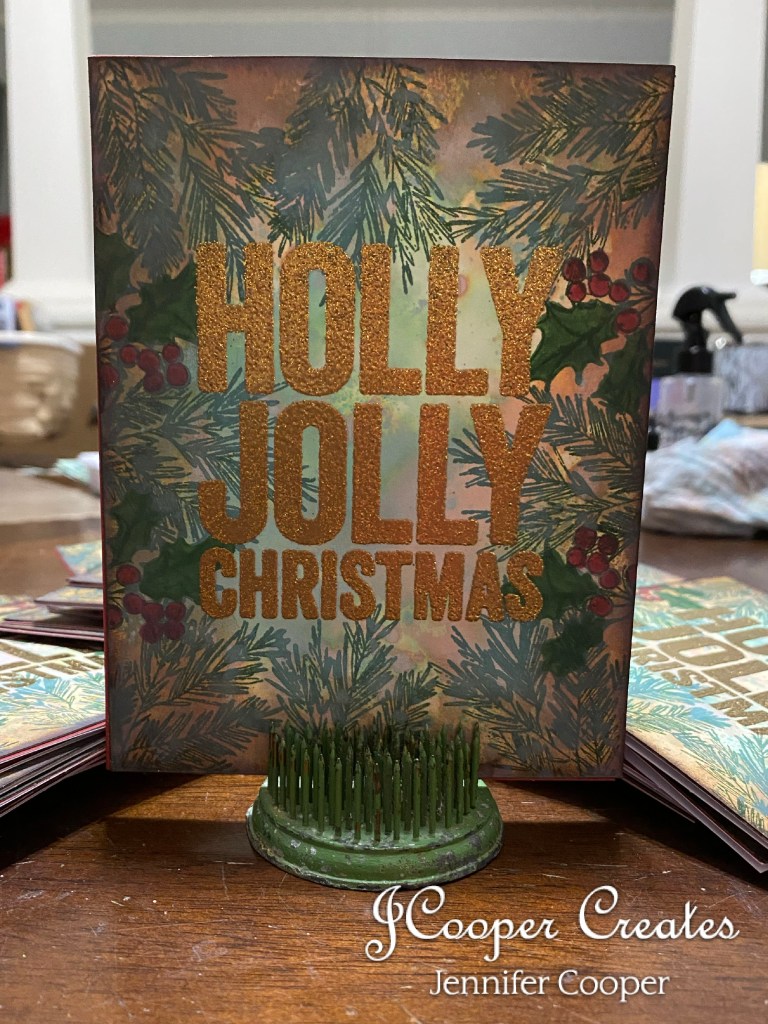
This card was relatively simple this year. It only becomes a little time consuming when you make fifty. LOL. For this card, I used the new Distress Heavyweight white card stock. However, with all the inking that I did, the manila would have probably done just as well. I used my normal technique of smudging the Distress Ink pad onto the craft mat and spritzing it with water. I then just sort of dabbed the paper into the inky mix until I was happy with the amount of coverage. I dried the paper in between each application with my Heat It tool from Ranger. Then I just added another color of ink. For this card, I used three colors of Distress Oxide inks: Tea Dye, Speckled Egg, and Cracked Pistacchio. I used the same technique for each individual color.
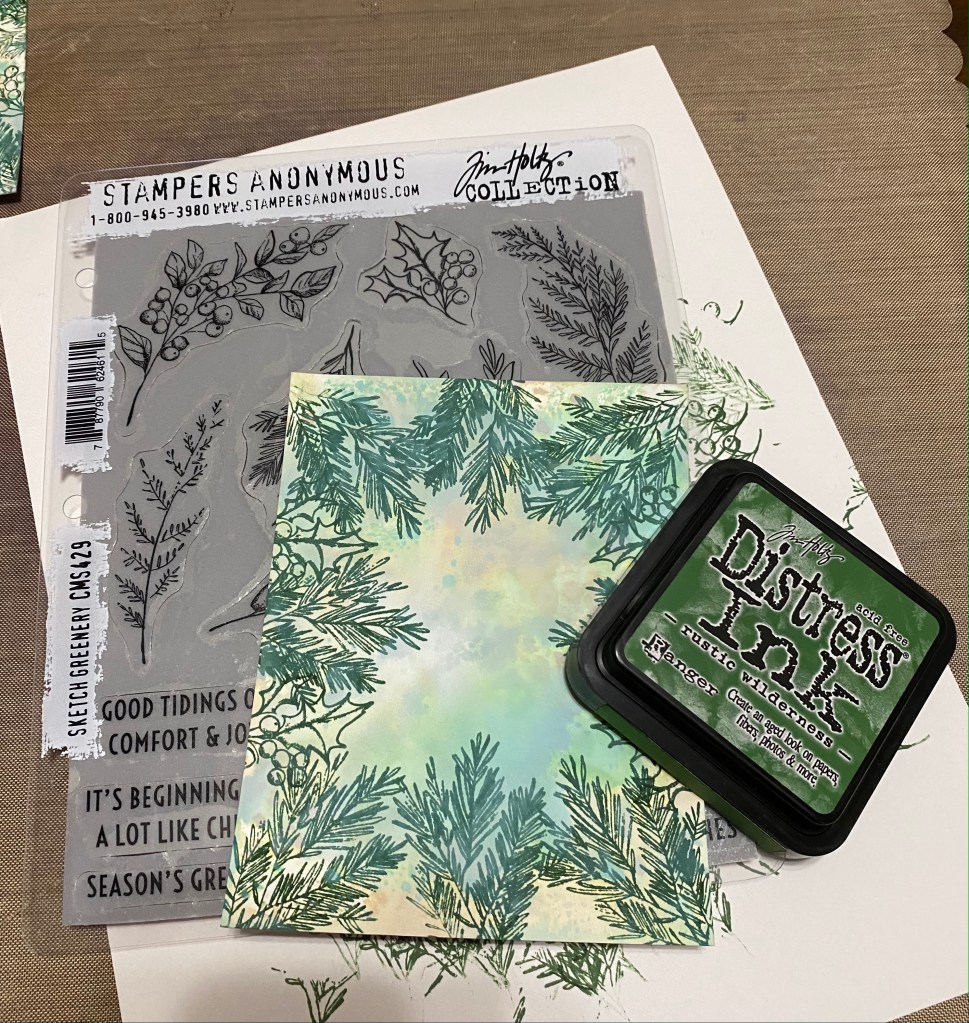
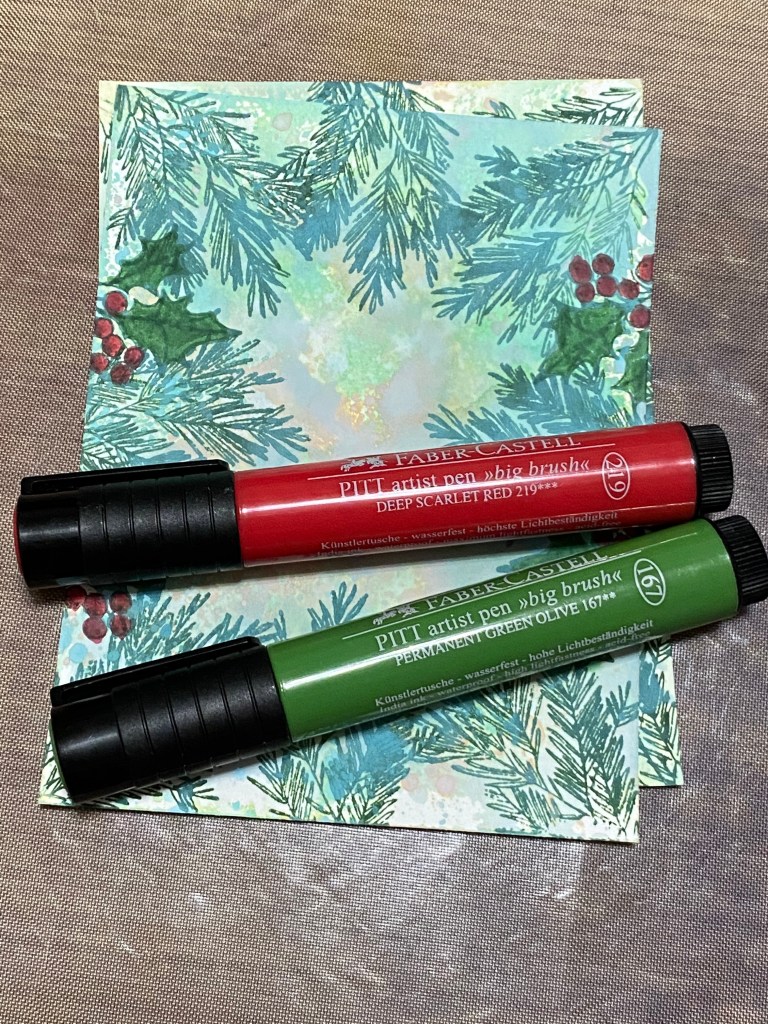
For the framing of this card, I used one of the new stamp sets by Tim Holtz from Stampers Anonymous. The name of this set is Skethc Greenery (CMS429). I used two of these stamps: the pine needle branch and the holly berry and leaves. Of course, to stamp these images, I used the BRAND new Rustic Wilderness Distress Ink from Ranger Ink. It is the perfect shade of green for Christmas foliage!! I then took my Faber Castell “big brush” markers and colored the holly leaves and berries. The colors I used were Deep Scartlet Red (219) and Green Olive (167).
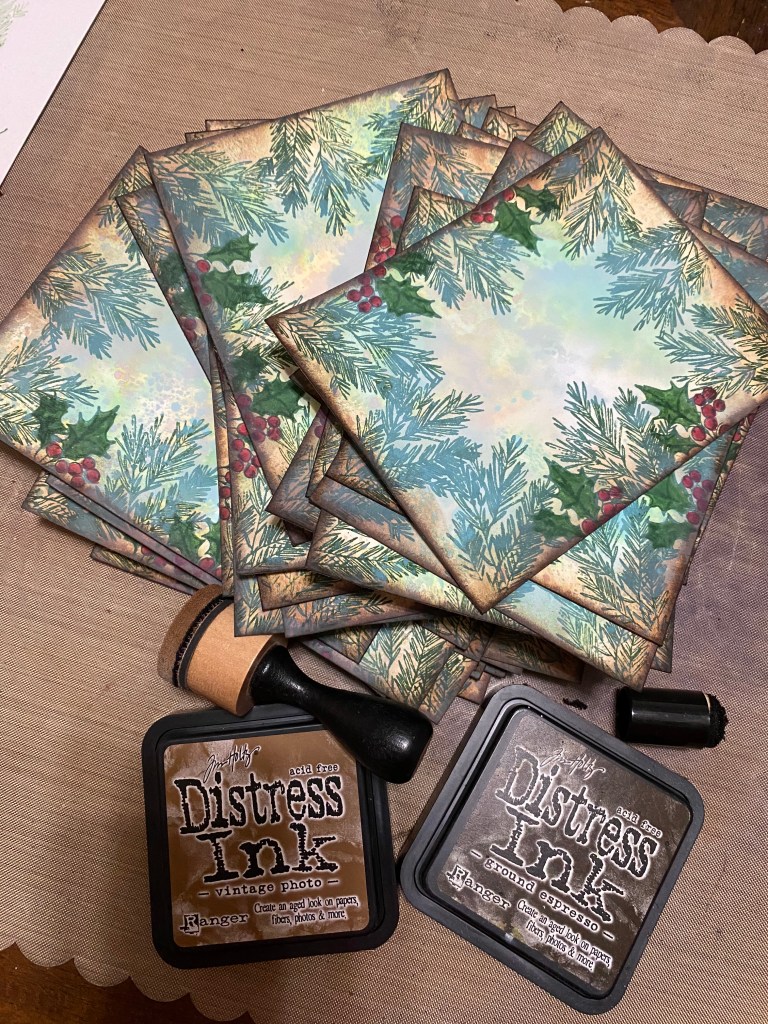
Next, I used the Vintage Photo and my mini blending tool to distess the edges of each background. Then I used the Ground Espresso and a finger dabber to give it that nice, dark edge.

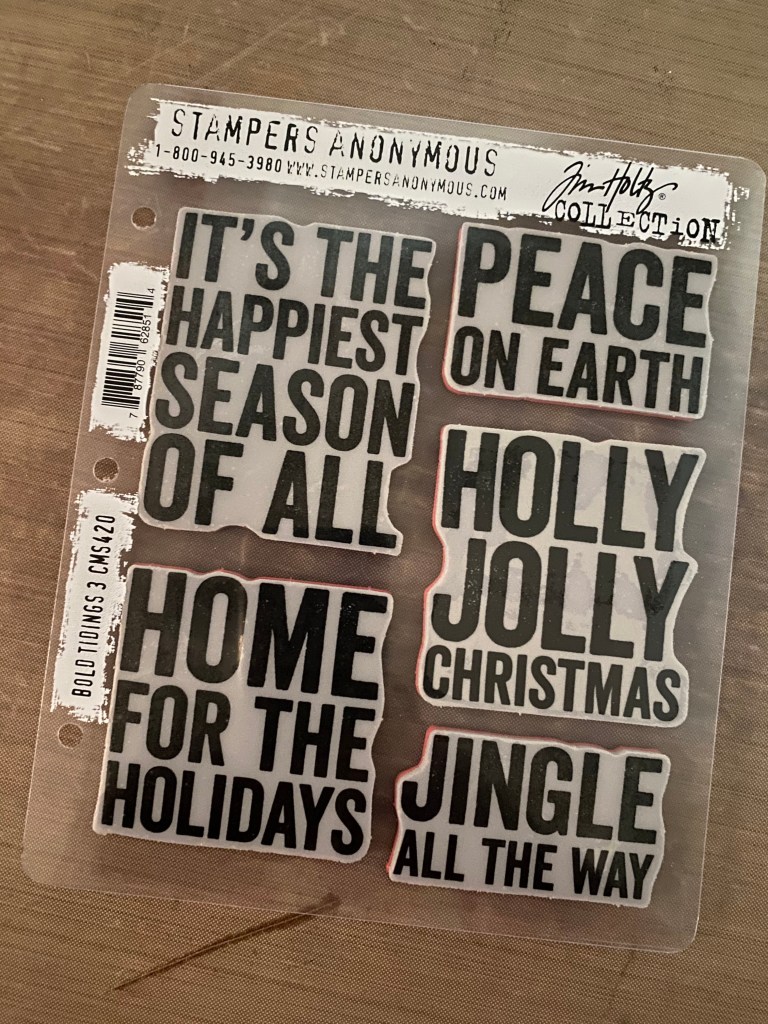
Last step for this card front was the embossing. For the embossing, I used my Tim Holtz Tonic Stamping Platform, Distress Embossing Ink, and some gold embossing powder that I have had for years from Stampendous. I used my stamping platform to make sure that the image was stamped in the same place every time. The sentiment I used was Holly Jolly Christmas. I stamped the sentiment with the embossing ink and then sprinkled a generous amount of the embossing powder over the ink. Then, I tapped the paper onto a piece of printer paper on the table to knock off the excess. You can pick the paper up and pour the excess back into your jar of embossing powder. Then, using an embossing gun, you heat the image until the powder melts. This gives you have that glitter, gold goodness without it coming off on your fingers!! Love the gold!!
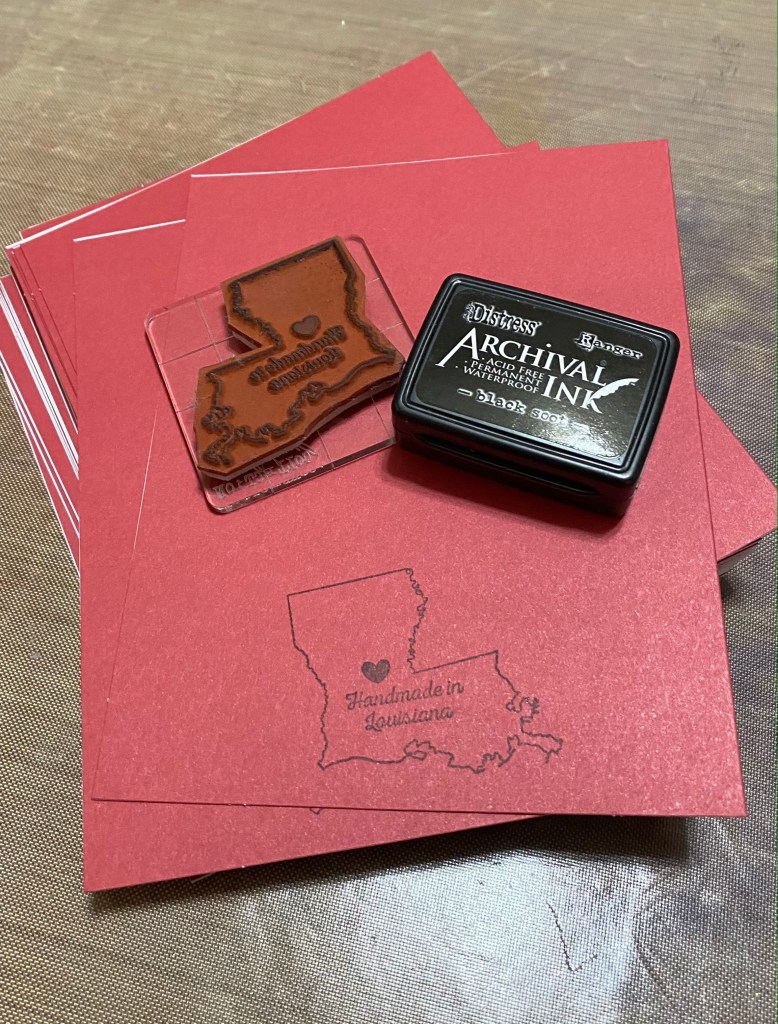
This is just a little step I like to take. It’s definitley not neccessary, but I think it makes a nice, personal touch. I found this stamp at Scrapbook.com a long time ago. I stamped this image with the Distress Archival Black Soot onto some blank card bases that I found at Michaels in the Christmas crafts section. I love blank card bases. It saves me those extra steps of cutting the cardstock and folding it. LOL.
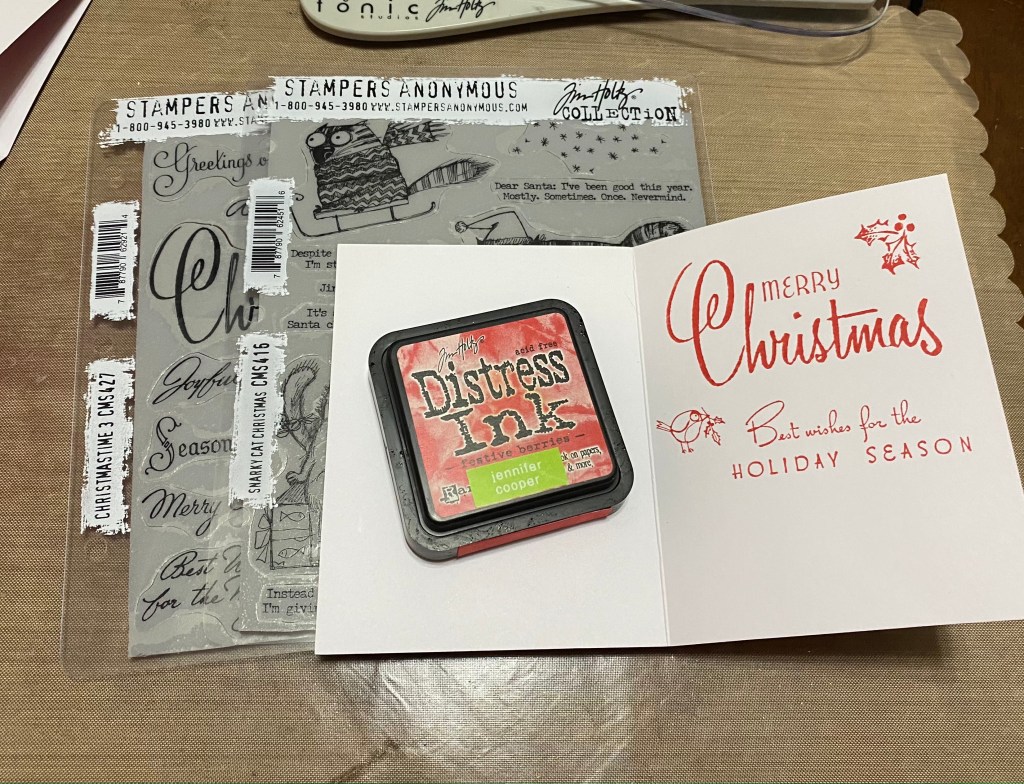
For the inside sentiment, I chose two sentiments and the holly leaf stamps from the Christmastime 3 (CMS427) and the little bird with the holly leaf in his mouth from the Snarky Cat Christmas (CMS416) set. The color I chose was Festive Berries in the Distress Ink. I used my stamping platform to align all the stamps where I wanted them. The stamping platform just allows me to make sure that each image is sstamped in the same position every time. I love this stamp set! It has those great, retro fonts that remind me of vintage Christmas cards. Love it!!

Once I was done with the card front, and the card base, I used my X-press It High tack tape to adhere the front to the card base. I just Love these cards. I think they have just enough grungy, vintagey, Holiday goodness. I LOVE them. I hope the people who receive them will love them as well.
My crafting times have been few and far between, so if I don’t talk to you before then, I hope you and your family have a very merry, Merry Christmas!!
Until next time,
Jennifer


WOW!!!
LikeLiked by 1 person