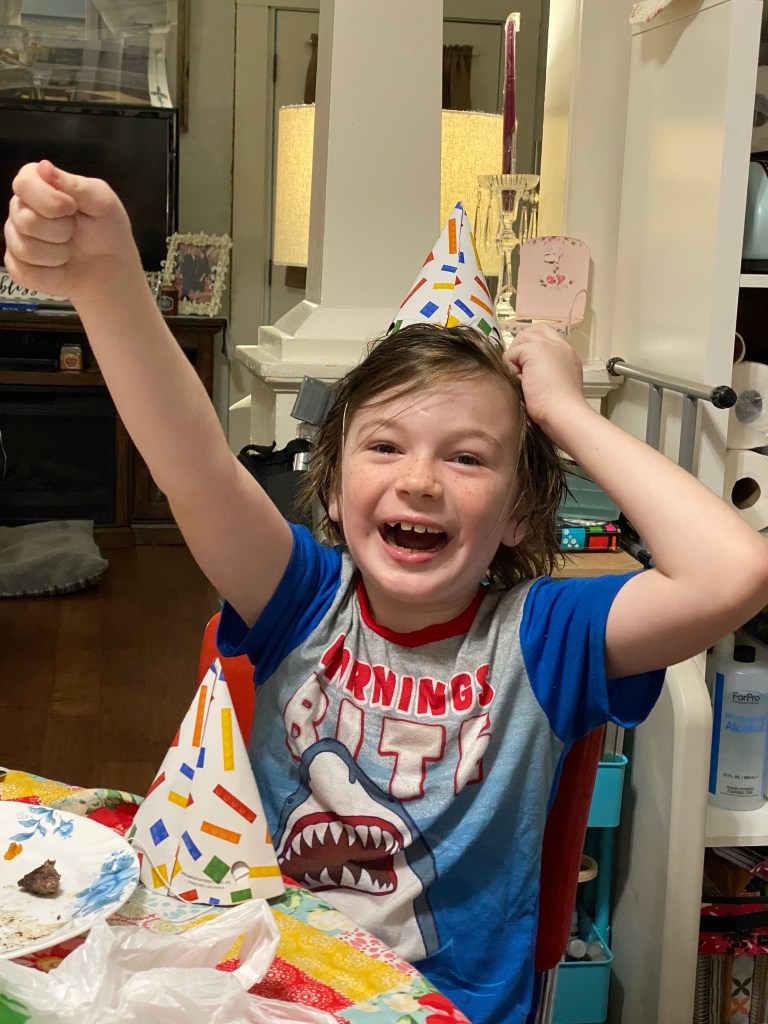
Y’all! I’m so sorry I missed Monday, this week, but I was just a little busy celebrating a certain nephew of mine. He used to live in Virginia, but is on his way to his new home in San Antonio, today. He was in town for a few days so we had to have a birthday party for him. Just look at that face, how could we not celebrate him?? He’s eight y’all!! I’m getting old.


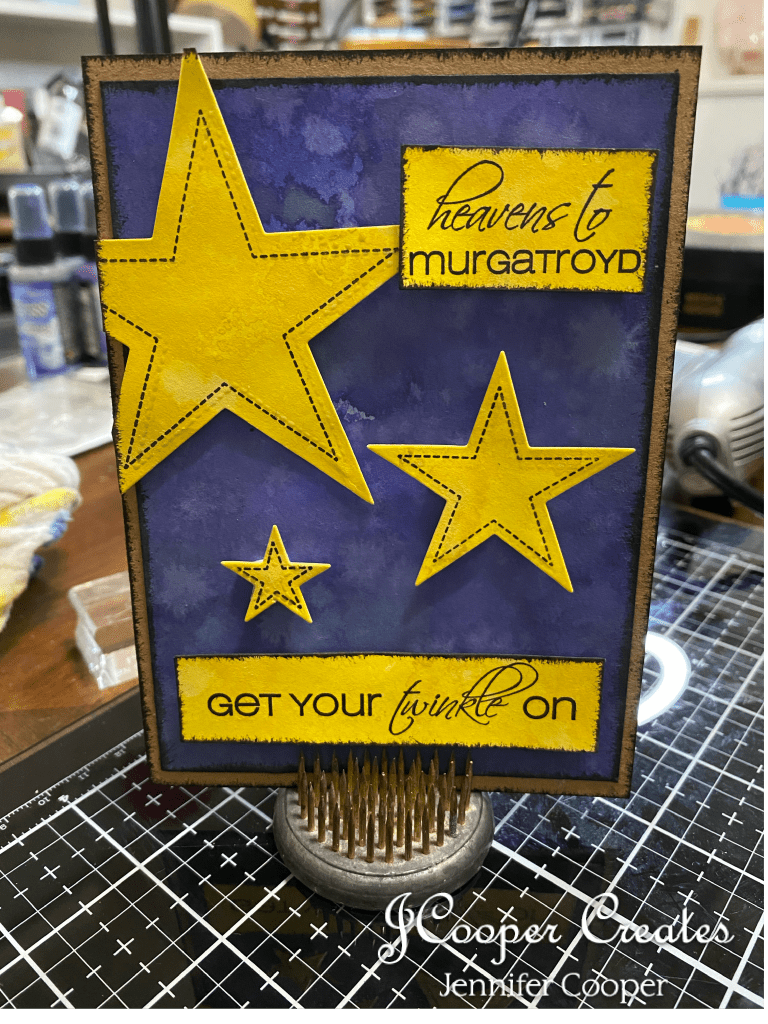
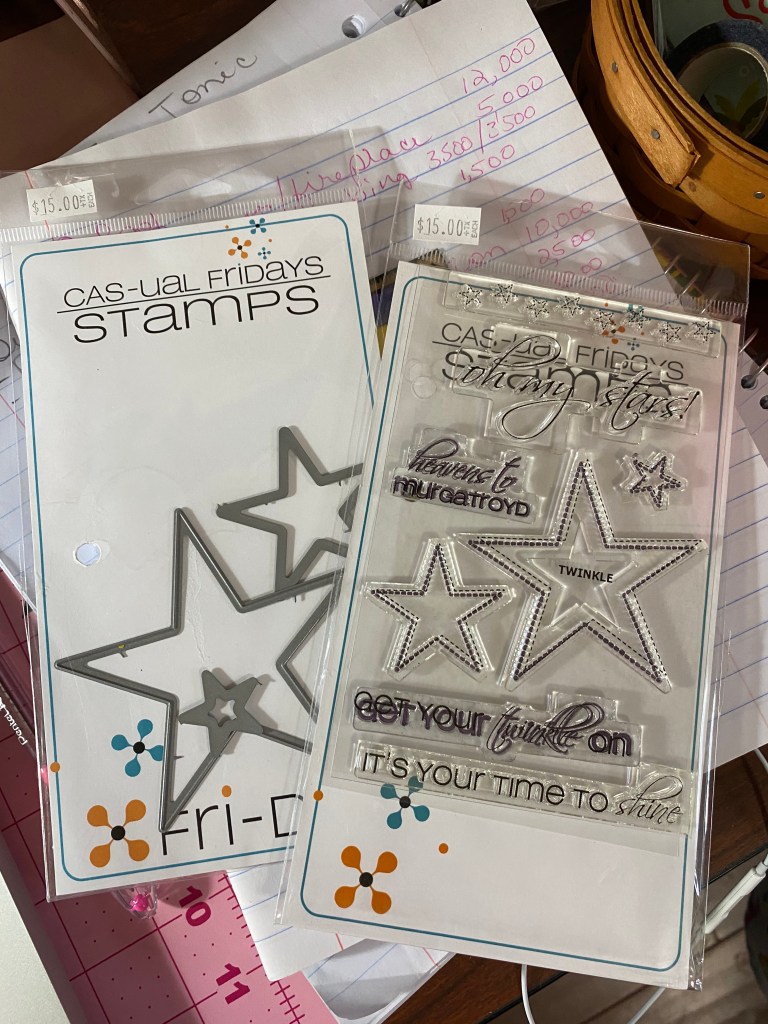
Anywho, back to the challenge. Today’s prompt for the challenge was “Reach for the Stars”. I didn’t have any Simon Says Stamps that were star themed, so I dug and dug until I came up with this stamp and dies set from Cas-ual Fridays. I have had them for years. The number on the back of the stamp set is CFSS-15-005 Twinkle if that helps.
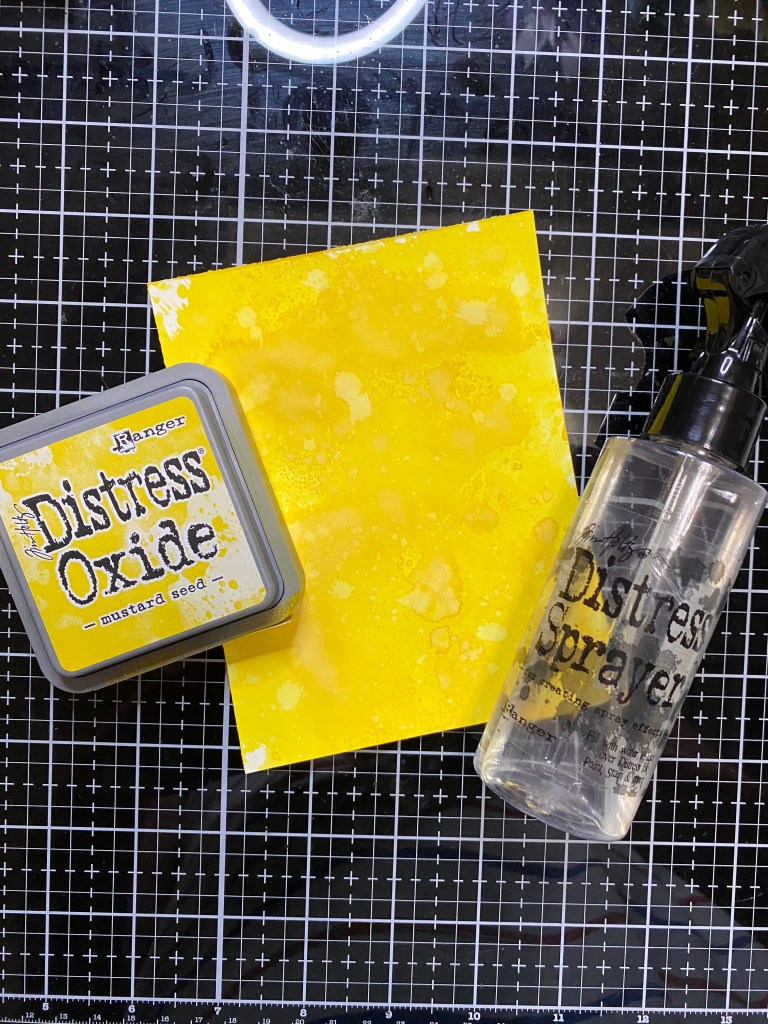
So, that’s what I worked with today. This was another simple card. I started with my Dylusions Media Cardstock, and some Distress Oxides. The colors I chose for today were Mustard Seed for the stars, and Chipped Sapphire, Wilted Violet and Blueprint Sketch for the night sky. First was the stars. I used my distress oxide ink pad and pressed some of the ink onto my nonstick mat and spritzed it with some water. Then, I dabbed my paper into the mix until I was happy with the coverage. I did this a few times to get the effect I liked. I then used my Archival Jet Black ink and my Misti to stamp the star images onto my yellow paper. I then used the dies and the Cuttlebug to cut them out.

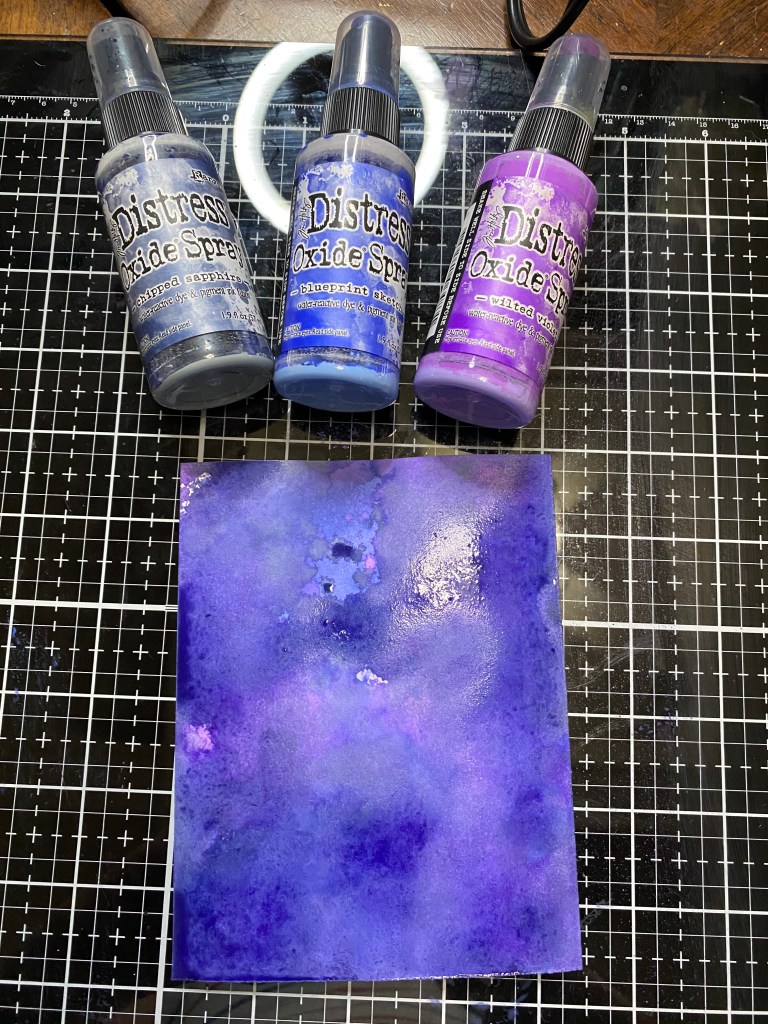
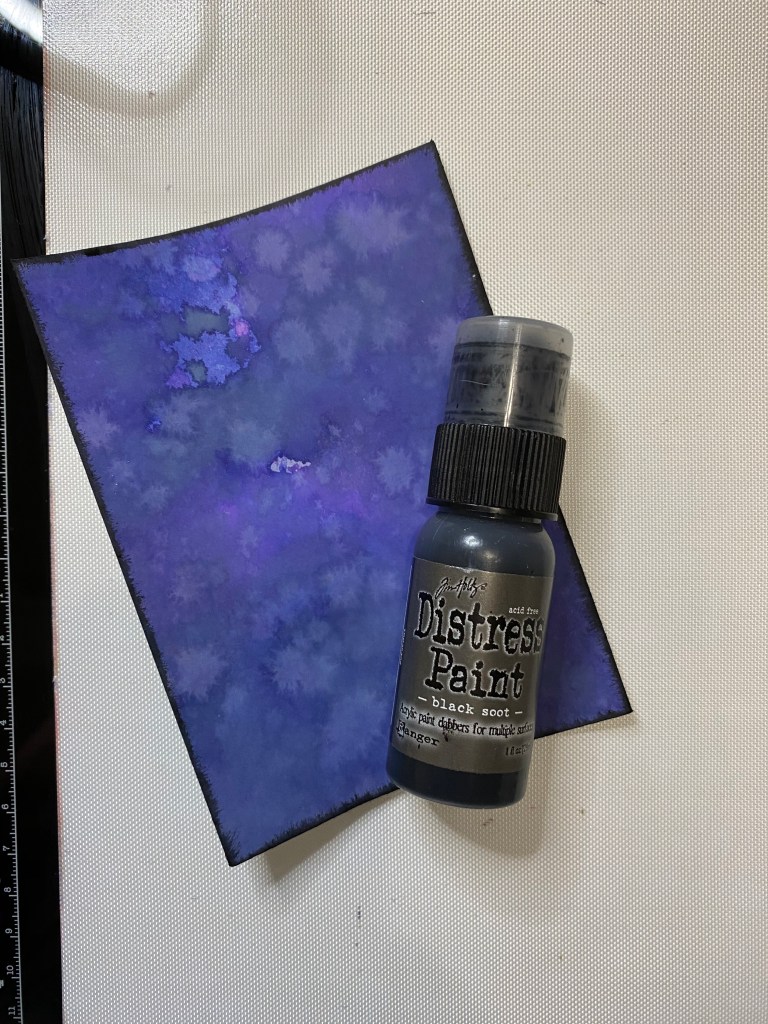
Next, the night sky. I did the same technique as I did for the yellow, except with all three colors this time. I made sure to dry the paper with my Ranger Heat It tool in between colors so that they layered nicely. Once I was happy with the coverage, I spritzed it with a little water from my Distress Sprayer and dabbed it with a towel. Once it was good and dry, I used my Distress Paint in Black Soot to distress the edges, then adhered it to my card base with my X-press It double sided tape.
I then stamped my sentiments on scraps of my star paper and cut them out. “Heavens to Murgatroyd”. I can still hear Snaglepuss from cartoons of my childhood. Haha. I used my Distress paint again, to distress the edges on them as well. I pop dotted all of my stamped images and adhered them to my card. Last step was to distress the edges of the card with the Distress Paint again. And that was that. It really was a simple card.


If you’re like me, and I’m sure there are some of you out there, who haven’t made cards in Fo-eva, get in that craft studio and get to making. You really can get some pretty cute cards for relatively little effort. I just love these Distress Inks. They make everything look like it was sooooo hard. Haha. It’s all about the tools, and knowing how to use them. I encourage you to research the things you’ve bought. Look for videos on YouTube. Ti Holtz has a TON of videos on his products. VERY informative!! You’d be amazed at the things you can learn on YouTube!!
Until next time,
Jennifer
Here is a list of the supplies:
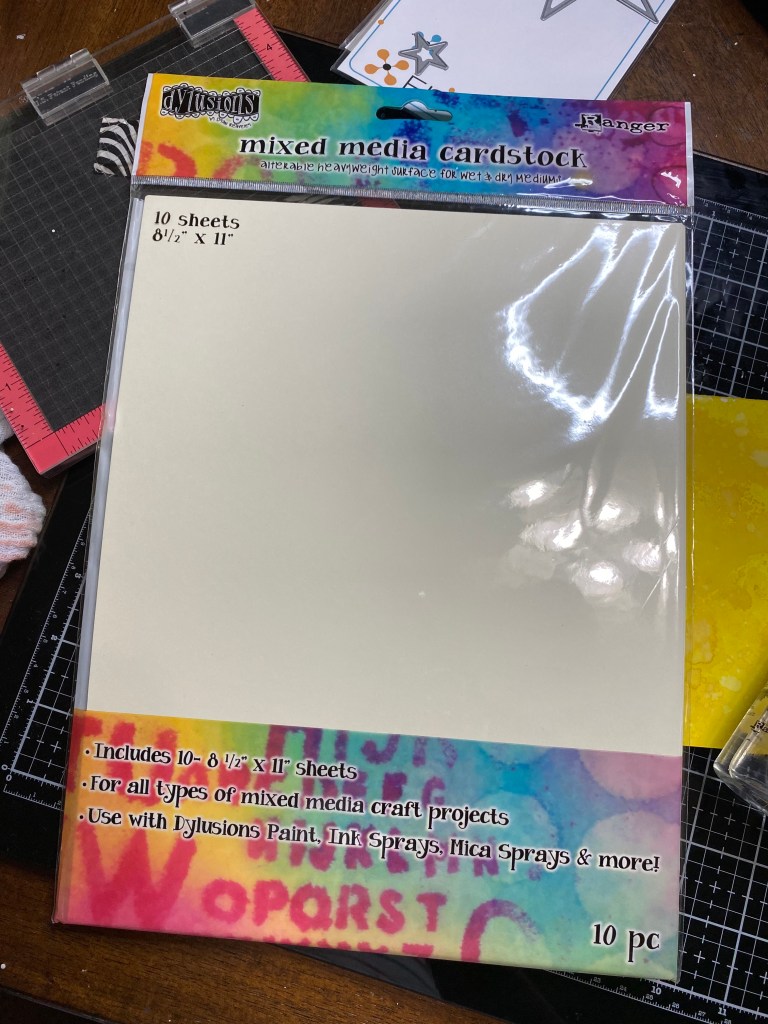
Dylusions Mixed Media Cardstock
Products used :
Distress Oxide Spray Blueprint Sketch
Distress Oxide Spray Wilted Violet
Distress Oxide Spray Chipped Sapphire
Distress Oxide Ink Mustard Seed
Distress Paint Black Soot
X-Press it High Tack Tape
Pop Dots
Tools Used:
Cas-ual Fridays Stamps Twinkle CFSS-15-005
Cas-ual Fridays Dies Twinkle
Ranger Heat it Craft Tool
Tim Holtz Distress Sprayer
Tonic Glass Media Mat
